Pages - Menu

Search This Blog

Showing posts with label driftwood. Show all posts

Sunday, September 23, 2018

The Three Graces Sculpture


The Three Graces Sculpture by Bea Grob

No, not the three graces by the Italian painter Raphael, but some from Makin's Clay® and a driftwood piece. You only need a bit with Makin's Clay® in black (about 60 g), some embossing powder, some wire and a driftwood to have your own sculpture.

Materials:

Driftwood 
Makin's Clay® - Black 
Makin's® Roller and/or Makin's Professional® Ultimate Clay Machine®
Embossing powder 
Heat gun 
A spray bottle with plain water
A piece of plastic wrapping or household wrap

Instructions:

I started with armature from wire (it is a simple wire from the hardware store). I cut 3 pieces, between 18 inch and 14 inch, and doubled the wire and twisted it together. Next, I wrapped around some painter's tape. I formed some bumps for the upper body part and the hips.

To harden the wire a bit, so it isn't so bendy, I hardened it with a hammer on a metal piece.


Before I went on, I drilled holes in the driftwood and tested what the armature would look like.


Now, add a clay sheet directly to the painters tape and wrap around. I used some water to smooth out, but I didn't go crazy about it, just to smooth the biggest gap where the the sheet meets up. Also, make an egg shaped head on top but leave some wire exposed to mimic the neck.


With the Feather Point tool from the Makin's Professional® Clay Tools Set, I added texture all over the body, but not the head. A little tip here, when you have the feeling you can't give a good enough texture, check your feather tool, you probably have some build up of clay, which you have to remove.


Now, we needed a temporary place to stick up our figure, I used some flower foam. Our next step is to add different colors of heat embossing powders. But, first to make sure that it sticks I applied a light spray of water. For the colors I chose some teal and some copper, but you are free to use any color combination you like. I sprinkled them in the place I want them to be (well more or less, lol)
and set them with the heat gun. Just make sure that you don't stay too long in one place, but move it around a bit. You don't want to burn your clay. 


After this step, I let the Makin's Clay®  dry completely on the flower foam. The next day, I mounted it to the driftwood adding a tiny bit of a 2-part quick dry epoxy glue to the holes. And here a little close up of the embossed areas.


Friday, July 20, 2018

Funky Bird Mixed-Media Sculpture

Funky Bird Mixed-Media Sculpture by Bea Grob

Today, I show how I made a funky bird with some driftwood, foil, wire and Makin's Clay®.

Materials:

Makin's Clay® - Red 60g, plus approximately 20g scrap clay from other projects
Makin's Professional® 
  • Ultimate Clay Machine®
  • Cutting Mat

Makin's® Clay Roller
Decorative foils 
Wire
Driftwood
Seed beads 
Black rond head pins
Tacky glue 
Ruler
Cutter 
Dowel 

Instructions:


I started by forming a head with red clay. I inserted some wire for the neck to connect to the driftwood and 3 pieces at the top for later embellishment.

 I let it air dry on these flower foams. Anything you can stick in the wire will work.


Next, I mixed the leftovers with the remaining red and ran it through the Makin's Professional® Ultimate Clay Machine® beginning on setting #1 and ending on setting #5. But you can also roll them out with the clay roller to about 3 mm thickness.

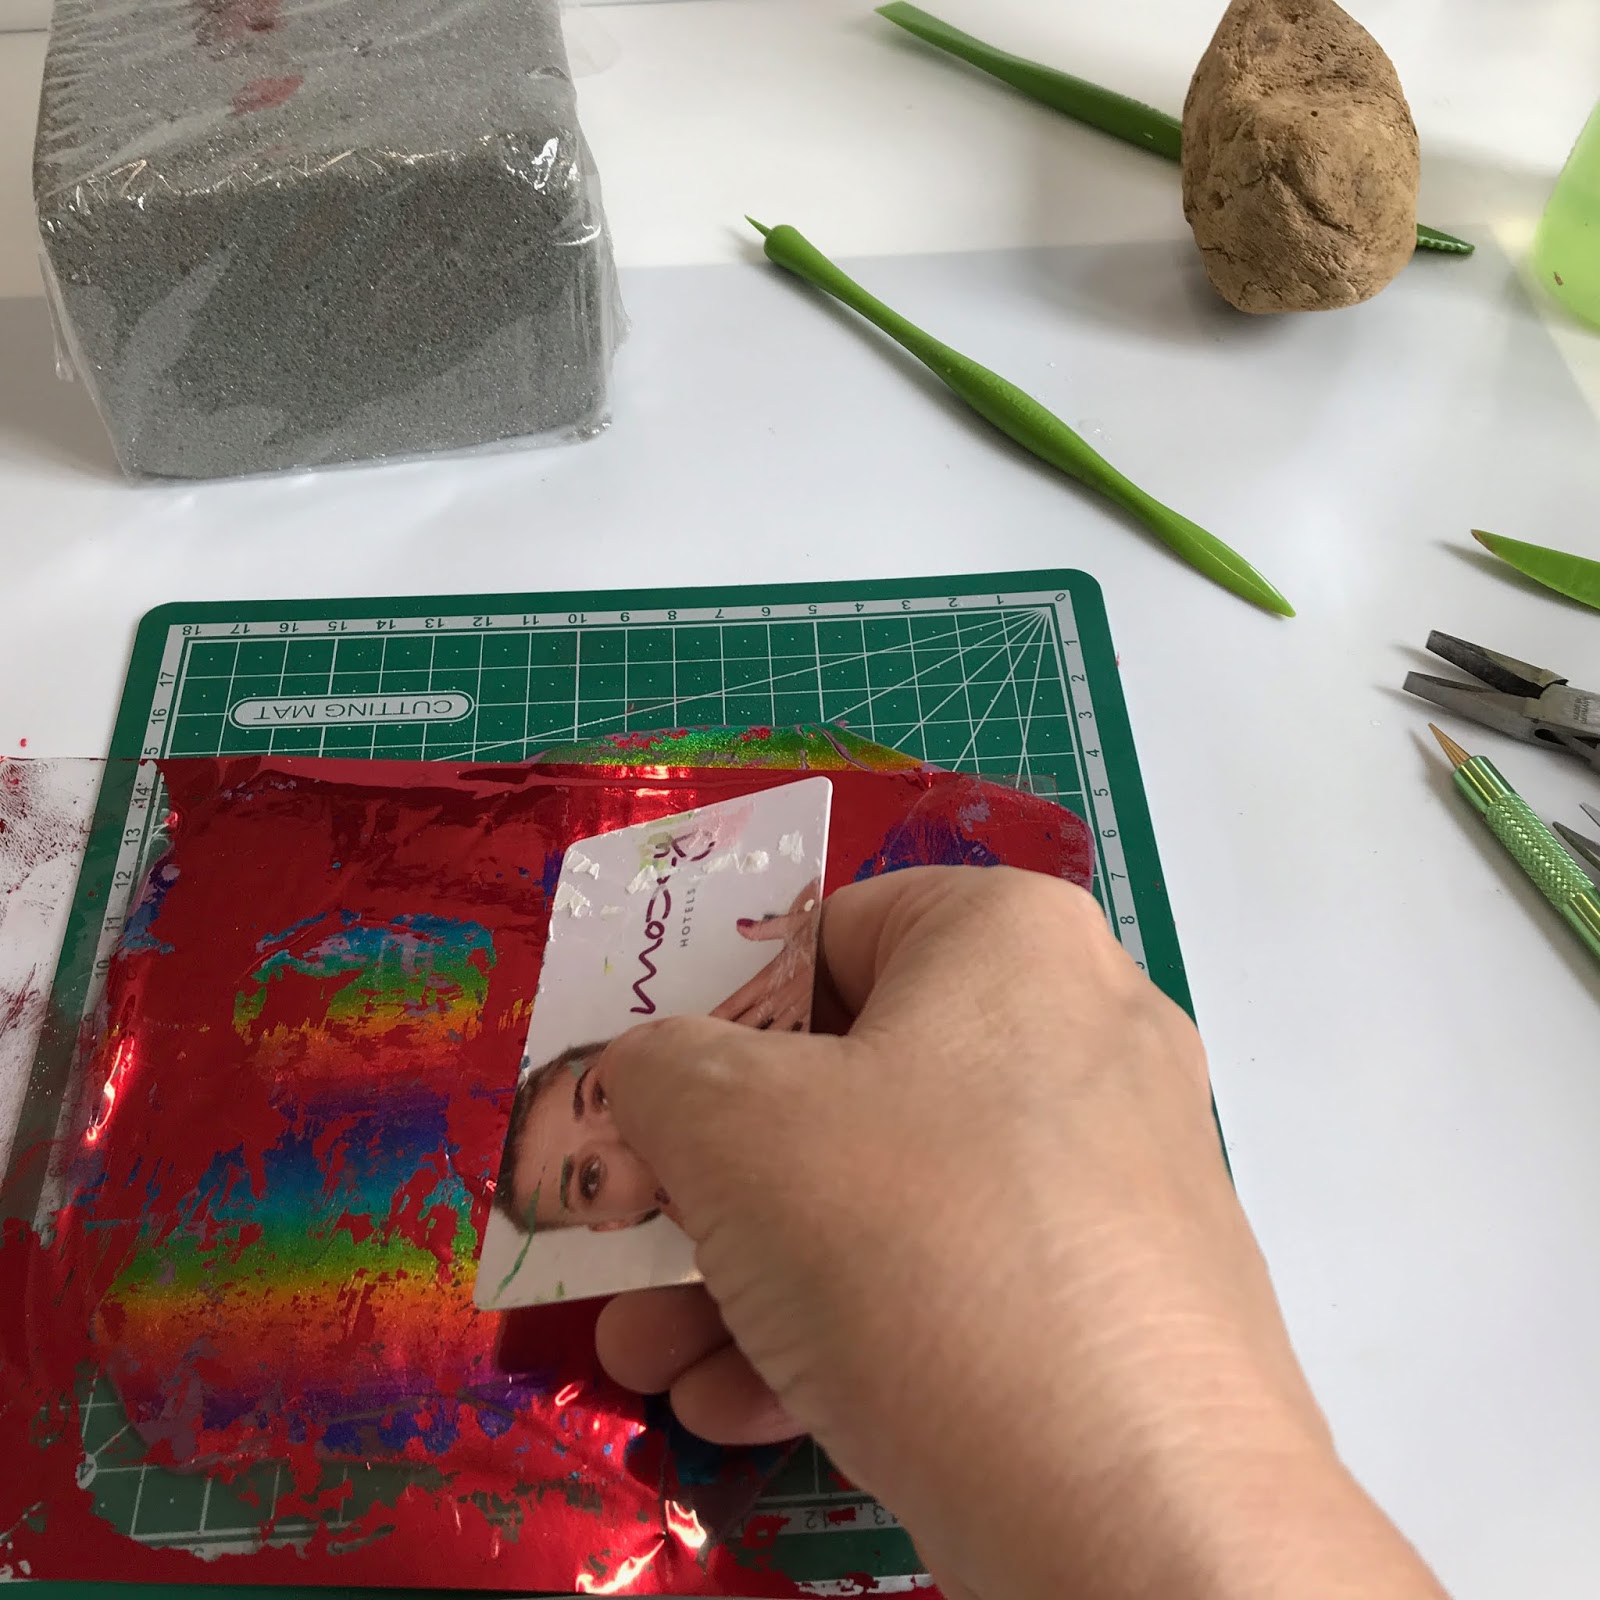
I sprayed the surface of the clay sheet lightly with water and then placed my foil on top. With an old gift card or keycard I rubbed the surface and made sure that it is well adhered.


While the clay was still fresh,  I cut triangular shapes, like you would to make rolled paper beads.  I used the same technique to create the clay beads.

I simply rolled them onto a sort of a dowel. I recommend either plastic (like mine) or metal. If you use wood it may permanently adhere. I let them dry overnight together with the bird head.


The next day I started assembling the pieces clay pieces and used seed beads for embellishing. I drilled holes into the wood to attach the head and the tail wires. For the eyes, I used some black pins from the sewing department. I clipped them in length and then simply stuck them in the right spot. 


To glue everything together I used tacky glue. I have also mounted the bird on a piece of stone from the garden. I used a two part quick dry epoxy glue for that. 


Tuesday, March 27, 2018

Driftwood Fairy


Driftwood Fairy by Bea Grob
Today I'm here with a new driftwood fairy. I love everything with wings, and so fairies are included. Not sure if they really exist, but I like the idea anyway....

Materials:

Makin's Clay® - Natural, Red
Makin's®  Clay Tool Set
Makin's Professional® - Ultimate Clay Machine®
Metal leaf any color you like. I used a variegated one
Glue for metal leaf
Brown acrylic paint as patina
Die and embossing folder for the wings
Wire from the hardware store
Glue E6000
Driftwood, wire, 2 beads for hands, toothpick to attach head and a stand to put the driftwood on top.

Instructions:

I started with a ball of Makin's Clay® in natural. To form the head and the neck I used a tool from my clay tool set. 

I marked a hairline and then started applying very thin pieces for torn clay to mimic the hair.


A toothpick in her neck will give a connection to the driftwood.

Roll clay beginning on setting #1 of the Ultimate Clay Machine® and then #2, then #3, and ending on setting #4.

Now I had to let dry everything over night, before I diecut and embossed some wings from a bee. (it is a set from Tim Holtz). If you don't have it you could totally just cut by hand some wings. It is really easy with Makin's Clay®, just use a pair of scissors.
I  also shaped a little bird in red, again with the help of a tool from  the tool set. 
 
I also had to prepare my driftwood. I used a power tool for making holes for the head and at the bottom for the stand. For the arms I  used a simple hardware store wire and made holes on both sides. To glue everything into the wood and also the bird on the wire I used E-6000.

To give a little bit more dimension to the head, I used brown acrylic paint. I used a stiff stencil brush to get the paint into the cracks of the hair. Then I let it dry somewhat and used a wet towel to remove the paint again from the top parts. Leaving the paints mostly in the cracks. This is sometimes a back and forth process, means apply paint, wipe it of, apply more paint and so on.

I like to mix and match in all my art, so I added some metal leaf to the wood and the Makin's Clay®. To glue on I prefer gluepaste as it dries faster but any other metal leaf glue works too.

The goal is to have the glue not completely dry, but a little bit tacky, so you can carefully add the leaf. When it has dried you can use a brush to wipe off any excess.


I also added the same brown acrylic paint as patina, and no worries it wipes off easy from the metal leaf.  As you can see I was going for a more aged, grungy look.

When everything was dry, I assembled my fairy. I used E-6000 to add the wings to the back and also to attach the beads and the bird to the wire arms.


Now have fun to make your own fairy.....

Thursday, March 8, 2018

Garden of Unity Mixed-Media Sculpture


For my March Makin's Clay® project, I designed a small piece to highlight the fact that we are all united regardless of the color of our skin. 

Note:  Patricia is a fan of the television program The View.  Some of the hosts, including Whoopi Goldberg, have frequently been discussing the state of the country right now and the need for unity.  Pat decided to send her Garden of Unity to Whoopi.   She knows it was received, as she received her own surprise in the mail recently - a signed copy of Whoopi's new book!  Thank you Pat for continuing to spread joy by sharing your art made with Makin's Clay®! 

Supply List:

Makin's Clay® in White/Olive        19G Steel Wire              Diamond Glaze™          Beacon Tacky 
Small Face Mold                              Krazy Glue®                 Alcohol Inks or                Glue™
Piece of Driftwood                           Wire Bristle Brush           Paint      
CreateAlong.com Small                   Victoria James Art        Beacon™ 527 Glue
    Heart Shape Plunger                        Shingle Cracked 
                                                             Growth Ring Real 
                                                             Textures 
Recommended Makin's® Tools:

Makin's Professional®                      Makin's®
    Ultimate Clay Machine®                Heart Cutter Set  
    Cutting Mat                                     Floral Push Mold 
    Professional Clay Tools® 

Instructions:

Using a small face mold, push some white Makin's Clay® into the mold. Make 4 faces. Set aside to dry. 

Push some white clay into 2 flowers on the Makin's® Floral Push Mold. Using a small Makin's® Heart Cutter, cut out one heart and free form cut out another heart from a small piece of white clay rolled out on the #1 setting on the Makin's Professional® Ultimate Clay Machine®. I textured the front of the hearts with Victoria James Art Shingled Cracked Growth Ring Real Textures. Let dry. 


Paint the 4 faces in multi-ethnic skin tones. Set aside to dry. 

I used alcohol inks to color the hearts and flowers but you can paint them the colors of your choosing. When the hearts and flowers were dry, I glued the faces onto the hearts and flowers using Beacon's™ Tacky Glue. Next I coated the front of each piece with Diamond Glaze™. Let dry. 

Cut 4 pieces of 19G steel wires in 5" lengths. Glue the wires to the back of each flower and heart with Beacon's™ Power-Tac. Let dry completely. 


Roll out some Olive Makin's Clay® on the #1 setting on the Makin's Professional® Ultimate Clay Machine®. With a small heart plunger cutter (CreateAlong.com), cut out 4 hearts.


I glued a heart covering the wires on the back of each piece using Beacon's™ Tacky Glue. Then I textured each heart with a wire bristled brush. let dry. 

When dry I coated the back of each piece with Diamond Glaze™. 


Drill some small holes in the driftwood to accommodate each heart and flower. Secure the wires with Beacon's™ 527 Glue. I chose to bend each wire for more interest. 

I finished the piece by adding some meaningful words to my Garden of Unity. 


Tuesday, July 25, 2017

Driftwood Doll Angel

Driftwood Doll Angel by Bea Grob

At the moment I'm very much into Dolls and Driftwood. So I'm introducing here my Driftwood Doll Angel. I'm pretty sure you can come up with something that pleases you. So why don't you give it a try?

Supplies:

Makin's Clay® Natural (I used approx. 120 gr)
Makin's® Clay Tools
Makin's Professional®
  • Ultimate Clay Machine®
  • Cutting Mat
Some old laces
Micapowders in different colors
Driftwood, or some other item to put a stick in
Wire from the hardware store about 20 Gauge
Some tulle for the wings

Instructions:

I began by drilling a hole for the stick.

Next, I used some clay to make first a ball about 1 inch size and I shaped the ball in form as you can see in the picture.


I connected all the parts together and let it dry overnight.

The next day, I rolled out the clay on the thickest setting of the clay machine. Thanks to the non-stick rollers, it works like a charm.


Next, I layed the lace on top of the clay and pressed it in by rolling with the roller several times. I wanted the fibre to be on the same height as the clay. Now comes the fun part, grab some Mica Powders in the colors you like and apply them with a stipple brush.

At the end, I go over it with some paper towel, to wipe off any excess.

Now you can lift your lace carefully from the clay to reveal the pattern.


I did a test wrap and decided I had to tear a bit. Then, I used some of the leftover to make two small balls which I added on the backside of the patterned clay before I wrap the whole “fabric” around.

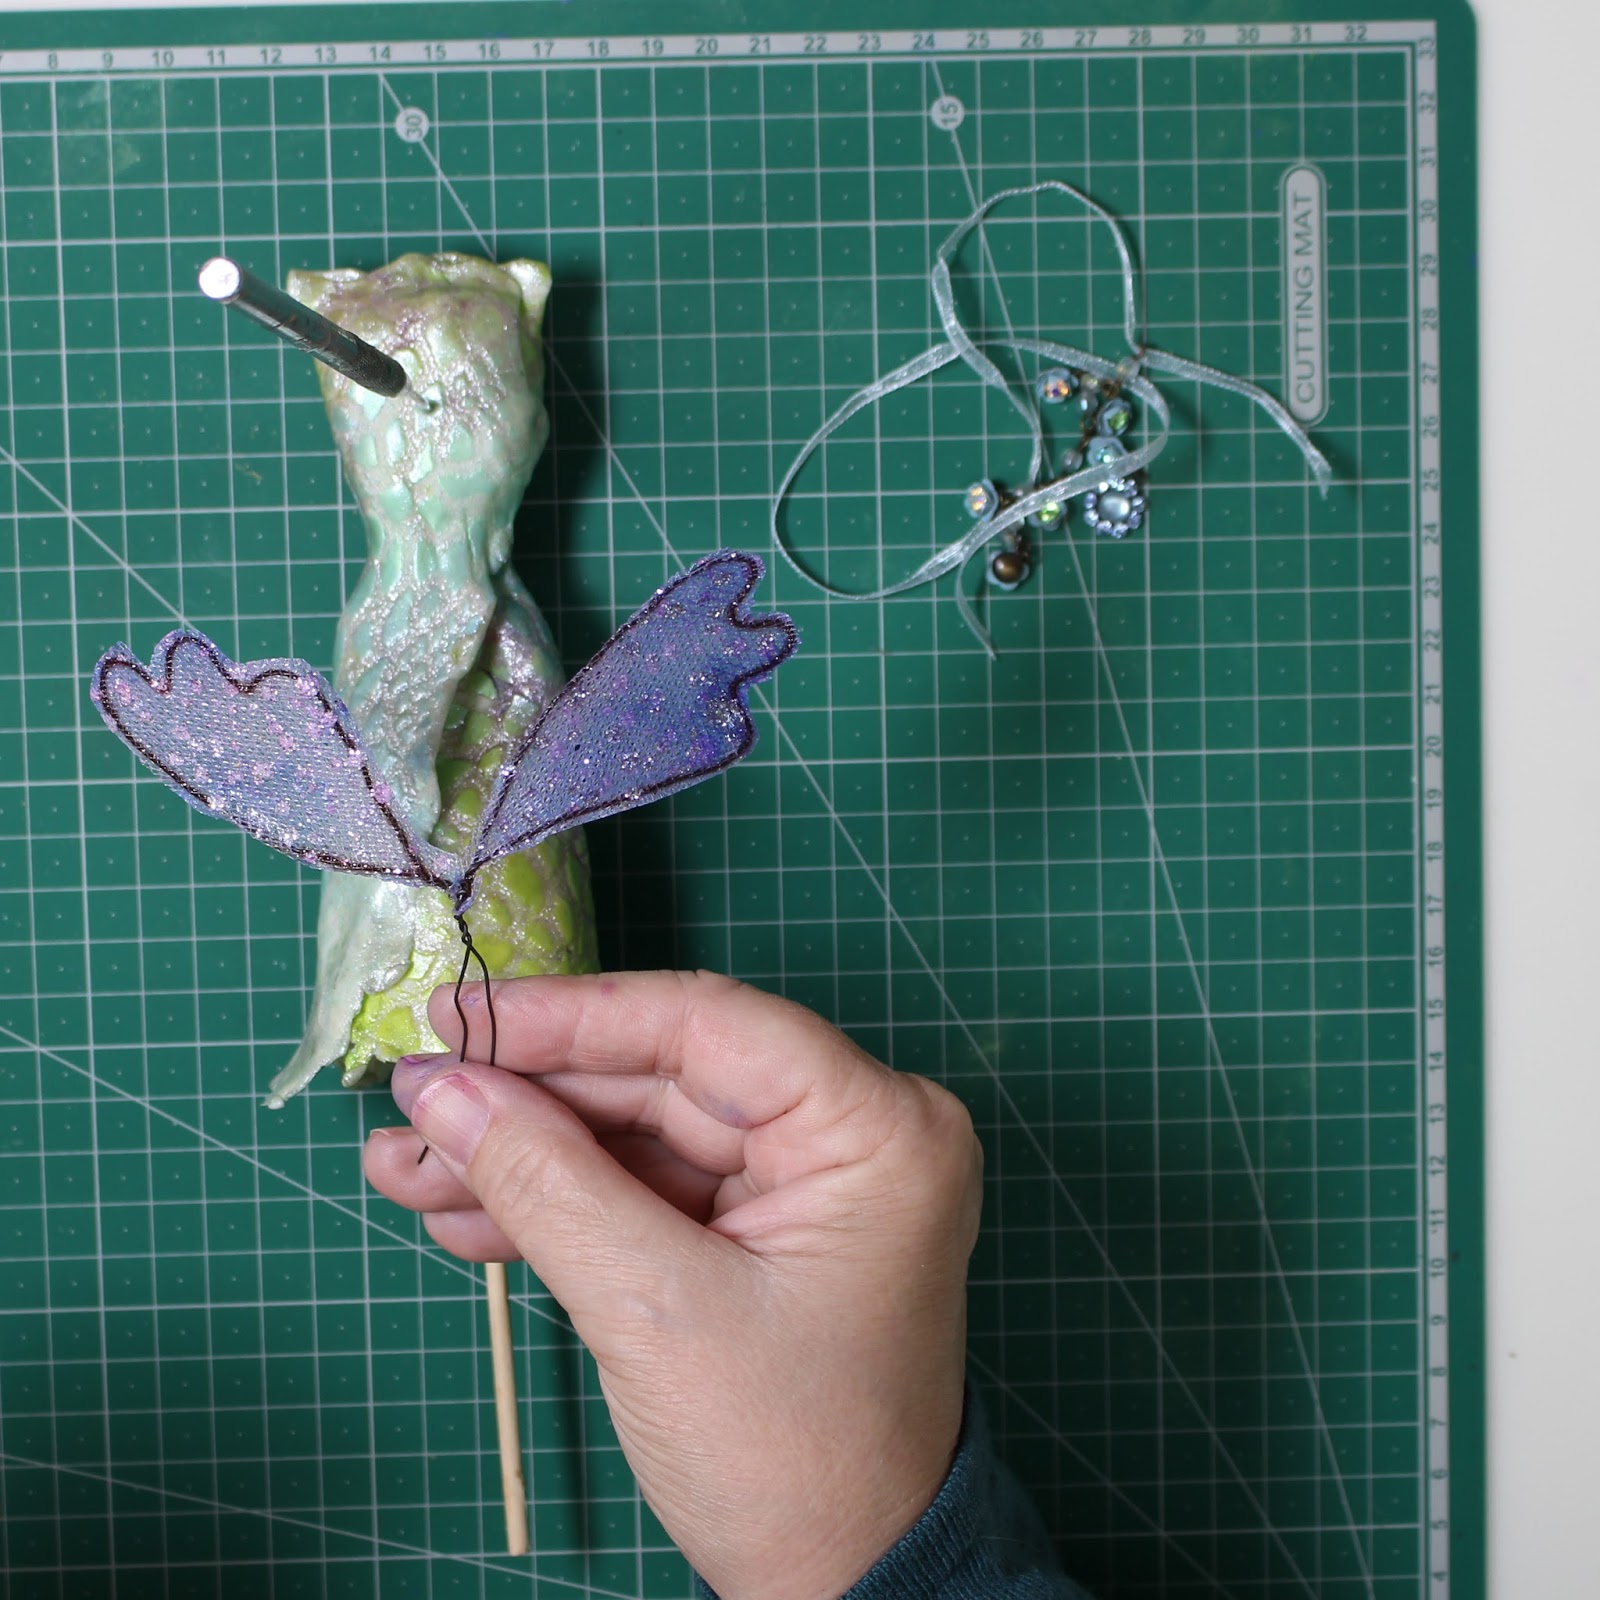
Now it it time to make some wings. I used wire and some tulle.

First, I drew a wing shape and then I cut 2 pieces of wire - one for each wing. I usually work on both wings at the same time. For me it's easier to give them somewhat the same form and size.
I start by bending a curve and check it on my drawing.

Using a dowel helped me shape the round forms and a plier to give me the sharp corners.


When I'm happy with the shape, I twist them together just twice, we don't want a bulk where they connect. I also make sure that they are as flat as possible for the next step.

To apply the tulle, I use some fabric stiffener, encasing the wire from both sides.

Don't leave it somewhere lying around on any surface, you have to put it upright to dry (ask me how I know, the first set I had to scrape it from the surface and had to start over again... lol)


Time to pierce the lady/dress. I made a hole to put in the wings.

To insert the wings I twisted them together and added a dab of glue to the end. Make sure that you make the hole long enough, but don't poke through.


I then sealed the Micapowder with a varnish, I used one that had some Mica in it, but a plain one would have worked too. Next, I also added some bling, from a piece of broken jewelry, just for fun.


Now have fun making your own sculpture, it's really easy with Makin's Clay®.

Contact us

Name

Email *

Message *