Pages - Menu

Search This Blog

Showing posts with label Angel. Show all posts

Monday, June 11, 2018

Steampunk Doorknob Angel

"Doorie" Steampunk Doorknob Angel by Patricia Krauchune 

For my June Makin's Clay® project, I utilized an old glass door knob and some other pieces of found objects to make this angel. Her name is "Doorie"

Supply List:

Old Glass Door Knob                         Set of Wings                                     Large Gear                                     Large Eyelet
Large 3/4" Nut                                    Ball Chain                                        Folkart® Chalk Patina Paint          Cornstarch
Plastic Ball about 1 1/8" Diameter     BSI™ 5 m Quick-Cure™ Epoxy     Makin's Clay® in Black                 Face Mold   
2 1/2" Piece of Wooden Dowel          Krazy® Glue                                    Beacon's™ Tacky Glue
DecoArt® Extreme Sheen™ Paint in Sterling Silver/24k Gold/Rose Gold

Recommended Makin's® Tools:

Makin's® Professional Ultimate        Makin's® Texture Sheet:  Diamond Tread         Makin's Professional® Cutting Mat
Clay Machine®                                  Pattern


Instructions:

Using the BSI™ 5 Minute Quik-Cure Epoxy, glue the small piece of wooden dowel into the door knob. Let cure overnight. 


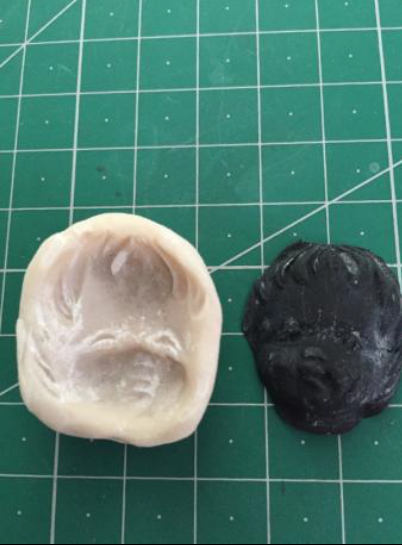
Push some Black Makin's Clay® into a face mold that was dusted with cornstarch. Let completely dry then remove. 

Drill a 1/4" hole into the bottom of a plastic ball. 

Roll out some Black Makin's Clay® on the # 2 setting on the Makin's Professional® Ultimate Clay Machine®

I brushed some Krazy® Glue onto the plastic ball and then covered the ball with the rolled out clay. Keeping the orientation of the ball with the 1/4" hole on the bottom, blend in the molded face using a little water sprayed on the ball and some Beacon's™ Tacky Glue. I textured the back of the head with a Makin's® Texture Sheet in the Diamond Tread A pattern. 


Next I trimmed a gear to look like the image in this picture and immediately pressed it into the "head" using Krazy® Glue to secure in place. This is the angel's halo. 


Roll out some more Black clay on the # 2 setting of the Makin's Professional® Ultimate Clay Machine® and cover the metal part of the door knob. Then I pushed some ball chain around the circumference meeting at the middle with a large eyelet. A small piece of ball chain was then glued into the eyelet using the epoxy. 

Now you want to epoxy the 3/4" nut onto the top followed by the "head". Let cure overnight. 

I used epoxy to attach the wings to the back of the angel again letting it cure overnight. 

The head was painted with silver paint. Later I decided the face would be more prominent if I painted it with gold paint. 


You can paint the "body" of the angel in colors of your choice. I added a little patina paint for aging and highlights. 

This was the birth of Doorie, my steampunk door knob angel. 

Wednesday, February 28, 2018

Carpenter's Angel


Design Team Member Patricia Krauchune recently shared another of her creative Steampunk projects!  She transformed a stubby screwdriver into this clever Carpenter's Angel!  Pat used Makin's Clay® for the face and wings.

Friday, February 2, 2018

Valentine's Day Heart


Valentine's Day Heart by Steph Ackerman

Hi everyone, Steph Ackerman here today with a Valentine's Day Heart.  Valentine's Day will be here soon, so why not create something special?

Supplies:

Makin's Clay® -  White
Makin's ProfessionalⓇ Cutting Mat
Makin'sⓇ Clay Roller and Cutters SetTool Set
Beacon Adhesives - 3-in-1
Prima acrylic paints
Prima mold
Mod Podge mold
Wilton mold

Instructions:

Place the white Makin's Clay® in the molds.  Use the roller to force the clay into the angel mold, alphabet mold, and border mold,  and then use the clay tool to trim away the excess clay.


Remove the clay elements. Paint the angel with Gold Rush, Rose Gold and Copper acrylic paints.  Paint the pearl drops and letters with Gold Rush acrylic paint

Paint a blackboard heart with Prima acrylic paints in Rose Gold, Copper and Violet Gold.  Heat set between each layer to set the paints so the colors don't get muddied.

Add a large flower in one corner, then place all elements on the heart until the arrangement is pleasing.  Glue in place with Beacon Adhesives.

Add rhinestones to the top edges to finish.

Clay elements are light weight and add no weight so you can hang this heart almost anywhere.

Thanks for stopping by.


Saturday, August 26, 2017

Free Your Mind Assemblage


Design Team Member Iris Rodriguez recently shared this Mixed Media Assemblage piece here on her blog.  Iris used Makin's Clay® to create her dimensional textured background elements.

Thursday, August 3, 2017

Flowers & Angel Altered Bottle


Altered Bottle by Steph Ackerman
Hi everyone, Steph Ackerman here today with an altered bottle.  I picked up this bottle from my local dollar store knowing that it would be fun to alter.

Supplies:

Makin's Professional® Cutting Mat
Beacon Adhesives - Tacky Glue
Prima Mold, Paints, Flowers
Rinea Foiled Papers
Spellbinders die

Instructions:
Condition white clay then wrap it around a glass bottle.  As you force the clay around the bottle, allow some texture to form - don't look for a smooth finish.  This adds some nice character to the finished project.  Allow to set before continuing.  Since I wasn't sure what I was going to do, I put it aside for about 2 weeks.  When I picked it up again, I had this fun dimension.                                                                                                      
I pulled out Prima acrylic paints and began by painting it with Red Gold.

Next, I painted over it with Gold paint.


Finally, I added some touches of Blue paint.  Then I used a baby wipe to remove some of the colors creating a patina effect.
I created the winged angel using white clay with a Prima mold.  After letting it dry for several hours, I painted it with Red Gold and Gold acrylic paints.  Then I used a baby wipe to blend in touches of Blue acrylic paint.


To finish, I adhered the angel to the bottle with Beacon Tacky Glue then surrounded it with flowers.

I dry painted some Red and Gold paints to give the flowers a touch of color.  Using Spellbinders dies, I die cut Rinea Foiled Paper and added some leaves around the flowers.

A little bird was created with white clay and then painted with Gold and Blue acrylic paints before adding it amongst the flowers.

Finally, I painted the stopper with Blue acrylic paint since I'm not yet sure what I'm putting in the bottle and I wanted it to be complete.

What do you think?

Thanks for stopping by.

Steph


Tuesday, July 25, 2017

Driftwood Doll Angel

Driftwood Doll Angel by Bea Grob

At the moment I'm very much into Dolls and Driftwood. So I'm introducing here my Driftwood Doll Angel. I'm pretty sure you can come up with something that pleases you. So why don't you give it a try?

Supplies:

Makin's Clay® Natural (I used approx. 120 gr)
Makin's® Clay Tools
Makin's Professional®
  • Ultimate Clay Machine®
  • Cutting Mat
Some old laces
Micapowders in different colors
Driftwood, or some other item to put a stick in
Wire from the hardware store about 20 Gauge
Some tulle for the wings

Instructions:

I began by drilling a hole for the stick.

Next, I used some clay to make first a ball about 1 inch size and I shaped the ball in form as you can see in the picture.


I connected all the parts together and let it dry overnight.

The next day, I rolled out the clay on the thickest setting of the clay machine. Thanks to the non-stick rollers, it works like a charm.


Next, I layed the lace on top of the clay and pressed it in by rolling with the roller several times. I wanted the fibre to be on the same height as the clay. Now comes the fun part, grab some Mica Powders in the colors you like and apply them with a stipple brush.

At the end, I go over it with some paper towel, to wipe off any excess.

Now you can lift your lace carefully from the clay to reveal the pattern.


I did a test wrap and decided I had to tear a bit. Then, I used some of the leftover to make two small balls which I added on the backside of the patterned clay before I wrap the whole “fabric” around.

Now it it time to make some wings. I used wire and some tulle.

First, I drew a wing shape and then I cut 2 pieces of wire - one for each wing. I usually work on both wings at the same time. For me it's easier to give them somewhat the same form and size.
I start by bending a curve and check it on my drawing.

Using a dowel helped me shape the round forms and a plier to give me the sharp corners.


When I'm happy with the shape, I twist them together just twice, we don't want a bulk where they connect. I also make sure that they are as flat as possible for the next step.

To apply the tulle, I use some fabric stiffener, encasing the wire from both sides.

Don't leave it somewhere lying around on any surface, you have to put it upright to dry (ask me how I know, the first set I had to scrape it from the surface and had to start over again... lol)


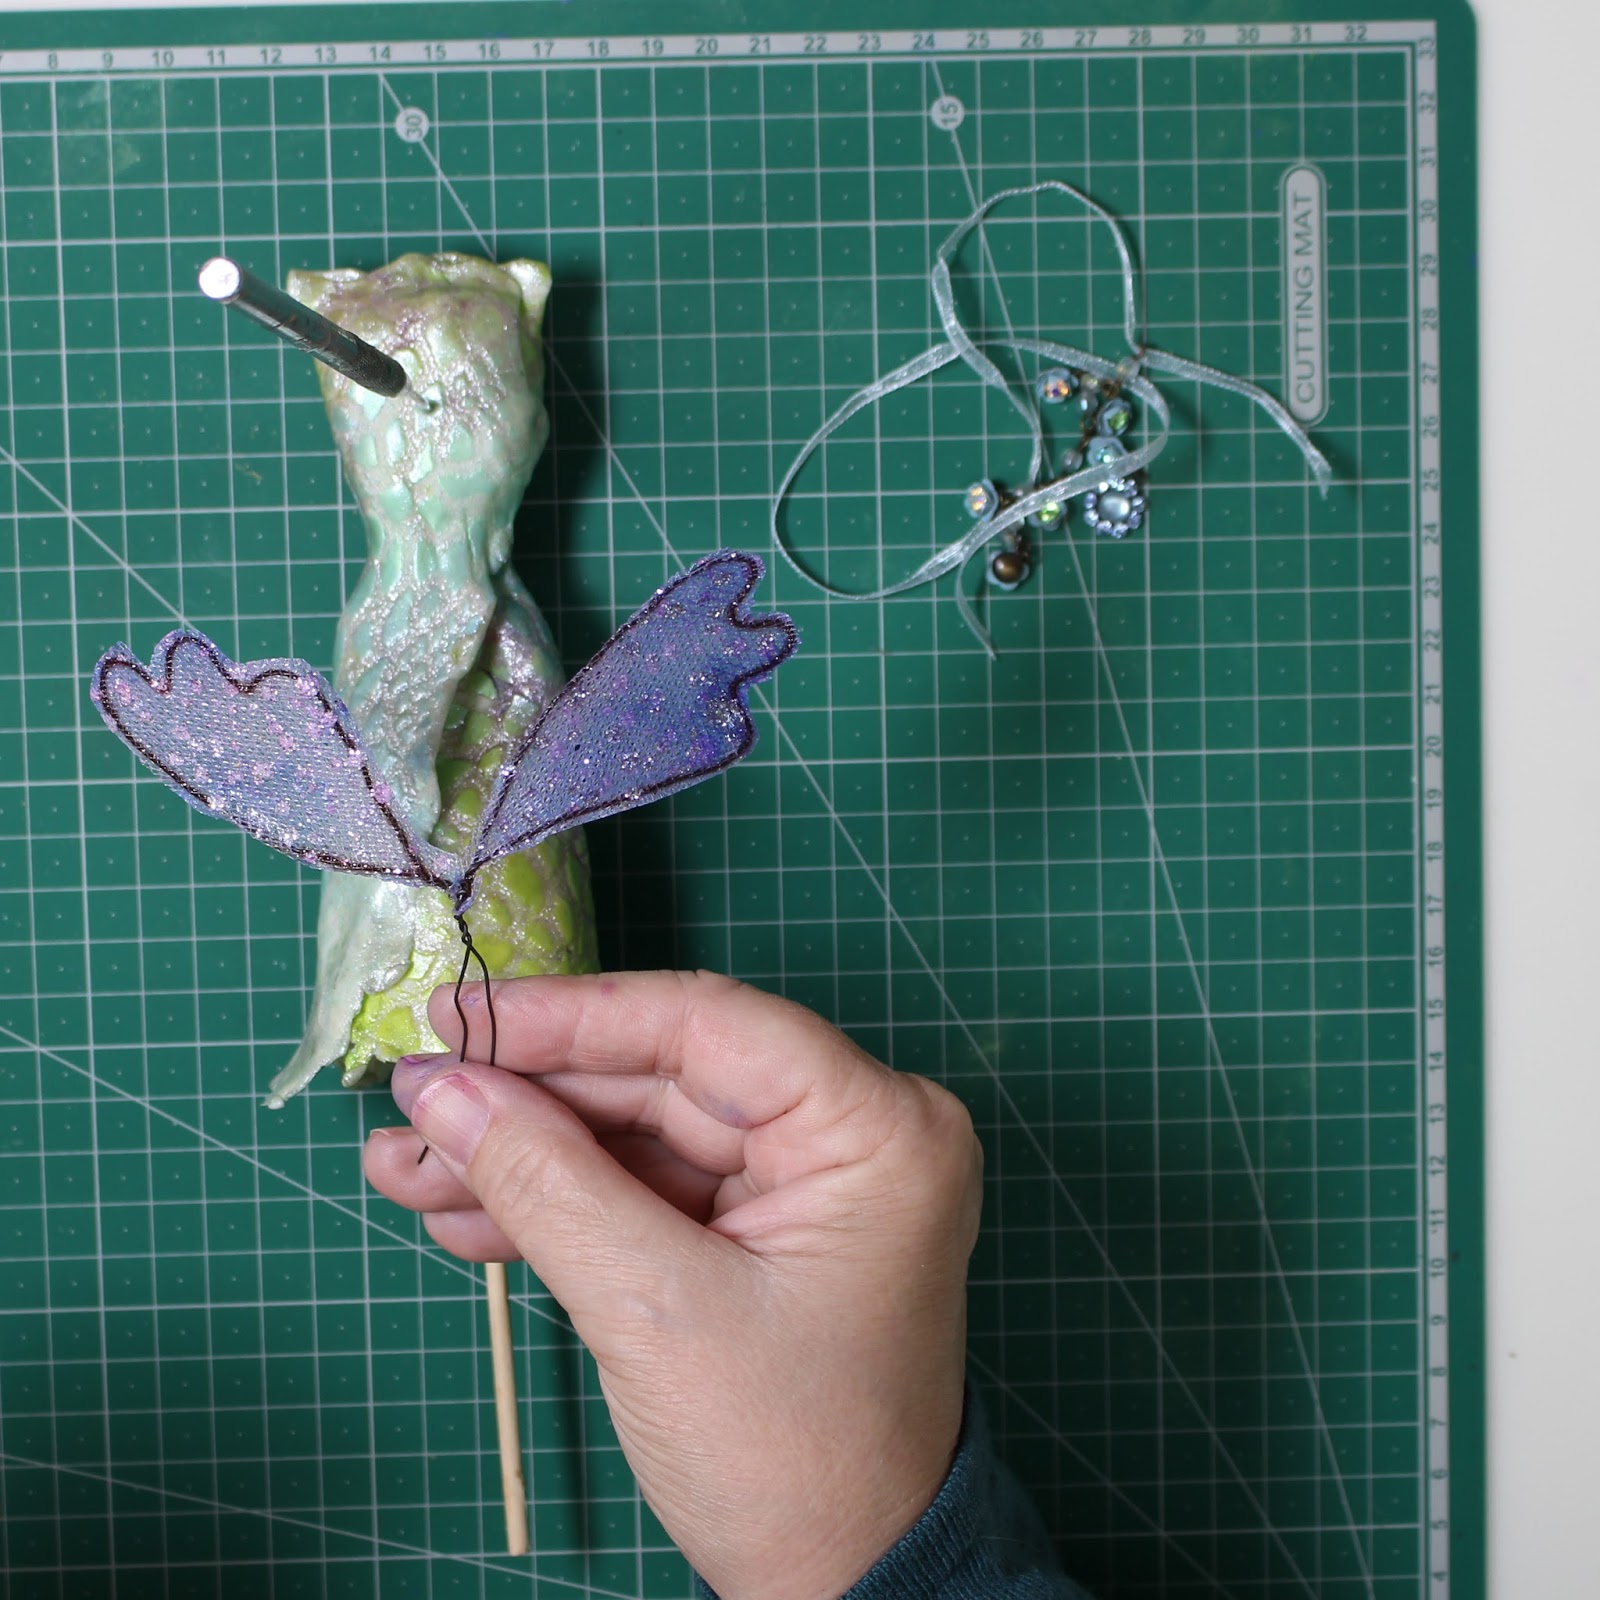
Time to pierce the lady/dress. I made a hole to put in the wings.

To insert the wings I twisted them together and added a dab of glue to the end. Make sure that you make the hole long enough, but don't poke through.


I then sealed the Micapowder with a varnish, I used one that had some Mica in it, but a plain one would have worked too. Next, I also added some bling, from a piece of broken jewelry, just for fun.


Now have fun making your own sculpture, it's really easy with Makin's Clay®.

Wednesday, February 10, 2016

Mixed-Media Heart by Irit Shalom

Design Team Member Irit Shalom recently shared this wonderful mixed-media heart project here on her blog.  Irit used Makin's Clay® to create many of the molded elements she included on her piece.

Contact us

Name

Email *

Message *