Pages - Menu

Search This Blog

Showing posts with label art doll. Show all posts

Tuesday, May 21, 2019

Art Spirit Doll Amphitrite


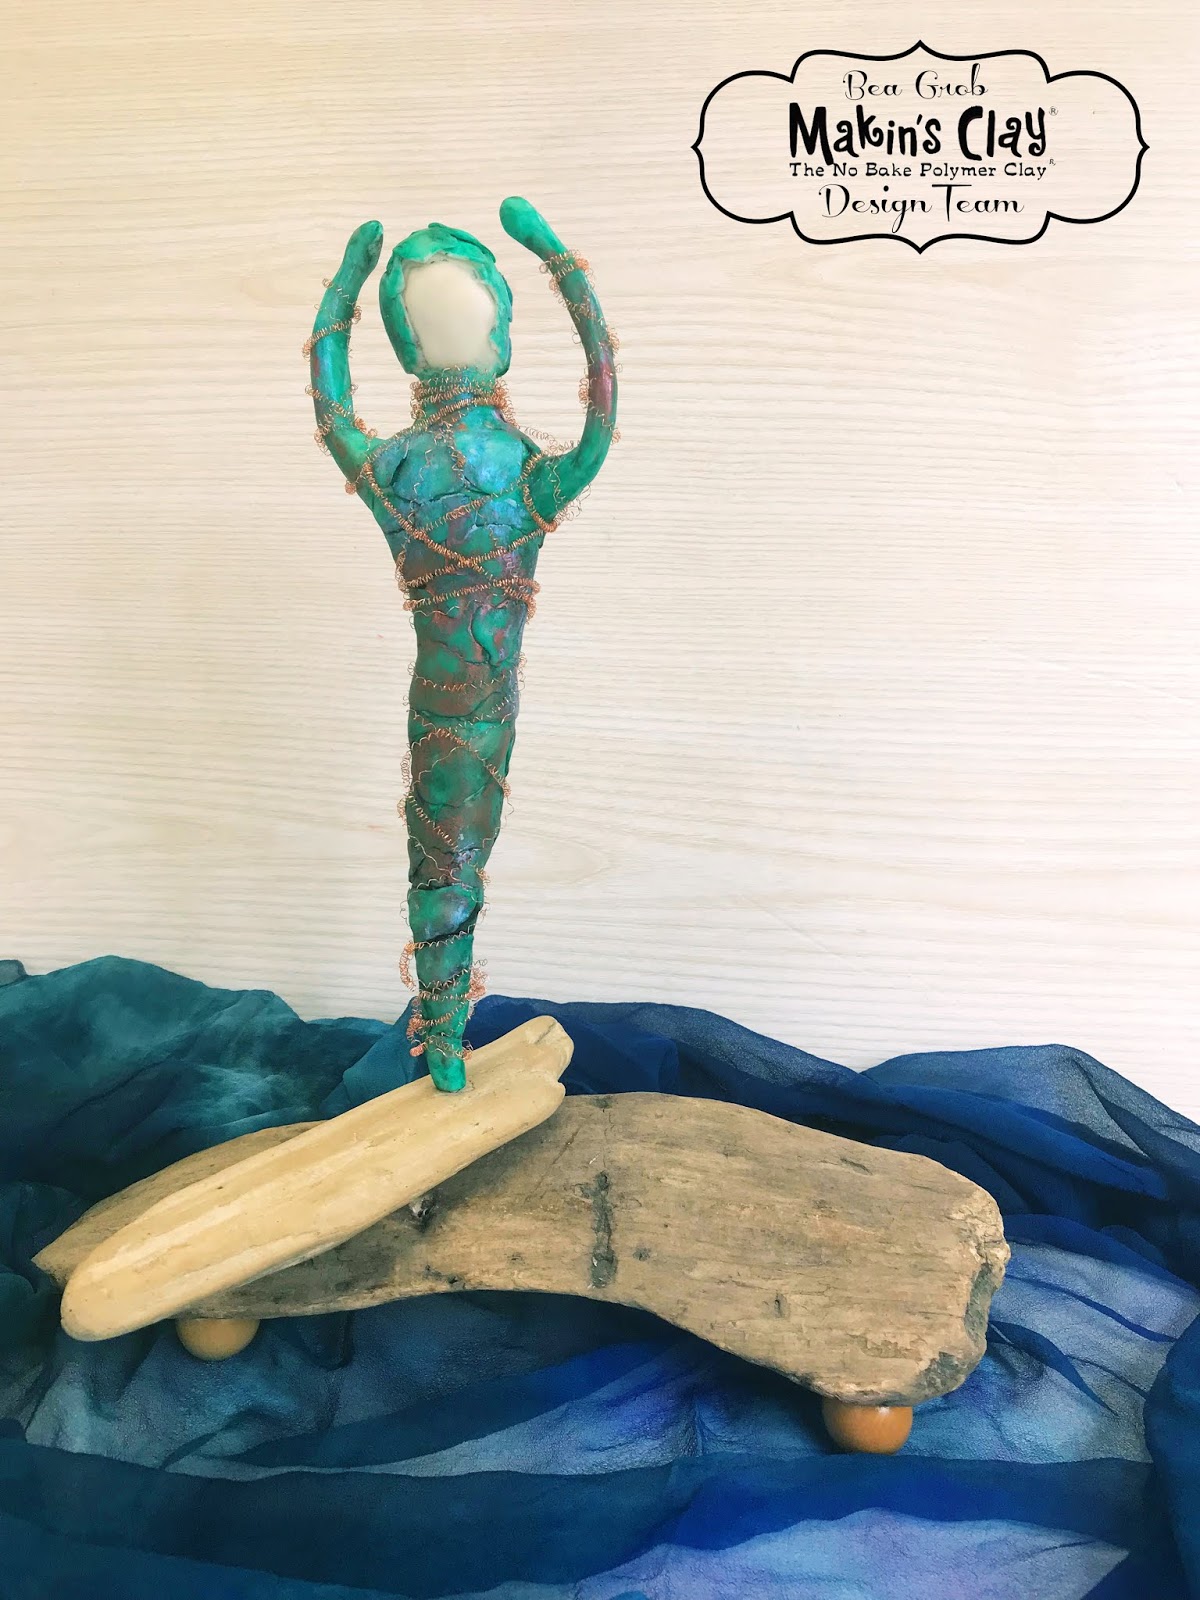
I like Spirit Dolls and Art dolls so I made Art Spirit Doll. Spirit Dolls are an ancient talisman against all negativity and in the Greek mythology, the goddess of Amphitrite is the goddess of the sea. So I choose those two concepts for my doll. 

Supplies:

120 g Natural Makin's Clay®
Makin's®  Basic Tool Set
Tissue paper 
Painters tape
wooden skewer
driftwood or something else as a base
Acrylic Paint
aluminum wire
Crinkle wire

Instructions:

It all started with some natural Makin's Clay®, tissue paper, a wooden skewer, painters tape and driftwood.

As a first step, I wrapped some tissue paper around the wooden skewer. I spritzed it lightly with some water and pressed it together. With the painters tape I attached it all together to the dowel. Make sure that you leave enough skewer uncovered for the later montage of your doll. But make also sure that your skewer goes up into the head. Depending on the size you plan your doll you need an according skewer length. (Mine was peaking out about 2 inches) Remember you always can cut back, but not add....


For the arms I used aluminum wire. I wrapped it around the upper body and crossed it in the back.

Next I added a bit more tissue paper and again wrapped it with painters tape.


Now it was time to grab the Makin's Clay®. I used little pieces and formed them by hand in little oval thin pieces. I simply pressed them right onto the painter's tape, starting from the bottom and overlapping them.


I didn't smooth out anything except the face, for which I used a wet towel. I also used a tool from the Makin's Clay®  Basic Tools to define the neck a bit.


For each arm I formed a more elongated piece from the clay and wrapped it around the wire. I made sure that the seam is in the back and went in again with the tool to smooth out the gaps.


I let the figure dry for two days before I went in with some acrylic paint. I started by adding some black all over and then remove most of it with a wet towel. This leaves more paint in the crevices and gives a more aged look. Next I went in with some transparent acrylic paint, it is the easiest if you use some fluid paint. I applied it all over wearing gloves, so I could massage the paint in.

Again everything had to dry before I could apply different types of Rub on Waxes. I choose the colors blue iridescent, copper and just a hint of black again. Don't forget to polish the waxes afterwards to get a nice sheen. I also added some crinkle wire all around. 


I added my doll to the driftwood by making a hole into the driftwood and adding some beads as little feet for the lower driftwood. This step is very much depending on what base you use. So there are no further instructions for this step.


Monday, August 28, 2017

Little Princess Art Doll


Lately, I have been much into doll's and so I'm here with another doll project. I have also incorporated some driftwood again.

Supply list

Makin's Clay® about 120 grams or 4.2 oz in White or Natural
Makin's Professional® Cutting Mat
Driftwood
20 gauge wire (mine is from the hardware store)
Acrylic paints 
Paint brushes
Stains (optional you could use acrylic paints instead)
Some sort of stand
Two part epoxy ( I did use UHU repair all powerkitt) I recommand a quick dry one.
Beads 
Detail of creation of head, hands, feet, and accent pieces (hearts, birds)

Detail of painting the face

You can find the whole process in this video:

Tuesday, July 25, 2017

Driftwood Doll Angel

Driftwood Doll Angel by Bea Grob

At the moment I'm very much into Dolls and Driftwood. So I'm introducing here my Driftwood Doll Angel. I'm pretty sure you can come up with something that pleases you. So why don't you give it a try?

Supplies:

Makin's Clay® Natural (I used approx. 120 gr)
Makin's® Clay Tools
Makin's Professional®
  • Ultimate Clay Machine®
  • Cutting Mat
Some old laces
Micapowders in different colors
Driftwood, or some other item to put a stick in
Wire from the hardware store about 20 Gauge
Some tulle for the wings

Instructions:

I began by drilling a hole for the stick.

Next, I used some clay to make first a ball about 1 inch size and I shaped the ball in form as you can see in the picture.


I connected all the parts together and let it dry overnight.

The next day, I rolled out the clay on the thickest setting of the clay machine. Thanks to the non-stick rollers, it works like a charm.


Next, I layed the lace on top of the clay and pressed it in by rolling with the roller several times. I wanted the fibre to be on the same height as the clay. Now comes the fun part, grab some Mica Powders in the colors you like and apply them with a stipple brush.

At the end, I go over it with some paper towel, to wipe off any excess.

Now you can lift your lace carefully from the clay to reveal the pattern.


I did a test wrap and decided I had to tear a bit. Then, I used some of the leftover to make two small balls which I added on the backside of the patterned clay before I wrap the whole “fabric” around.

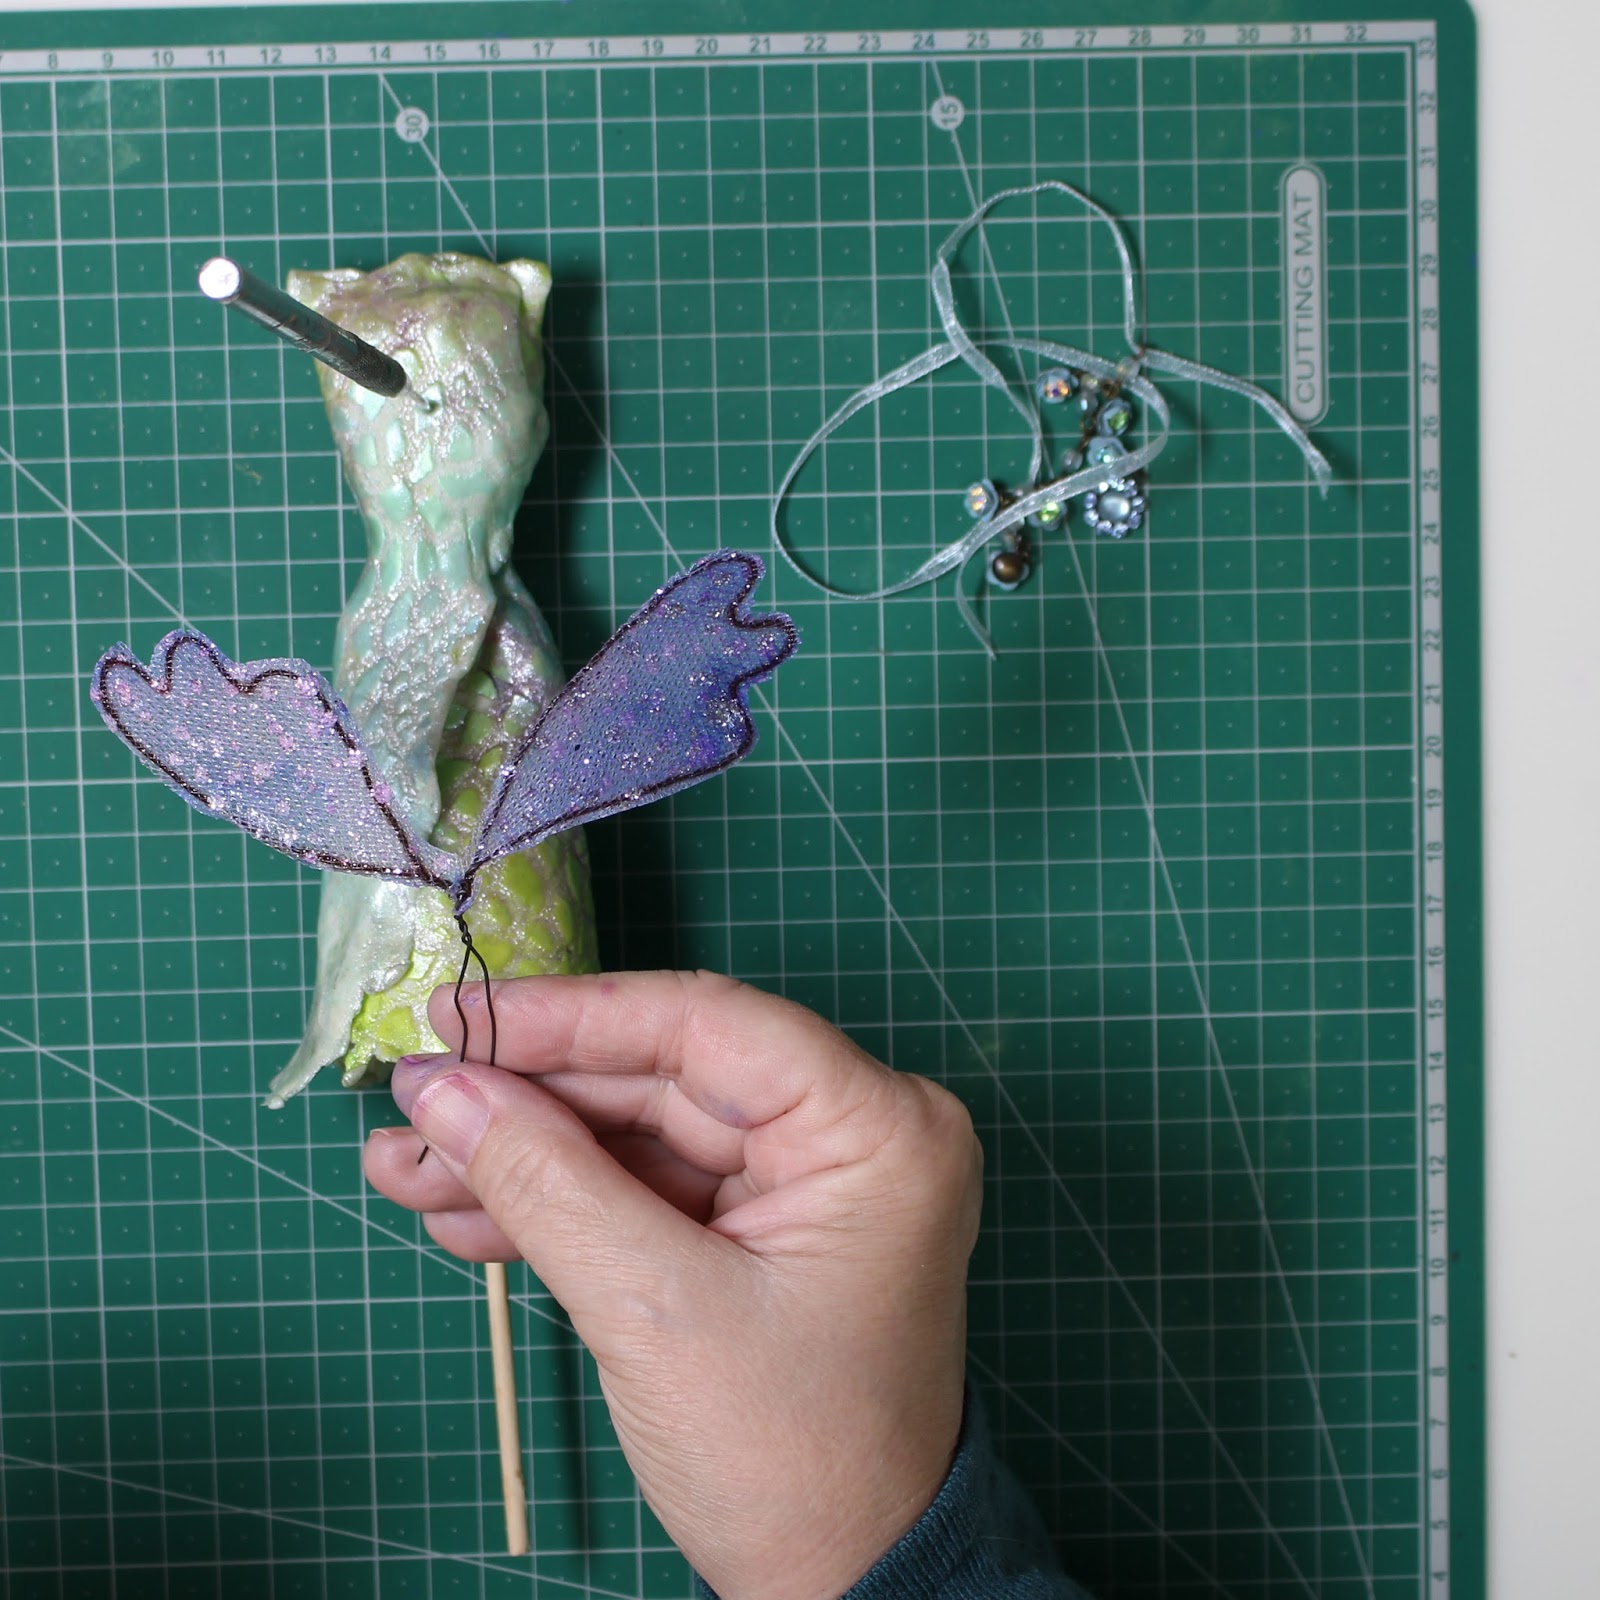
Now it it time to make some wings. I used wire and some tulle.

First, I drew a wing shape and then I cut 2 pieces of wire - one for each wing. I usually work on both wings at the same time. For me it's easier to give them somewhat the same form and size.
I start by bending a curve and check it on my drawing.

Using a dowel helped me shape the round forms and a plier to give me the sharp corners.


When I'm happy with the shape, I twist them together just twice, we don't want a bulk where they connect. I also make sure that they are as flat as possible for the next step.

To apply the tulle, I use some fabric stiffener, encasing the wire from both sides.

Don't leave it somewhere lying around on any surface, you have to put it upright to dry (ask me how I know, the first set I had to scrape it from the surface and had to start over again... lol)


Time to pierce the lady/dress. I made a hole to put in the wings.

To insert the wings I twisted them together and added a dab of glue to the end. Make sure that you make the hole long enough, but don't poke through.


I then sealed the Micapowder with a varnish, I used one that had some Mica in it, but a plain one would have worked too. Next, I also added some bling, from a piece of broken jewelry, just for fun.


Now have fun making your own sculpture, it's really easy with Makin's Clay®.

Tuesday, June 27, 2017

Mixed-Media Art Dolls


Mixed-Media Art Dolls by Bea Grob
Create your own wonderful, whimsical charakter an make your own studio spirit or alter ego.
Use Makin's Clay® as the basis for this project and combine with beads, paints, fibre and more.

Supply List

Makin's Clay®  - about 2 oz in the desired color
Makin's® 
  • Texture Sheet Set H
  • Clay Tools

Makin's Professional® 
  • Ultimate Clay Machine®
  • Cutting Mat 

Assortement of beads for the arms and fibres for the skirt, beadcap for the head, metal parts or soda can die cuts for wings.
20 gauge wire , I used black steel wire from the home improvement store
2 square chopsticks
E6000  for permanent bond and some 
Hot glue for immediate hold
Tape
Decorator foil 
Pan Pastels 
Craft knife
Face mold
Scissors, pliers, drill

Instructions:

I started with some black and rolled it out on the the second thickest setting of the Ultimate Clay Machine®. The height of the body is roughly 4 inches, so I made sure that I could fit it in two times on the rolled out clay.

I added the foil and burnished it with the help of an old plastic card and then ripped foil off. (Sidenote: not all foils work equally well, if you are missing spots, just reapply it and try again. Sometimes I even heat it up carefully with a heat gun and try again.)

Next, I used a texture make an impression. As you can see I don't mind the spots where there is no foil. It just adds to the character.


I actually removed more of the foil with some clear tape, by pressing the tape onto the foil and then pulling back to reveal the clay underneath. Again sometimes you have to repeat that step.

I applied Pan Pastels to the areas where there is no foil. I do use both the matt ones and the shiny ones, simply by rubbing it on with my fingers. When I'm done I wipe loose  powder from the foil with a baby wipe.


Now it is time to cut out the two parts with a craft knife. I like to work on the Makin's Professional® Cutting Mat which has conveniently two sides. A self-healing side and a rolling (non-stick) side.

I made a face for my doll with a flexible face mold. I made sure that  I didn't fill it at first hand, as I wanted to add the wire and then add a bit more on top. The wire was approx. 15 inch and then folded together. I also pressed in the beadcap, to give me a guide when I'm gluing everything together.


Next, I had to prepare the legs, I used 2 chopsticks. It is much easier if they are square at the top. The round ones don't work so well. I taped them together with painter's tape and then drilled a hole through both at the same time. Depending on the length of the chopsticks you have to shorten them also.
    
In the meantime the body and the head are beginning to cure/dry.

About 1 inch from the head, make a bend in the wire on both sides.
         
Take the doll's head and thread the wire as shown in the picture.


I wrapped the arm wires around the chopsticks and reinforced the neck with an additional piece of wire. I start from the chopsticks and wrap around as tidy or messy I like.

I pressed the wire together on the places that are going to be covered by the body with a heavy plier.


I also punched 5 holes on each side, and made a hole at the back side for the wings.  I glued everything together using E6000, but also a little bit of hot glue for immediate bond.

For the head I used the beadcap and some other embellishments from my stash. For the wings I used some die cuts from an empty soda can. I used a brad, but I did also glue it with E 6000.
          
For the skirt you can use all kind of fancy yarns, ribbons or fabric strips as long as you can thread them through your holes. I cut mine about 11 inches long and then folded it together and thread them through the holes.
          

The final step is to add beads for the arms. I tried several version, what will you come up with?


Bea recently taught this creative workshop at Artworks and it looks like her students had a great time.  We think they created some amazing dolls too! 


Contact us

Name

Email *

Message *