Pages - Menu

Search This Blog

Showing posts with label home decor. Show all posts

Tuesday, September 17, 2019

Clay Heart Canvas


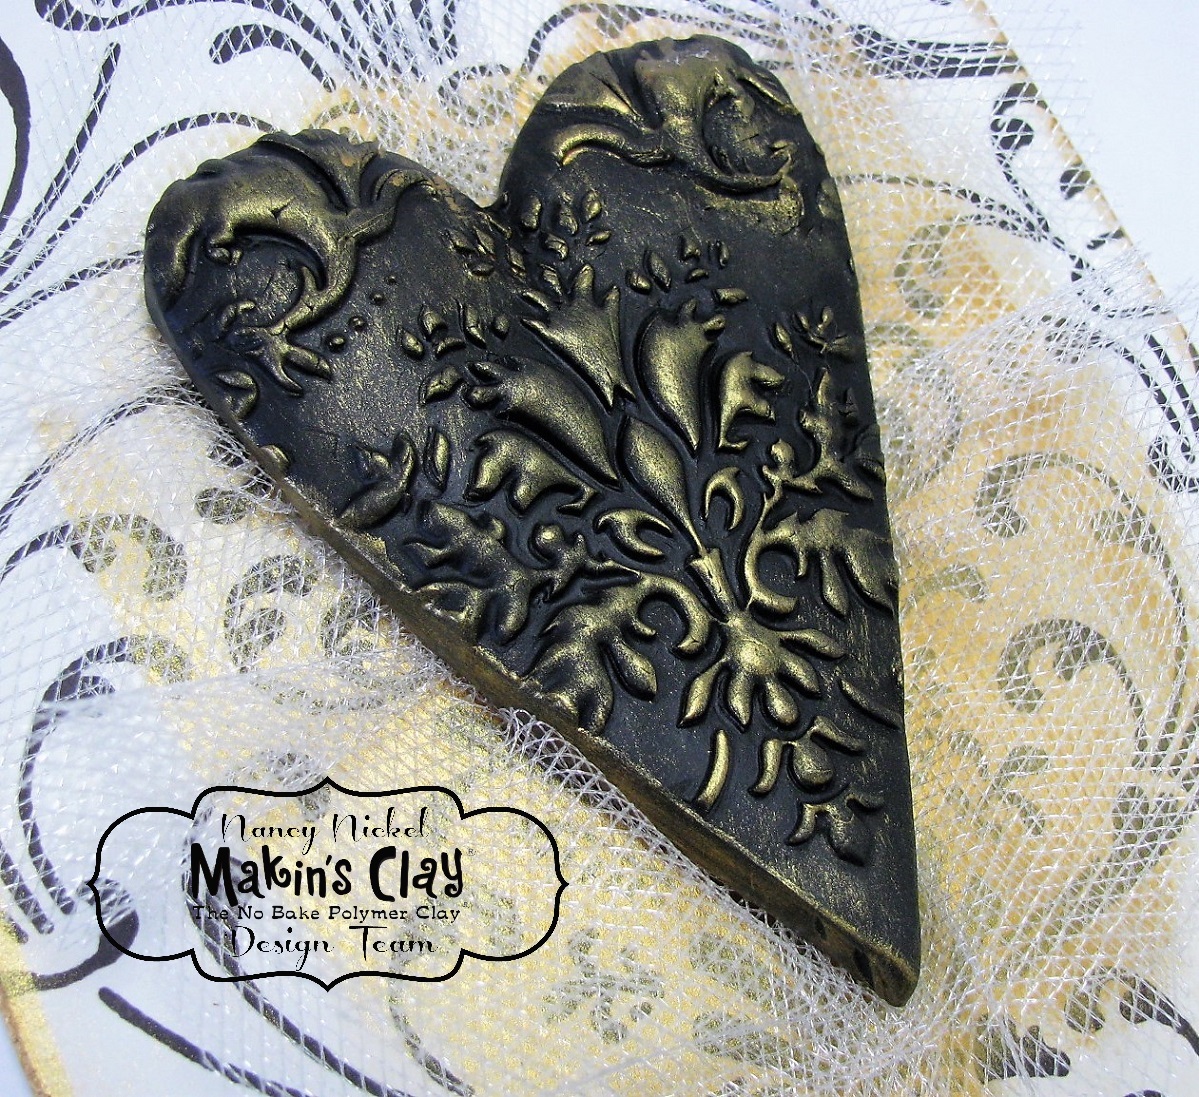
Clay Heart Canvas by Nancy Nickel

Materials Used:
Makin’s Clay® - Black Clay
Makin’s Professional® - 
Cutting Mat
Heart Mold – Stamperia;
Canvas – 5 x 7;
Decorative Paper – 5 x 7;
Cosmic Shimmer Metallic Gilding Polish – Gold;
Scraps of Gold Shimmer Tulle;
Tim Holtz Quote Sticker;
Scrap of Black Chipboard
Instructions:
1.   Roll a good size piece of black clay into a smooth oval. Insert clay firmly into the heart mold. Pop heart out of mold, and allow to dry.

2.   When it’s dry, brush the surface of the heart with the gold gilding polish, using the foam applicator. 


3.   Adhere the paper to the front of the canvas.
4.   Swipe some gilding polish on the center of the canvas, as well as along all the outside edges. 
5.   Bunch up the shimmer tulle, and adhere to the center of the canvas.
6.   Adhere the pretty heart in place on the tuft of tulle. TrIm any excess tulle, so that it frames the heart nicely.


7.   Adhere the quote sticker to the scrap of black chipboard, and adhere in place under the heart.
8.   Pop the canvas in a frame, or display as it is!


Saturday, September 7, 2019

Polymer Clay Flower Curtain Holder


Flower Curtain Holder by Leila Bidler

For this project you will need:

Makin's Clay® Green, Red, Yellow, Black 
(I highly suggest the "Vineyard Tones" and the "Multi Color" 4.2 oz packs!)
Makin's® Clay Roller
Makin's Professional®  Cutting Mat
Makin's® Basic Tool Set
Makin's® Push Mold "Floral"
Makin's® Push Mold "Leaves"
2 small round magnets
Acrylic Paint white and gold
Soft paintbrush
Hard bristles brush
Fabric ribbon (approx. 10 inch)
Superglue

Instructions:

In this tutorial we will use two awesome Makin's® Push Molds: "Floral" and "Leaves".

I choose the flower in the top right corner and start by taking a small amount of yellow Makin's Clay® and pushing it right into the center. The best way to use different colors with these molds is to look at them from the front while you push the clay in from behind, this way you can see if you have enough, need more or if you need to take off some.

Now take one or more colors of your choice (I am using the Makin's Clay® "Vineyard Tones" and "Multi Color" purple and red here) and fill in the petals of your flower.


To make an interesting leaf or two mix two different greens from the sets mentioned above to create a variegated color blend

Proceed using the "Leaves" Push Mold as you did with the flower.

With these push molds you do not really need any release agent, if the clay is too soft just let it sit for a couple of minutes and it will come out nice and clean.


Now we need a base to put our flower and leaves on, so using your clay roller
flatten a ball of green clay big enough to hold the flower and part of the leaves and push one of your round flat magnets into it. This will be the backside where we will glue the ribbon on.


To fit the leaves and the flower nicely together put the flower on top of the biggest leaf and using your tool mark the leaf around the outline of the flower petals. Cut then off the part
that is under the flower.


Use some water to wet the base and put the leaves on, push the edges down and put the flower right on top in the center of the base.


Get your green Makin's Clay® and make a small ball the will be the counterpart of our curtain holder and push the second magnet into the center.

Let everything dry for 24 hours.


When everything is dry use some acrylic paint to highlight the texture on the flower and the leaves:


Check if the magnets are loose (they should not be, but make sure and if they are use some
superglue to glue them in. Now you also need the ribbon to connect the two parts of our curtain holder. Spread a few drops of superglue on the surface of the two parts and attach the ribbon.


All done and ready to use! 


Monday, August 26, 2019

Light House Wall Plaque

Lighthouse Wall Plaque by Panarili

Tools and Materials:
Makin's Clay® white and red 
Makin's Professional® cutting mat
Makin's Professional® Ultimate Clay Extruder®
Clay machine or a roller
Blade
White acrylic paint
Paint brushes
Superglue
Cardboard coaster 
Round Cutter
Brown and blue chalk pastels
Plastic bag

Instructions:
Take some white Makin's Clay® out of the package and roll out a thin sheet either with a roller or a clay machine. Place the rest of the clay in a zip lock bag with a wet paper towel or moist towelette inside. Cut out a shape for the light house with the help of the blade.  For the clay not sticking to the blade, use a plastic bag that you place over the clay.
This is what we get. The shape could differ. 
Apply some water with a brush over the base.


Extrude white and red threads with the help of Makin's Professional® Ultimate Clay Extruder®.
Place threads over the base white, red, white, red, alternating as shown. 
Once you get near the top, make a white thread kind of twisted at the ends.


Cut a circle about 2.5 cm from white clay. Use a plastic bag again for the clay not to 
stick to the cutter. Cut off about a third and place as a topper part of the lighthouse.


Take another piece of white clay and add some brown chalk pastel powder. Do not mix it much, we do not want a solid color. 

Make small balls of different sizes and place them at the bottom of the lighthouse.  These will serve as the stones.  

You may add some texturing with a rounded tool for the stones to fit better.  Do not forget to brush some water to help adhere the fresh clay to the lighthouse. 


Add some shading to the upper part of the lighthouse.

I have some leftovers from another project (Shabby Chic Box) – this is white clay coloured with blue chalk pastel with a gradient. I kept in a zip lock and now can use it for this project.  I just flatten in and rip off a bit, the ripped edge will mimic the waves.

Place those pieces overlapping each other at the bottom of the lighthouse.  


Add some windows.
Let it dry for at least 24 hours.


Take a cardboard coaster and cover it with white acrylic paint.  Let it dry.  Write whatever you would like for a phrase.  
Once dried, glue the lighthouse to the coaster.  Your little motivation board is ready!
 

Contact us

Name

Email *

Message *