Pages - Menu

Search This Blog

Showing posts with label beach. Show all posts

Tuesday, September 3, 2019

Mermaid Altered Bottle

Mermaid Altered Bottle by Steph Ackerman

Hi everyone, Steph here today with another altered bottle.  I must say I have been having so much fun incorporating Makin's Clay® products on my bottles.  Makin's Clay® is a fantastic medium to use on glass.
Makin'sⓇ Texture Sheets
Burlap
Prima Metallique Paints and Art Stones
​Fireworks! Shimmery Craft Spray Inks
Ranger Metal Embellishment

Instructions:

​Originally, I placed white clay around the bottle, then used the texture sheets randomly around the bottle for texture.  Then I painted assorted colors of acrylic paint.


But then I realized I wanted to go in a different direction and painted white gesso over the entire piece.  The gesso covered the paint, but still allowed the texture to show.


Once dry, I painted the entire bottle with Prima Mermaid Tears for a pretty light blue effect.  Next, I wrapped burlap partially around the bottle and glued mesh on top.  Art Stones in a variety of sizes were glued next on the mesh and allowed to dry.

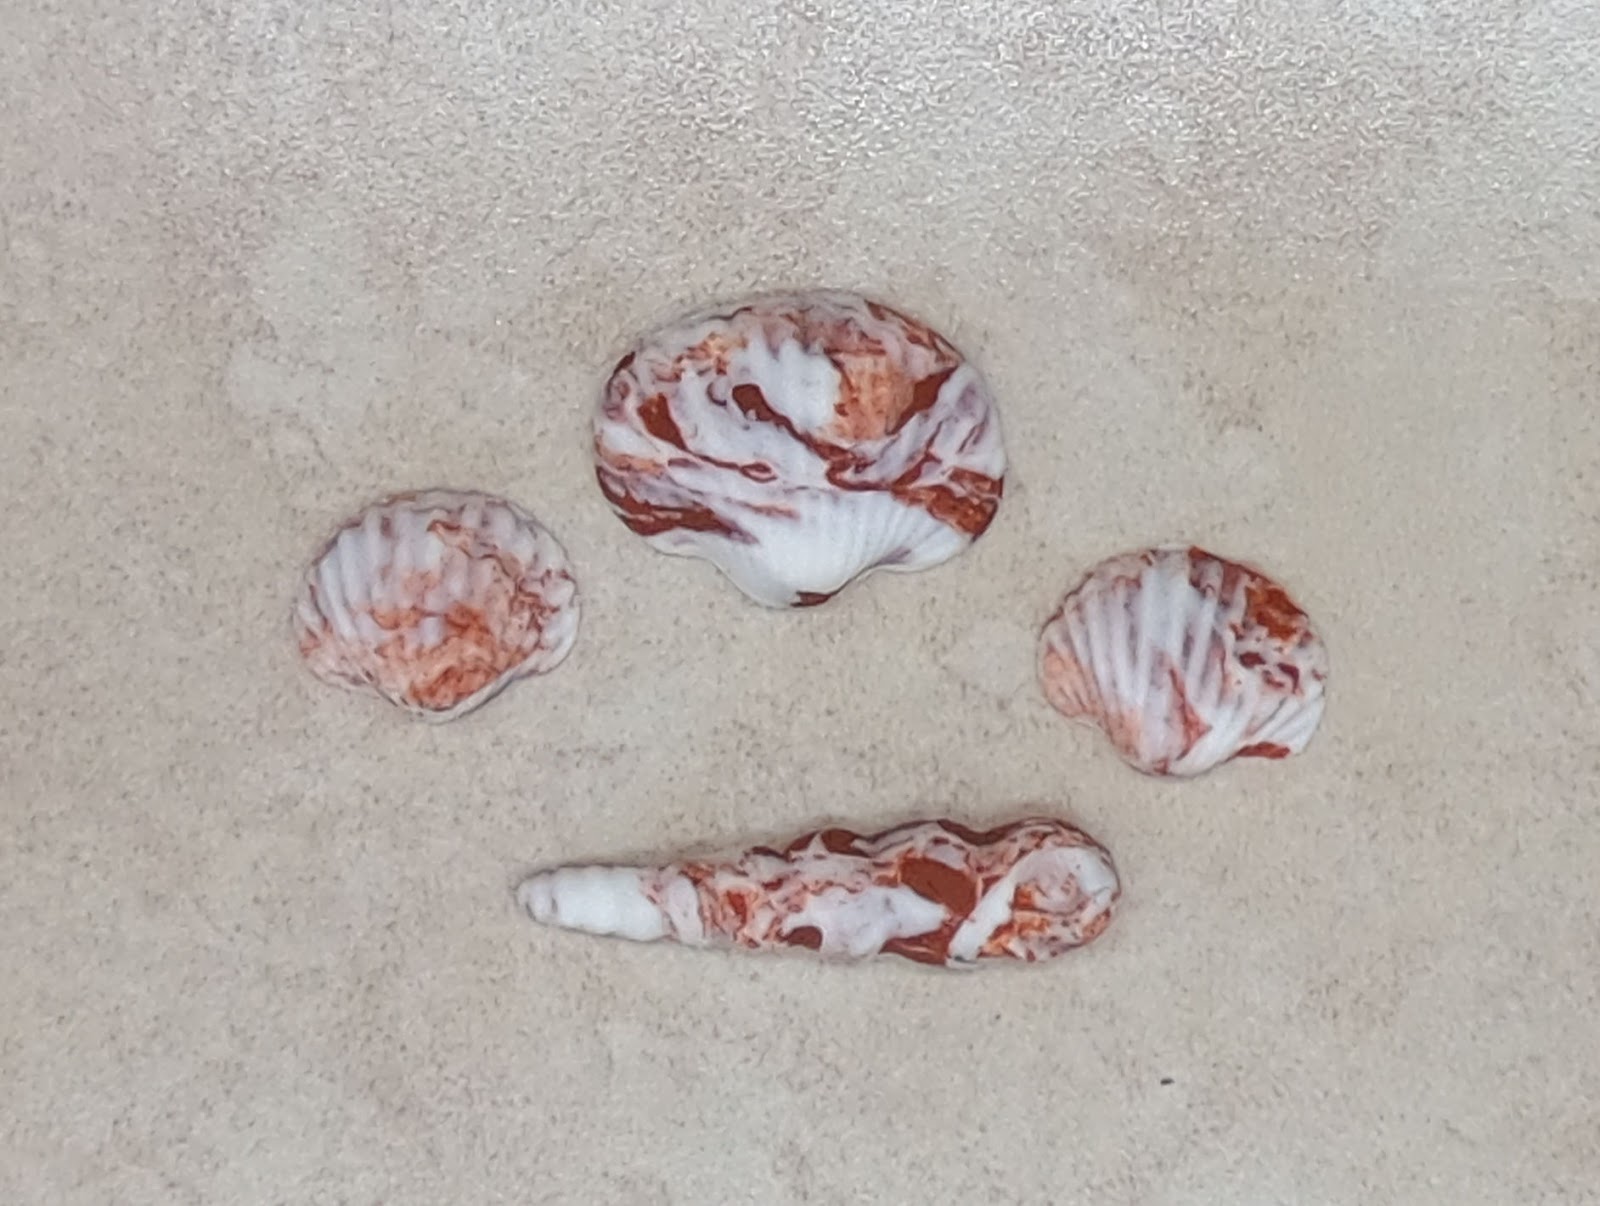
Using the sea shell mold, I created an assortment of shells.  I must say this is one of my favorite molds and I use it quite often. 


​For color, I inked the shells, then spritzed them with several colors of Fireworks! Shimmery Craft Sprays before adhering them about the mesh.   I spritzed the bottle with several colors of Fireworks! Shimmery Craft Spray Inks, heat setting each layer so the colors would stay true.


​ Finally, I added chain to a metal charm and placed in amongst the sea shells.


​ I added more color as I felt necessary to finish my Mermaid Bottle.

​ What do you think?

​ Thanks for stopping by.

Steph

Monday, August 26, 2019

Light House Wall Plaque

Lighthouse Wall Plaque by Panarili

Tools and Materials:
Makin's Clay® white and red 
Makin's Professional® cutting mat
Makin's Professional® Ultimate Clay Extruder®
Clay machine or a roller
Blade
White acrylic paint
Paint brushes
Superglue
Cardboard coaster 
Round Cutter
Brown and blue chalk pastels
Plastic bag

Instructions:
Take some white Makin's Clay® out of the package and roll out a thin sheet either with a roller or a clay machine. Place the rest of the clay in a zip lock bag with a wet paper towel or moist towelette inside. Cut out a shape for the light house with the help of the blade.  For the clay not sticking to the blade, use a plastic bag that you place over the clay.
This is what we get. The shape could differ. 
Apply some water with a brush over the base.


Extrude white and red threads with the help of Makin's Professional® Ultimate Clay Extruder®.
Place threads over the base white, red, white, red, alternating as shown. 
Once you get near the top, make a white thread kind of twisted at the ends.


Cut a circle about 2.5 cm from white clay. Use a plastic bag again for the clay not to 
stick to the cutter. Cut off about a third and place as a topper part of the lighthouse.


Take another piece of white clay and add some brown chalk pastel powder. Do not mix it much, we do not want a solid color. 

Make small balls of different sizes and place them at the bottom of the lighthouse.  These will serve as the stones.  

You may add some texturing with a rounded tool for the stones to fit better.  Do not forget to brush some water to help adhere the fresh clay to the lighthouse. 


Add some shading to the upper part of the lighthouse.

I have some leftovers from another project (Shabby Chic Box) – this is white clay coloured with blue chalk pastel with a gradient. I kept in a zip lock and now can use it for this project.  I just flatten in and rip off a bit, the ripped edge will mimic the waves.

Place those pieces overlapping each other at the bottom of the lighthouse.  


Add some windows.
Let it dry for at least 24 hours.


Take a cardboard coaster and cover it with white acrylic paint.  Let it dry.  Write whatever you would like for a phrase.  
Once dried, glue the lighthouse to the coaster.  Your little motivation board is ready!
 

Monday, August 12, 2019

Faux Gilded Polymer Clay Seashells

Faux Gilded Seashells by Cynthia Gougian
Materials List:
·     Makin’s Clay® 60G White, Brown
·     Makin’s® Push Mold Seashells
·     Wire Ferrule, Cocktail Straw, or Toothpick
·     400 grit sandpaper 
·     Gold Craft Paint
·     Water Based Glossy Sealer/Varnish
·     8 mm Jump Rings
·     4 mm Jump Rings
·     Chain Nose Pliers, and Flat Nose Pliers
·     Necklace Cord, or Chain
·     Earwires

Instructions:
Step 1:  Begin with a 1 ½” ball of white clay, and a ¾ “ball of brown clay. 
Step 2:  Roll the ball into logs of approximately the same length.
Step 3:  Twist the logs together. 
Step 4:  Fold the twisted log and half and twist it again.


Step 5:  Roll the log out again.  
Step 6:  Repeat Steps 4-5, until the clay becomes marbled. 

Step 7:  Dust the seashell mold with cornstarch or powder.  
Step 8:  Place a ball of the marbled clay into the mold.  Press it into the mold firmly. 
Step 9:  Turn the mold over to make sure there are no air bubbles, or gaps between the clay and the mold. 
Step 10:  Repeat this process to make smaller shells for earrings. Or, you can make several different types of shells. 


Step 11:  Use a wire ferrule, a cocktail straw, or a toothpick to create a hole at the top of the shell. 
Step 12:  Allow the shells to dry thoroughly. The shells are thick. So, drying will take at least 24 hours, more if you are in a humid environment. 
Step 13:  When the shells are thoroughly dry, sand the bottoms smooth with 400 grit sandpaper.  


Step 14:  Paint the bottoms of the shells with gold craft paint. 
Step 15:  When the backs of the shells have dried. Paint the sides of the shells with the gold paint.     
Step 16:  Add more gold stripes.  Be careful not to cover up too much of the shells.  Don’t try to create perfect stripes.  Irregular stripes look more authentic.    
Step 17:  When the gold paint has thoroughly dried, seal the shells with a water-based gloss varnish of your choice.  Apply at least two coats, allowing the sealer to dry thoroughly between coats. 


Step 18:  To create a necklace, place an 8 mm jump ring through the hole at the top of the shell. 
Step 19:  Close the jump ring with chain nose and flat nose pliers. 
Step 20:  String a necklace cord or chain through the jump ring. 


Step 21:  To create an earring, once again, place an 8 mm jump ring through the hole in the top of a smaller shell, and close it with pliers. 
Step 22:  Then, place a 4 mm jump ring through the 8 mm jump ring and close it. 
Step 23:  Place an ear wire through the 4 mm jump ring. 


Contact us

Name

Email *

Message *