Pages - Menu

Search This Blog

Showing posts with label Nancy Nickel. Show all posts

Sunday, October 27, 2019

Feather Card


Feather Card by Nancy Nickel
Materials Used:

Makin's Clay® - Blue Clay
Feathers Mold  
Carta Bella  Wildflower Paper
Recollections - Cardstock
Enamel Accents - White
White Seam Binding

Instructions:

1.   Start with making the three clay feathers. Press the blue clay into the feather mold. Allow to air dry in mold, or remove from mold.
2.   When feathers are dry, dab with white Enamel Accents, to bring out all the details.
3.   Adhere decorative paper to card base.
4.   Adhere feathers in place, on the decorative paper. Position them in the center towards the top.
5.   Tie the seam binding into a bow, and adhere in place over the clay feathers.


Makin's Clay® is so much fun to work with, and it offers endless creative possibilities!


Wednesday, October 23, 2019

Sunday, September 22, 2019

Altered Trading Card


Design Team Member Nancy Nickel recently shared this pretty ATC with Makin's Clay® accents.  Makin's Clay® is perfect for paper crafts and mixed-media projects as it is lightweight, flexible, and acid free when dry.  It can be molded, sculpted, and even die cut or used with craft punches when dried.

Tuesday, September 17, 2019

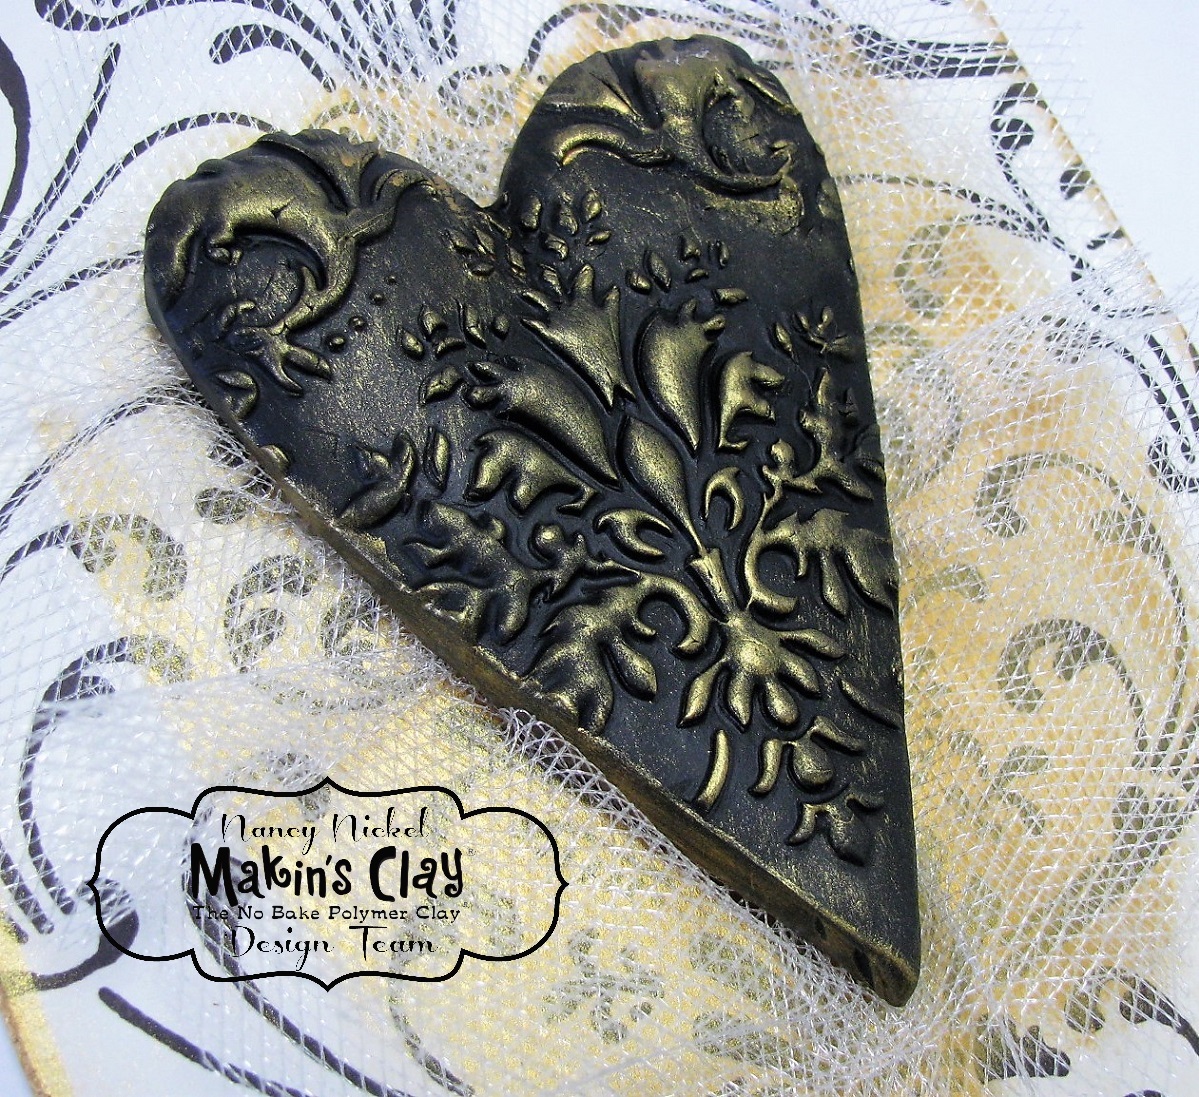
Clay Heart Canvas


Clay Heart Canvas by Nancy Nickel

Materials Used:
Makin’s Clay® - Black Clay
Makin’s Professional® - 
Cutting Mat
Heart Mold – Stamperia;
Canvas – 5 x 7;
Decorative Paper – 5 x 7;
Cosmic Shimmer Metallic Gilding Polish – Gold;
Scraps of Gold Shimmer Tulle;
Tim Holtz Quote Sticker;
Scrap of Black Chipboard
Instructions:
1.   Roll a good size piece of black clay into a smooth oval. Insert clay firmly into the heart mold. Pop heart out of mold, and allow to dry.

2.   When it’s dry, brush the surface of the heart with the gold gilding polish, using the foam applicator. 


3.   Adhere the paper to the front of the canvas.
4.   Swipe some gilding polish on the center of the canvas, as well as along all the outside edges. 
5.   Bunch up the shimmer tulle, and adhere to the center of the canvas.
6.   Adhere the pretty heart in place on the tuft of tulle. TrIm any excess tulle, so that it frames the heart nicely.


7.   Adhere the quote sticker to the scrap of black chipboard, and adhere in place under the heart.
8.   Pop the canvas in a frame, or display as it is!


Wednesday, August 14, 2019

"Thanks" Greeting Card


Materials:
Makin’s Clay® - Clay
Makin’s Professional® - 
Cutting Mat - Small
Makin’s®- Push Mold – Borders;
White Cardstock;
Scrap of Red Cardstock;
Decorative Paper (I used Making Memories – English Garden Collection);
Your Next Die – Thanks.

Instructions:

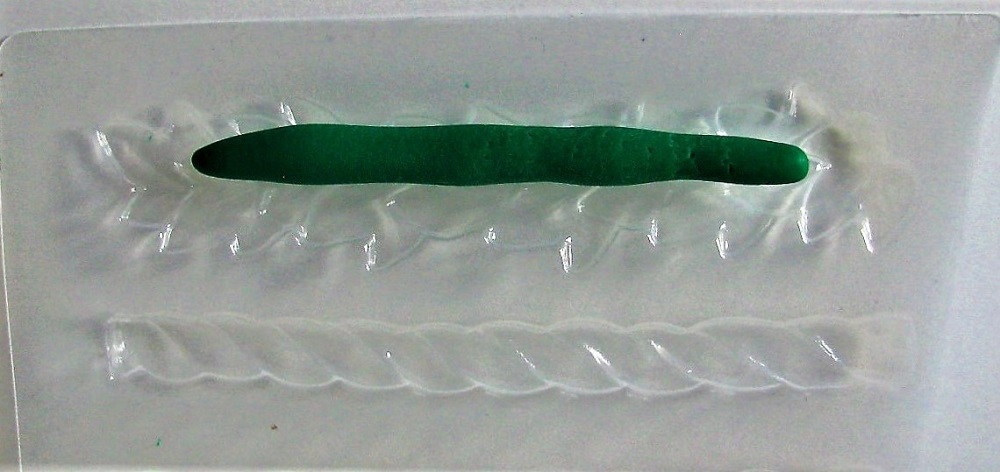
1.    Roll green clay into a skinny little piece. 

2.    Lay skinny piece over ivy portion of border mold. Push into mold using ball of fingers.

3.    Turn mold over and ensure that all the little corners have been filled. On the back, make sure that all the edges are pushed in smooth.


4.    Pop the clay piece out of the mold and allow to dry flat. Alternatively, allow piece to dry in mold, and then pop out when dry. Create two of these leaf borders.


5.    Cut A2 tent-fold card out of white cardstock. 

6.    Adhere a 4 ¼” x 5 ½” piece of decorative paper to the card front. 

7.    Cut a 4 ¼” x 1 ¾” piece of white cardstock. Adhere in place on card front 1” from bottom edge. 

8.    Adhere clay pieces along top and bottom edge of white cardstock strip.

9.    Die-cut “Thanks” from red cardstock. Adhere to white cardstock strip, centering between clay border pieces. 


Clay borders are such a fun addition to a handmade card! They add some lovely dimension and make it special! 😊


Wednesday, July 24, 2019

It's a Beautiful Day Calendar Page


Design Team Member Nancy Nickel recently shared this pretty calendar page embellished with tiny punched Makin's Clay® butterflies.  Thin sheets of dry Makin's Clay® are perfect for using with craft punches, die cutting machines, and more.  And, Makin's Clay® is acid free when dry so it's safe for scrapbooking and all types of paper crafts!


Sunday, July 14, 2019

Polymer Clay Vintage Lock & Key Charms


Vintage Lock & Key Charms by Nancy Nickel
Materials Used:
Makin’s Clay® - Black Clay
Makin’s Professional® - 
Cutting Mat - Small
Mold for Key and Lock Charm;
ScraPerfect Best Glue Ever;
Silver Leafing;
Jump Rings;
Scruffy Paint Brush.
Instructions:
1.   Roll black clay into smooth round balls. Store any unused, open clay in an airtight container with a moist towelette or damp paper towel to retrain freshness for later use. Push clay into mold areas. Remove excess clay from back. Allow clay to dry in mold, or remove clay from mold and allow to dry. It works great either way.


2.   Squeeze a small amount of glue onto a scrap paper. Using your finger, dab a little bit of glue onto the charm pieces. Let the glue dry for a while, until it is just a little bit tacky. 

3.   Lay the silver leafing onto the charms, covering all the tacky glue. Rub with your fingers. Then take the scruffy brush and burnish very well, brushing away all the excess leafing.


4.   Add jump rings, and your piece is finished! Now it’s ready to use as an embellishment on any project, or even to add to a chain!


This is such a fun and easy project to make, and I really like the results! The hardest part of the whole job is cleaning up the mess left behind by the silver leafing!

Monday, July 1, 2019

Create Art Artist Trading Card


Design Team Member Nancy Nickel recently shared this eye-catching ATC with Makin's Clay® embellishments.  Makin's Clay® is perfect for paper crafting as it is lightweight, flexible, and acid free when dry. 


Tuesday, June 25, 2019

Decorative Heart Box

Decorative Heart Box by Nancy Nickel
Design Team Member Nancy Nickel shares a great example of how dry, textured sheets of Makin's Clay® can be used to embellish home decor pieces. Dry, textured sheets of Makin's Clay® can also be die cut or cut with a craft punch when very thin. Texture any scrap from leftover projects and save it for future projects...

Materials Used:
Makin’s Clay® - White
Makin’s® Clay Roller
Makin’s® Texture Sheet – Set C 38003
Wooden Heart Trinket Box
Acrylic Paint
Ribbon Trim
Tacky Glue
Instructions:
Roll white clay out using roller. Lay texture sheet on top. Use roller on top of texture sheet. Remove texture sheet. Let clay air dry over night. 


Choose the wooden box you want to use. Then decide which texture you want for the top. Place the box upside down on the wrong side of the clay piece. Trace around using a pencil.  
Cut out the shape using scissors. Glue clay shape to the top of wood box using tacky glue. Put a heavy book on it to adhere it flat. Allow to dry. 


Use acrylic paint, in color of choice, to paint wooden box and textured clay top. I chose for some of the white clay color to show through, and did just a light brushing of paint on the top.
Paint a second coat if needed. Adhere ribbon trim around top of heart box, covering edge of clay.
Here’s a closer look at the texured clay top.
One final look at the finished project:

Contact us

Name

Email *

Message *