Pages - Menu

Search This Blog

Showing posts with label paper crafting. Show all posts

Wednesday, August 14, 2019

"Thanks" Greeting Card


Materials:
Makin’s Clay® - Clay
Makin’s Professional® - 
Cutting Mat - Small
Makin’s®Push Mold – Borders;
White Cardstock;
Scrap of Red Cardstock;
Decorative Paper (I used Making Memories – English Garden Collection);
Your Next Die – Thanks.

Instructions:

1.    Roll green clay into a skinny little piece. 

2.    Lay skinny piece over ivy portion of border mold. Push into mold using ball of fingers.

3.    Turn mold over and ensure that all the little corners have been filled. On the back, make sure that all the edges are pushed in smooth.
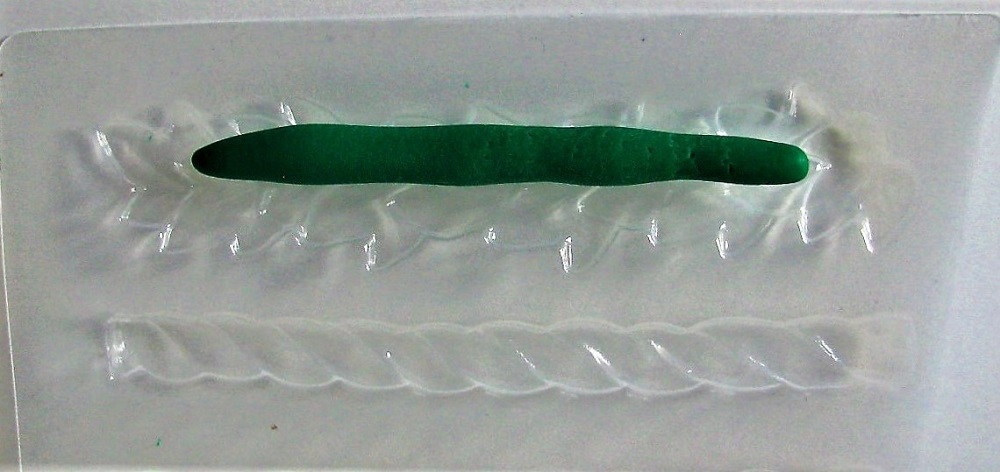


4.    Pop the clay piece out of the mold and allow to dry flat. Alternatively, allow piece to dry in mold, and then pop out when dry. Create two of these leaf borders.


5.    Cut A2 tent-fold card out of white cardstock. 

6.    Adhere a 4 ¼” x 5 ½” piece of decorative paper to the card front. 

7.    Cut a 4 ¼” x 1 ¾” piece of white cardstock. Adhere in place on card front 1” from bottom edge. 

8.    Adhere clay pieces along top and bottom edge of white cardstock strip.

9.    Die-cut “Thanks” from red cardstock. Adhere to white cardstock strip, centering between clay border pieces. 


Clay borders are such a fun addition to a handmade card! They add some lovely dimension and make it special! 😊


Friday, May 31, 2019

Choose Joy Journal

Choose Joy Journal by Nancy Nickel


Materials Used:

Makin's® Push Mold - Florals 39005
Art Alchemy Metallique Paints - Lime Peel, Light Patina, Vintage Rose
Unknown Silver Wax
Tacky Glue
Finished Journal

Instructions:

1. Gather all your materials. Two molds are shown but I only used the Florals mold for this project.

2. Take small pieces of the white clay. Roll the clay in your hands to form nice smooth balls.

3. Place the ball in the center of the flower shape. Push firmly with the ball of your finger until the flower shape is full, and flat and smooth on the back. This ensures there will be no gaps.

4. Flex the mold to pop the flowers out. Allow to dry.


5. When completely dry, paint with desired colors of paint. These Metallique paints leave a pretty shimmer, and a soft color. Allow to dry.
  

6. Use the tacky glue to adhere them in place on the finished journal front. 


7. Since they were added on top of a silver ribbon, I decided to add a touch of silver was. did this using my finger tool, and dabbing the silver onto the high spots of the flowers.


8. Don't forget to make extra flowers to embellish the inside of the journal too. Shown here is an additional tag embellishment.

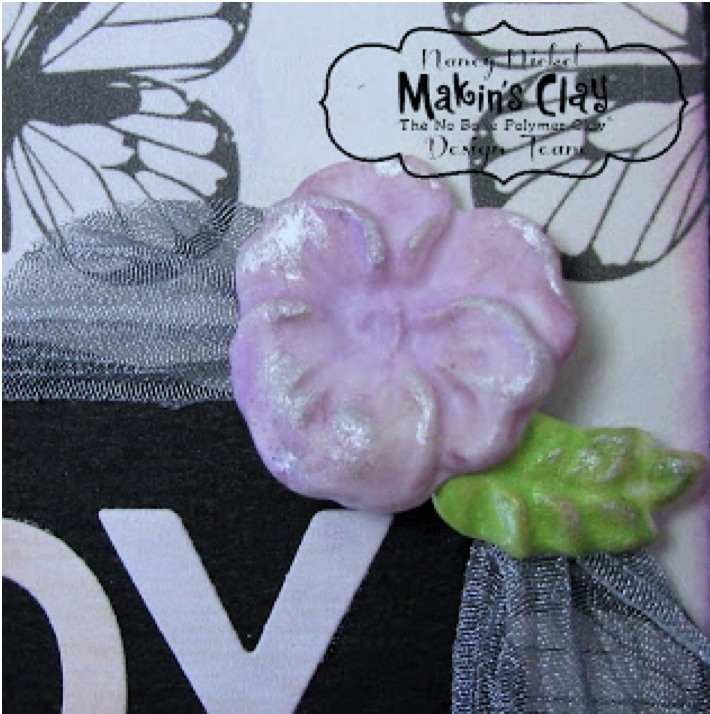
Here's a closer look at the flowers on the journal. 

They work very well for this project, as they add additional texture and dimension, without adding a lot of extra bulk.

Here is a closer look at the pretty flower on the top of the tag.


I hope you'll consider the great Makin's Clay® molds for your next paper crafting projects!

There's a wonderful selection to choose from. 

Thanks for stopping by! See you again soon!

Nancy

Thursday, June 28, 2018

"Happy Birthday" Card with Polymer Clay Dress Accent

"Happy Birthday" Dress Card by Iris Rodriguez
Hello Makers!
Ever feel sassy on your birthday and want to put on your best clothes and paint the town red? Not only does this card make a cute gift, but also may inspire that special someone to get out there and paint the town red and invite you along. How fun is that? Lol! If not, it’s okay. A nice quiet birthday is fun too. This cute red dress card was made with the Black Makin’s Clay® and Coil Texture Sheet from Set H.
Materials:
  • Makin's Clay®– Black  
  • Makin's Professional® Cutting Mat
  • Makin's Professional® Ultimate Clay Machine® 
  • Makin's®– Texture Sheet, Set H (Coils)
  • Makin's®– Clay Roller
  • Prima Marketing – Finnabair Fire Ruby Metallic Wax
  • Cardstock-Black, Red
  • Scrapbooking Paper
  • Ribbon-black
  • Rhinestones
  • Sentiment Stamp
  • Imagine-Nocturne VersaFine Clair ink, clear embossing powder
  • Aleene’s Clear Glue

Instructions:


Get a dress pattern from the internet, or draw your own. Keep in mind the desired card size and therefore the dress size. Scale your image on the computer.
To make a template, use chipboard and graphite paper. A hard surface, like the chipboard, helps to guide the knife around the clay, when cutting out the dress.
Place graphite paper over the chipboard, with the darker side down. Place the image over the graphite paper. Trace over the image with pencil or pen. 
Cut out the pattern with scissors or precision knife.


Using the Makin's Professional® Ultimate Clay Machine® roll out a sheet of Black Makin’s Clay® to the third thickest setting.

Place the texture sheet over the sheet of clay and press firmly into the clay with a roller.
Cut out the dress. Use the chipboard to guide the knife. Do not press the dress into the clay, it will distort the stamped pattern.
To give the dress a little movement and dimension. Make slight folds by pinching the clay down the center. Pinch the down on the edges. No need to drape over anything, Makin’s Clay® will keep its shape.

Let the dress dry for 24 hours to cure.
Now it’s time to embellish the dress. Rub the metallic wax with your fingers on the raised areas. Glue a ribbon on the waist.
Cut a piece of scrapbooking or other paper to desired size. Ink the edges. Glue onto black cardstock.
Stamp the sentiment onto a red cardstock paper and emboss. Assemble the card.

Sunday, November 6, 2016

Steampunk Angels Tag

Steampunk Angels Tag by Irit Shalom

Design Team Member Irit Shalom recently shared another of her detailed mixed-media tags - this one with a "steampunk & angels" theme.  Irit used Makin's Clay® to mold her angels embellishment.

Wednesday, September 7, 2016

It's a Girl! Card with Makin's Clay®


It's a Girl! Card 
Designed by Martha Lucia 
Gomez

Hello dear friends, Martha Lucia here with you. Today I want to share an It's a Girl Card that I made using one of my favorite colors of Makin's Clay®: red, and some special tools. For this I created red dresses using clay cutters and tools from Makin's Clay®. Let me share with you how to made this.

Product list:

Makin’s Clay® 
Card Stock: Crumb Cake and Whisper White
Beacon™ 3-in-1 Advanced Craft Glue
Oh Baby Stamp Set by Joy Clair
Puffy Clouds by Memory Box
Sizzix® Big Shot™
VersaFine Onyx Ink and Distress Ink.
Instructions:

The first step is creating the embellishments for your card. For this, take small amounts of red clay and roll it to about 1/8" thick.   Use the Dress cutters to cut assorted sized dresses from the rolled clay.  Let dry.

Roll red clay
Cut dresses
Add details
Take one of the Assembly Handles and insert the Fine Point from the Professional Tool Kit. With this fine point, you can make the pin holes around of the borders of the dress.

Using white clay and the Ultimate Clay Extruder™and round disc #5, extrude clay and let dry slightly, then cut and gently flatten to create the buttons to decorate your dresses.

You can make the holes of the button using the Fine Point. If your clay is fresh you don't need any additional adhesive to attach the buttons.  If the clay has dried, use a clear drying adhesive such as Beacon's 3-in-1.  

Extrude clay for buttons
Add buttons & details
To create the clouds, roll a very thin sheet of white clay.  Let it dry and then die cut with clouds dies and the Sizzix® Big Shot™. 

Give color to the clouds using Distress Ink applied with a blending tool.

Die cut clouds from dry clay
Add ink to shade
Create the base of your card and a second layer using Crumb Cake and Whisper White card stock. Stamp your sentiment over the whisper white layer using VersaFine Onix. Choose the clay dresses and clouds you want to use to highlight on your card front and mount the embellishments using Beacon™ 3-in-1 Advanced Craft Glue.

Finished card ready to send!

I hope my tutorial inspires you and come back soon to share with us!

Thank you for stopping by today!

See you soon, Martha Lucia

Sunday, March 13, 2016

Cheers Card by Steph Ackerman

 Sometimes you just need a great combination of elements to bring your projects to life - and sometimes Makin's Clay® is the perfect solution!  Steph Ackerman shared this colorful mixed-media card here on her blog recently.  She wanted a dimensional leaf for her paper flower - so she created one with Makin's Clay and our Leaves push mold!   Makin's Clay® is perfect for paper crafting - it's lightweight, flexible, and can be rubber stamped, die cut, craft punched, and more, and is acid free when dry.


Contact us

Name

Email *

Message *