Pages - Menu

Search This Blog

Showing posts with label gift tag. Show all posts

Friday, May 31, 2019

Choose Joy Journal

Choose Joy Journal by Nancy Nickel


Materials Used:

Makin's® Push Mold - Florals 39005
Art Alchemy Metallique Paints - Lime Peel, Light Patina, Vintage Rose
Unknown Silver Wax
Tacky Glue
Finished Journal

Instructions:

1. Gather all your materials. Two molds are shown but I only used the Florals mold for this project.

2. Take small pieces of the white clay. Roll the clay in your hands to form nice smooth balls.

3. Place the ball in the center of the flower shape. Push firmly with the ball of your finger until the flower shape is full, and flat and smooth on the back. This ensures there will be no gaps.

4. Flex the mold to pop the flowers out. Allow to dry.


5. When completely dry, paint with desired colors of paint. These Metallique paints leave a pretty shimmer, and a soft color. Allow to dry.
  

6. Use the tacky glue to adhere them in place on the finished journal front. 


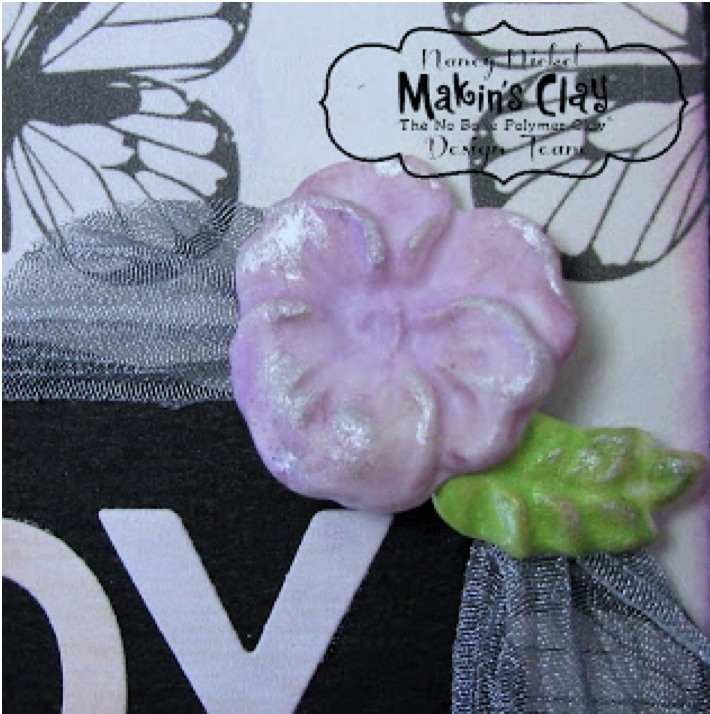
7. Since they were added on top of a silver ribbon, I decided to add a touch of silver was. did this using my finger tool, and dabbing the silver onto the high spots of the flowers.


8. Don't forget to make extra flowers to embellish the inside of the journal too. Shown here is an additional tag embellishment.

Here's a closer look at the flowers on the journal. 

They work very well for this project, as they add additional texture and dimension, without adding a lot of extra bulk.

Here is a closer look at the pretty flower on the top of the tag.


I hope you'll consider the great Makin's Clay® molds for your next paper crafting projects!

There's a wonderful selection to choose from. 

Thanks for stopping by! See you again soon!

Nancy

Thursday, December 22, 2016

Glazed Holiday Tag/Ornament


Holiday Tag/Ornament by Donna Budzynski

This month Makin's Clay® challenged it's Design Team members to select a Pin from our Tutorials & Techniques Board or our Polymer Clay Inspiration Projects Board and create a project using Makin's Clay® based upon the chosen pin.  Our goal was not to have our designers simply copy of the projects, yet be inspired to perhaps try a new technique, or create a project style they might not normally have considered. 

Hi everyone, Donna here. I was inspired by our own team member! She had created a wonderful Poppy necklace using Diamond Glaze™ and food coloring. I just loved the effect if had given. So I thought I would give it a try, except I did not have any food coloring! I also did not have the same ink she used. But I had a let’s try attitude! So here is how I did it!

https://www.pinterest.com/pin/94083079694911151/

Materials:
·       Makin’s Clay® - White
·       Diamond Glaze™
·       Media Fluid Acrylic Paint
·       Black Archival Ink – Ranger

Tools:
Makin's Professional® Cutting Mat
·       Small Paintbrush
·       Misc. Plastic or Paper Plate (to mix paint and glaze)
·       Stamp of choice


Instructions:

1.     Roll clay out to desired thickness (I rolled mine to about 1/8") and cut an oval using the largest oval for the  Oval Clay Cutters set.  Let dry for just a bit.


1.     Stamp your image into the clay using permanent ink.   Poke hole into the clay for ribbon or jump ring. (This can be done while clay is still fresh, or since Makin's Clay® stays flexible when dry, you can use a small hole punch to make your hole after your tag is dry).   Let dry. 


1.     Mix the Diamond Glaze™ and just a drop of Fluid Acrylic together and paint onto image. Let dry.  Add ribbon.


Enjoy!


Contact us

Name

Email *

Message *