Pages - Menu

Search This Blog

Showing posts with label ornament. Show all posts

Thursday, December 20, 2018

Baby's First Christmas Ornament


Cindi McGee recently shared how she used Makin's Clay® and the Makin's® Christmas Nature push mold in a bit of an unexpected way to create this Baby's First Christmas ornament.  She used the mold to make individual petals/leaves for her poinsettia, then cut them down to a smaller size, and re-assembled them to make a poinsettia the perfect size to fit in the space she needed to complete the ornament. 


Friday, December 7, 2018

Christmas Bulb Ornament


Here's a fun little ornament made with an upcycled light bulb to adorn your Christmas tree.

Materials:

Makin's Clay®: WHITE / RED 
Clear Glass Ornament
Krazy® Glue
Art C Wax : Silver / Gold
Ribbon

Recommended Makin's® Tools:

Makin's® Christmas Nature Push Mold
Makin's Professional® Ultimate Clay Machine

Instructions:

Roll out some WHITE Makin's Clay® on the # 3 setting on the Makin's Professional® Ultimate Clay Machine®.

Cover the bulb with the rolled out clay. I textured the clay while it was wet using an old gardening glove.


I pushed some RED clay into the bow and poinsettia cavity on the Makin's® Push Mold. It may be helpful to dust the cavity with a little cornstarch to ease in the removal of the clay.

I glued, using Krazy® Glue, the poinsettia and bow to the front and back of the bulb. Let dry. 


After the bulb was dried, I used Art C wax in gold and silver to highlight the piece. I also added a ribbon to the top. Now how easy was that!  Merry Christmas.


Friday, November 23, 2018

Polymer Clay Poinsettia Christmas Tree Ornament - Makin's Clay® DIY Video


In this creative video from our Makin's Clay® Design Studio, Cindi McGee shares how easy it is to die cut Makin's Clay® and create a pretty poinsettia ornament for your holiday tree! 


Saturday, December 9, 2017

Mr. Grinch Ornament


Design Team Member Patricia Krauchune recently shared this nifty ornament featuring none other than Mr. Grinch!  He's a mean one, Mr. Grinch, but he still looks festive!   Pat used the Makin's Professional® Ultimate Clay Machine® and the Makin's® Texture Roller to create the background on her project.

Wednesday, December 6, 2017

Vintage Frosty Ornament

FROSTY Vintage Ornament by Patricia Krauchune

For my December Makin's Clay® project, I made a little snowman from a very small old Christmas bulb. The old bulb I used was under 2" tall. 

Supply List: 

Makin's Clay® White/Red           Eye Screw                           Beacon™ Fast Finish Decoupage
Old Christmas Bulb                      Black & Orange Paint        Beacon™ Dazzle Tac Jewelry Glue™
Plastic Top Hat                             Krazy® Glue                      Beacon™ Tacky Glue
Glitter                                           Diamond Glaze™

Recommended Makin's® Tools: 

Makin's Professional® 
  • Ultimate Clay Machine®
  • Professional Clay Tools
  • Cutting Mat

Start with an old Christmas bulb. Roll out a small ball of White Makin's Clay® and using the Beacon's™ Tacky Glue cover the end of the bulb. With a Makin's Professional® Clay Tool, make some indentations for the eyes, mouth and nose. Small pieces of dried clay are inserted into the indentations for the mouth, eyes and nose. I also painted, with the black and orange paints, the pieces of clay that were inserted.


Red Makin's Clay® was rolled out to the #6 setting of the Ultimate Clay Machine®.  I used the knurling pattern on the handle of the clay tool to give some texture to the sheet of clay.


Now cut a small narrow strip of clay to form a scarf and with the Tacky Glue attach it around the neck of the snowman.  I also added a small strip of clay around the top hat.  Let the pieces dry overnight.


I mixed some glitter into a small amount of Beacon's Fast Finish Decoupage. Brush the glitter mixture onto the head, scarf and top hat band. Let dry. 

I drilled a tiny hole into the top hat and glued an eye screw in place for hanging. A drop of Krazy® Glue was added inside the top hat to insure the eye screw stayed in place. 
Frosty's top hat was glued in place with Beacon's™ Dazzle Tac Jewelry Glue™. 
Coat all the glittered surfaces with Diamond Glaze™ to further adhere the glitter. Let dry. 


For a final touch, I topped all the clay surface and the top hat with another coat of Diamond Glaze. This gives the appearance of wet snow. Let dry.  

You are now ready to hang Frosty on your tree. Happy holiday! 


Saturday, December 2, 2017

Season to Be Jolly Poinsettia Ornament


Materials: 

Makin’s Clay® - Merlot 60g, Grape Leaf 60g 
Makin’s Professional® 
Ultimate Clay Machine®
Cutting Mat
Professional Clay Tools 
Sizzix® Big Shot™
Sizzix® Poinsettia die 
Beacon Mixed-Media Glue™
CreateAlong.com mica powder - Gold 
Round clear plastic ornament 
Decorative ribbon 
Computer & printer
Galaxy Gold Brilliance ink pad 
Tea stained ivory card stock 
Parchment paper 
Scissors 
Paintbrush 

Instructions:

Select the font for your text.  I chose “Princess Sofia”.  Type out the text you want to appear on your paper strip.  I chose “‘’Tis the Season to be Jolly” for the front, and “Fa la la Fa la la Fa la la” for the back.   I sized it to be about 4 1/2” across when printed.

Print onto tea stained ivory card stock (I chose to use tea stained card stock because I liked the “aged/vintage” effect, but it’s optional!).   Trim around verses.  Check to be sure you have trimmed it enough so that it will fit inside the hole in the top of the ornament. 

Use Mixed-Media Glue to mount the verses back to back.  Be sure to attach them so that the verse on the back is not upside down.  

Ink the edges with the gold ink pad.   Carefully insert into the ornament.    


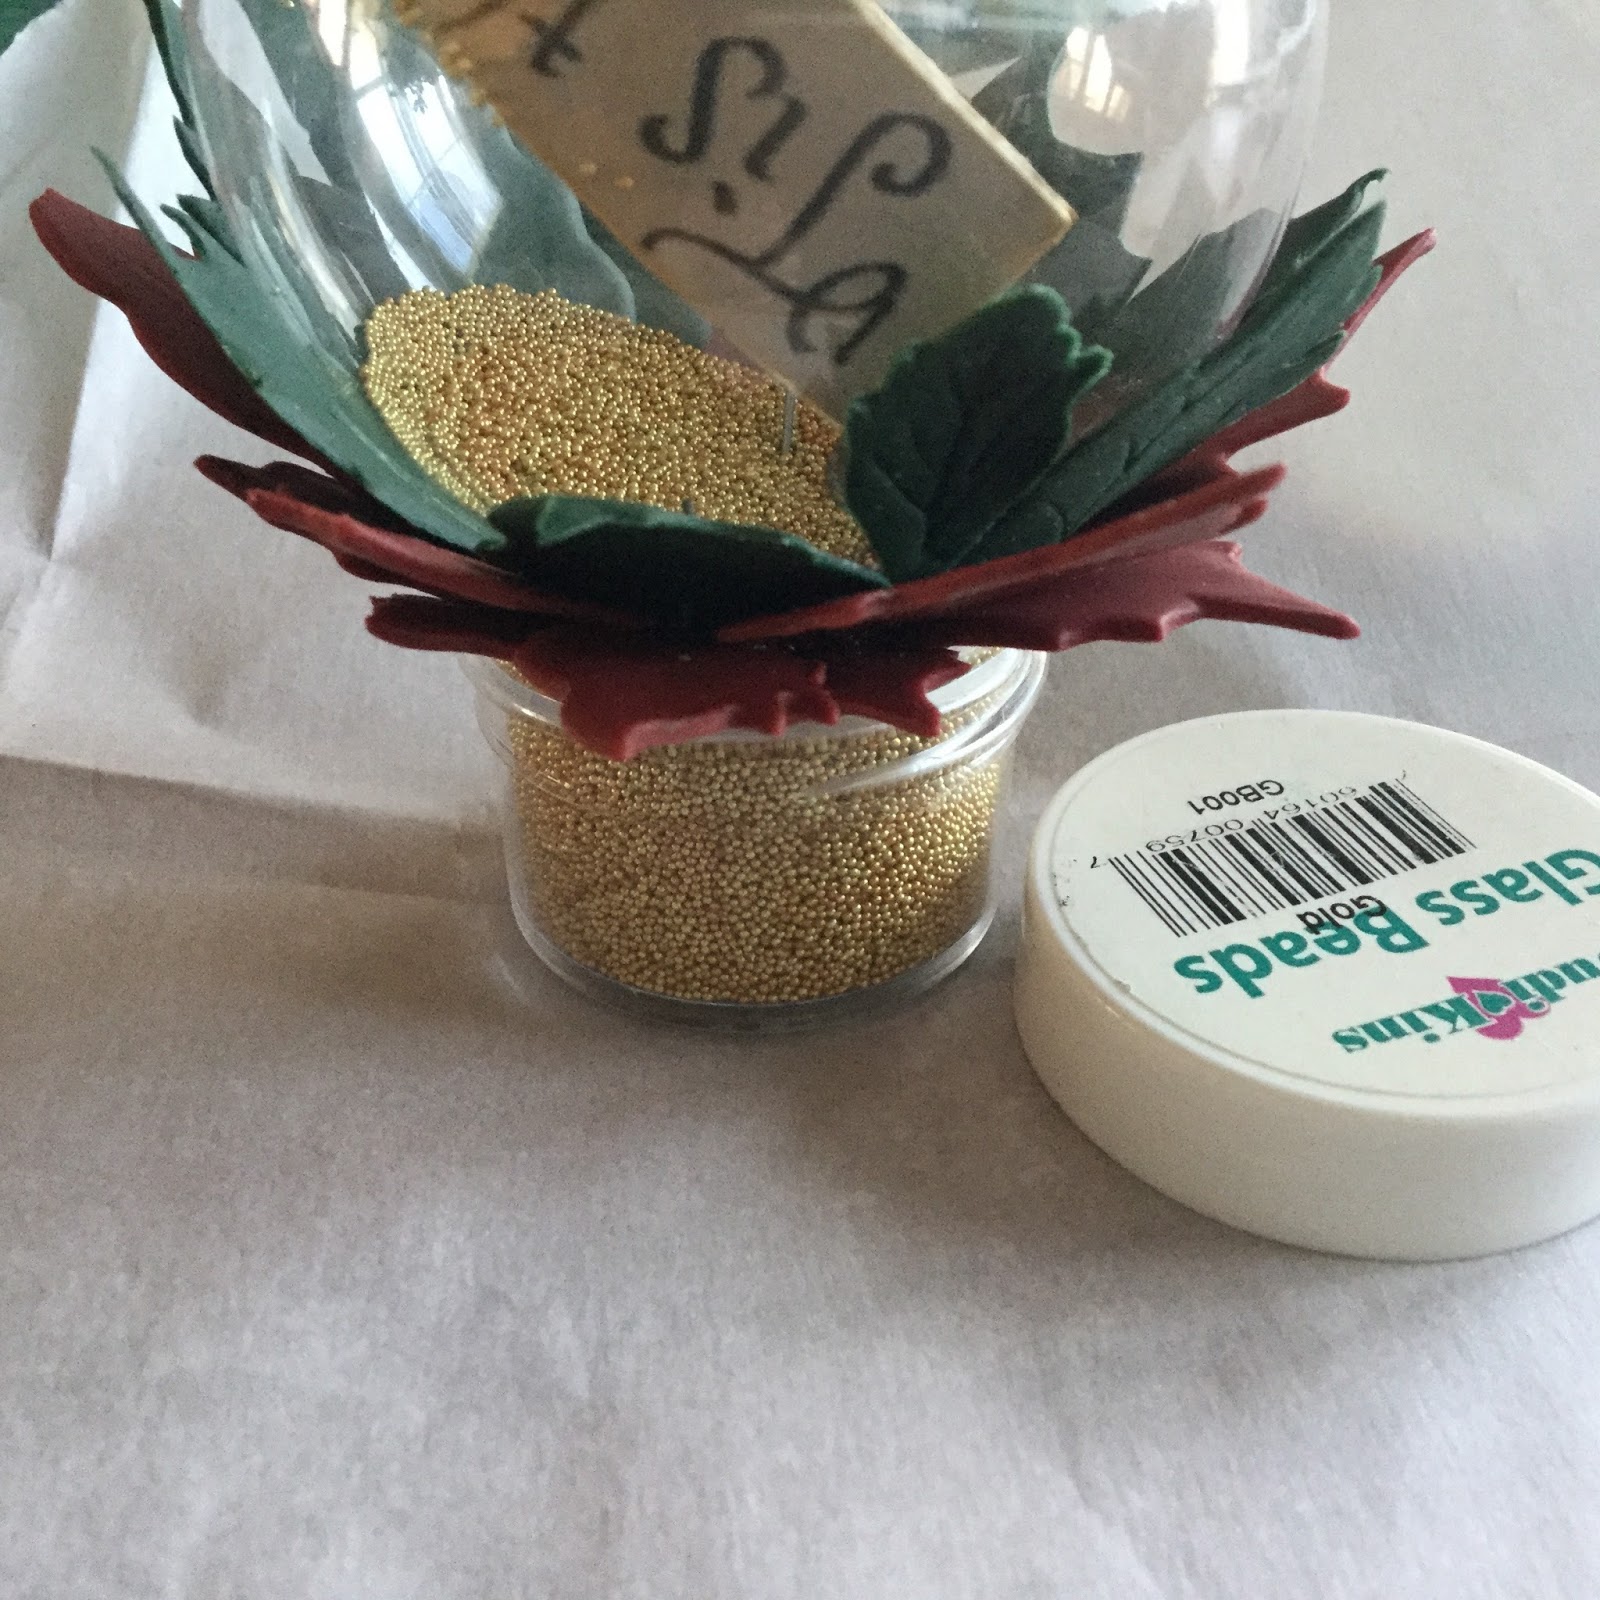
Add about a tablespoon of gold Judikins Glass Beads to the ornament.  Set aside. 


Roll Merlot and Grape Leaf Makin's Clay® in Ultimate Clay Machine® starting on setting #1 and progressing 1 setting at at time until you have rolled it on setting #6.   As you are rolling it, be sure it is the right size to fit the image you wish to cut with the die.  


At this point you can either let the clay sheet dry and then proceed to die cutting, or you can sandwich it between two layers of parchment paper and die cut while it is still fresh. I preferred to do it while it was still fresh for this project, as I planned to add veining to the leaves after cutting.  Follow the manufacturer instructions for the type of die cutting machine you are using.  

Cut 1 set of Grape Leaf petals/leaves and 1 set of the Merlot.


Use fine point tool on Professional Clay Tool to add veins to the leaves while the clay is still fresh.  

Cut all the petals leaves from the center pieces.  


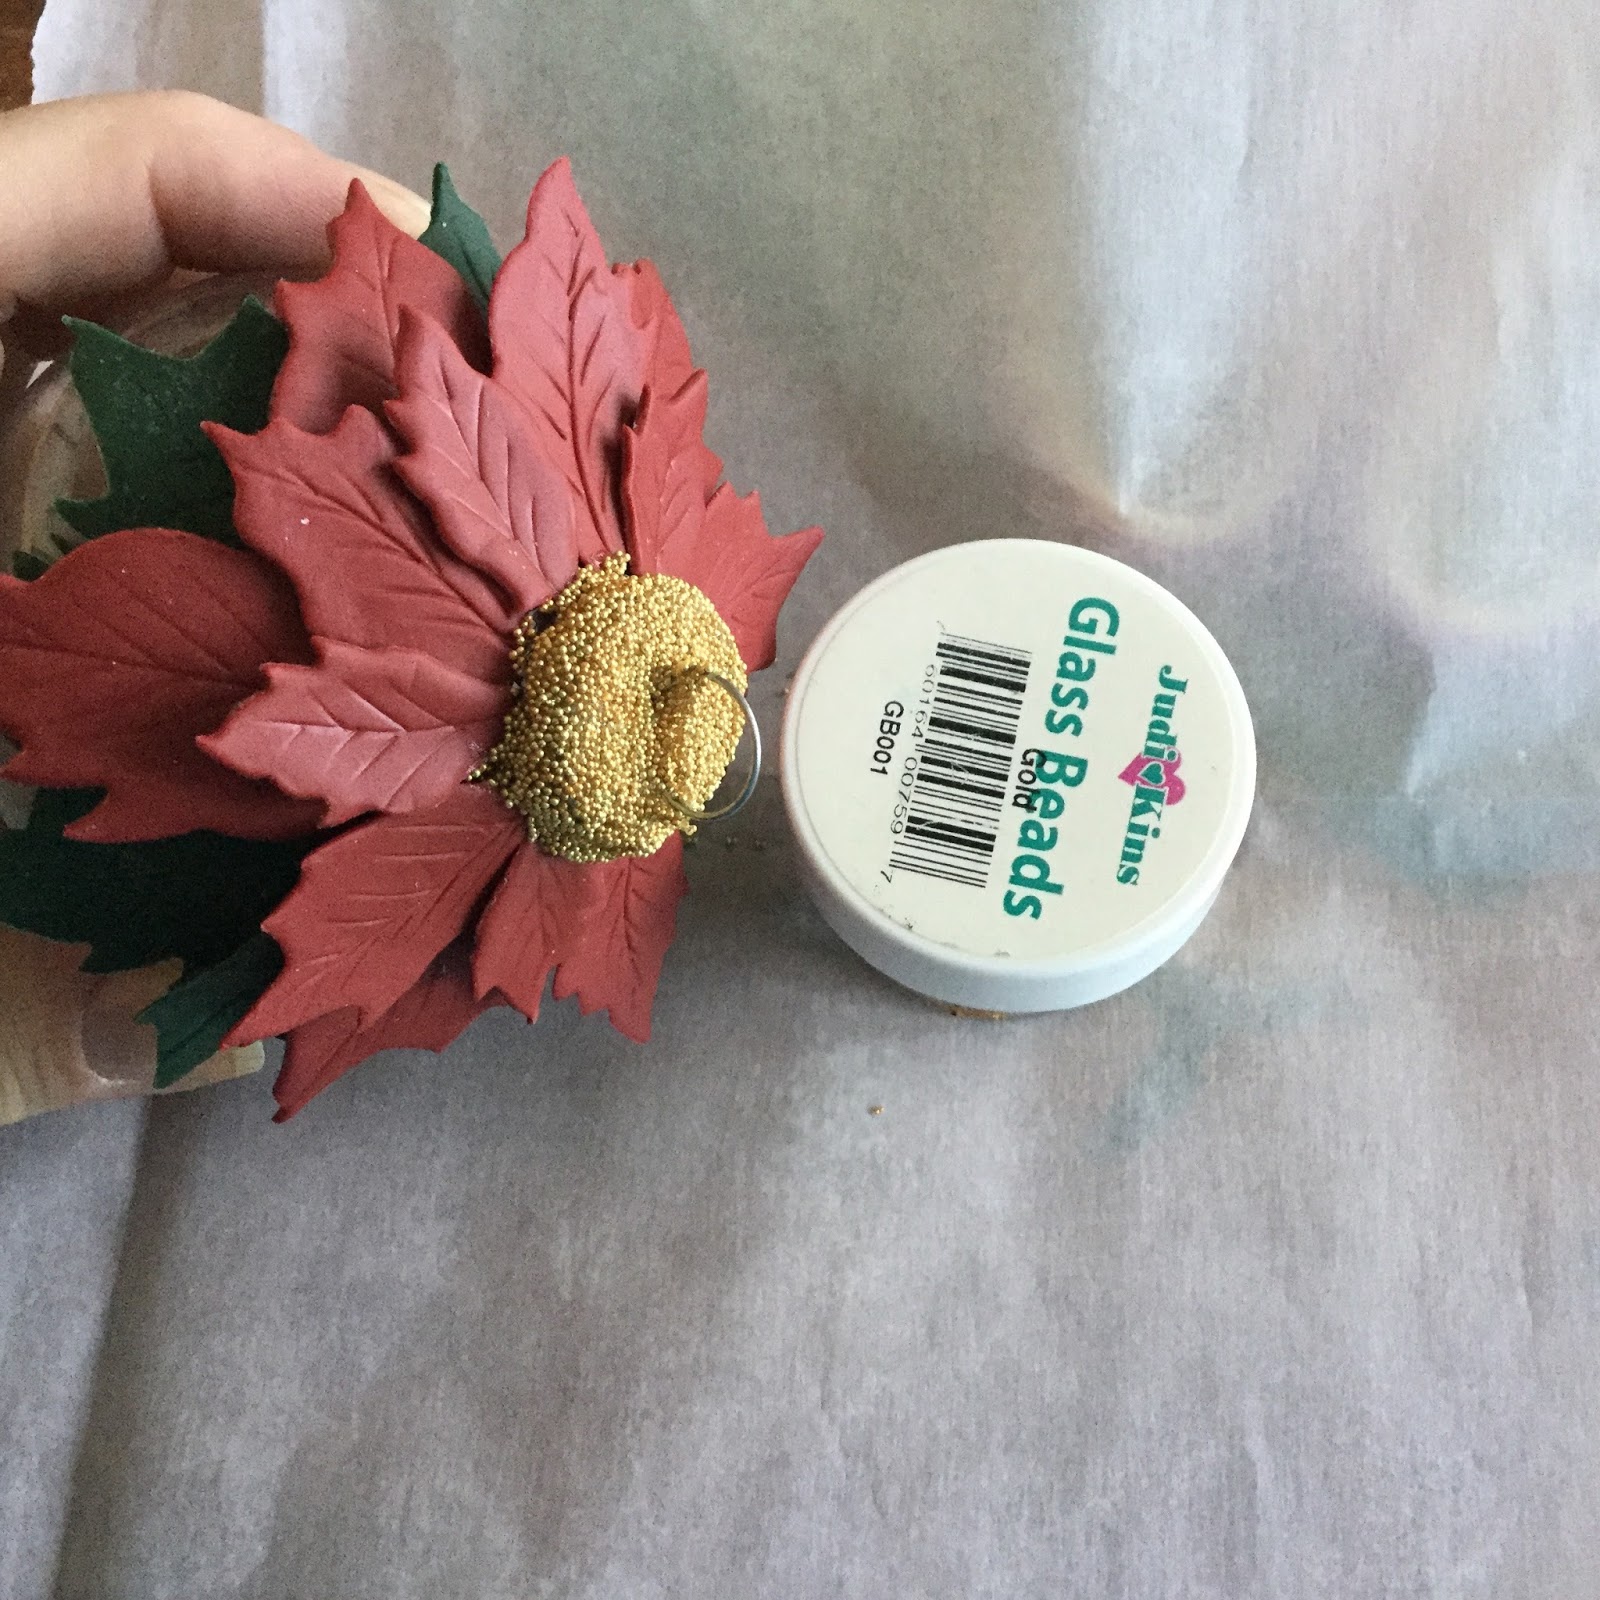
Replace the cover of the ornament.  Using a touch of the Mixed-Media glue to adhere, begin adding the Grape Leaf leaves around the cover.   Then repeat with the largest Merlot petals, then proceed to the next size, and end with the smallest petals.  


Coat entire are of metal cover with glue.  Dip into gold glass beads to coat.  Let dry. 


Use paintbrush to apply a light dusting of gold mica powder over the leaves & petals.  The goal is to highlight the veining and just add a little sheen, not totally coat the petals.

Add decorative ribbon.


Thursday, November 30, 2017

Church Window Ornament

Church Window Ornament by Carole Monahan
Materials:

Makin's Clay® - 2oz Brown 
Beacon Tacky Glue™
Mylar or Tavoos Dichroic films
Stringing materials

Tools:

Makin's Professional® Ultimate Clay Extruder® - Extruder discs 6 and 18
Makin's Professional® Professional Tool Kit

Instructions:

I used the gothic window stencil board as a pattern it is under a glass pane.
You can get the Masonite and just cover the board with clay as well.

Extrude brown clay with the larger disc 1st 18 about 1 foot. Trim with the flat blade from the professional tool kit.

Place over the pattern and press onto the glass sheet to hold in place. 

Then extrude with the smaller disc # 6 to add the small circles and details. 

To smooth use the medium tip sculpting tool and spray with a little water. 


After the window has dried for 24 hours, gently remove from the glass and glue it on to the Tavoos or mylar sheet.

Let the Beacon’s Tacky Glue cure completely then trim off any excess.


I used a hole in the top to string the window and it is ready to hang on your tree!

Contact us

Name

Email *

Message *