Pages - Menu

Search This Blog

Showing posts with label poinsettia. Show all posts

Friday, December 21, 2018

Embellished Gift Tags


Design Team member Steph Ackerman recently shared these festive holiday gift tags with Makin's Clay® accents! She used Makin's Clay® and the Makin's® Christmas Decor and Christmas Nature push molds to create her embellishments. Pretty enough to be saved for tree ornaments for years to come!


Thursday, December 20, 2018

Baby's First Christmas Ornament


Cindi McGee recently shared how she used Makin's Clay® and the Makin's® Christmas Nature push mold in a bit of an unexpected way to create this Baby's First Christmas ornament.  She used the mold to make individual petals/leaves for her poinsettia, then cut them down to a smaller size, and re-assembled them to make a poinsettia the perfect size to fit in the space she needed to complete the ornament. 


Friday, December 7, 2018

Christmas Bulb Ornament


Here's a fun little ornament made with an upcycled light bulb to adorn your Christmas tree.

Materials:

Makin's Clay®: WHITE / RED 
Clear Glass Ornament
Krazy® Glue
Art C Wax : Silver / Gold
Ribbon

Recommended Makin's® Tools:

Makin's® Christmas Nature Push Mold
Makin's Professional® Ultimate Clay Machine

Instructions:

Roll out some WHITE Makin's Clay® on the # 3 setting on the Makin's Professional® Ultimate Clay Machine®.

Cover the bulb with the rolled out clay. I textured the clay while it was wet using an old gardening glove.


I pushed some RED clay into the bow and poinsettia cavity on the Makin's® Push Mold. It may be helpful to dust the cavity with a little cornstarch to ease in the removal of the clay.

I glued, using Krazy® Glue, the poinsettia and bow to the front and back of the bulb. Let dry. 


After the bulb was dried, I used Art C wax in gold and silver to highlight the piece. I also added a ribbon to the top. Now how easy was that!  Merry Christmas.


Friday, November 23, 2018

Polymer Clay Poinsettia Christmas Tree Ornament - Makin's Clay® DIY Video


In this creative video from our Makin's Clay® Design Studio, Cindi McGee shares how easy it is to die cut Makin's Clay® and create a pretty poinsettia ornament for your holiday tree! 


Friday, November 2, 2018

Poinsettia Vintage Metal Effect Pendant

Vintage Metal Effect Poinsettia Pendant by Cindi McGee
The aged, vintage metal effect on this poinsettia pendant gives it a feeling of days gone by - a relic from a past holiday in the "old days".  It looks as though it could have been dug up from an old west town or a "little house on the prairie".....  

Materials:

Makin's Clay® - Light Adobe (other colors can be substituted, I just prefer to work with a base color that is as similar to my paint color as possible)

Makin's Professional®
  • Cutting Mat 
  • Ultimate Clay Machine®
Makin's®
  • Round Clay Cutter 4 Piece Set 
  • Christmas Nature Push Mold 
Swellegant® 
  • Brass Metal Paint
  • Darkening Patina 
  • Blood Red Dye Oxide
  • Spruce Dye Oxide 
  • Sun Yellow Dye Oxide
Paintbrush
Gold satin cording 
Plastic wrap
Craft knife

Instructions:

Roll clay in Ultimate Clay Machine® starting on setting #1 and ending on setting #2.


Place plastic wrap over clay sheet, use  ______mm round clay cutter to cut disc from clay.

 
Use Christmas Nature push mold to make large poinsettia.

Make two additional poinsettias.  Use craft knife to cut some of the individual petals free from the flowers.

Fresh clay will stick to fresh clay without additional adhesive, if necessary you can dampen the clay slightly to help with adhesion while clay is fresh.  Arrange the petals you cut from the flowers as desired on the outer edge of the disc.  These will be the leaves of your poinsettia.

Add the complete flower to the center, overlapping the leaves.


Make a small hole at then top of the disc for the cording.

Let dry 24 hours.

Paint entire piece, front and back, with brass metal paint.  Let dry.  Apply second coat.  Let dry.

Apply third coat, and while paint is still wet, sponge on some
darkening patina.   Let dry.  The aging effect will begin almost immediately and continue to progress over night.
.
Apply a small amount of red dye oxide to the flower, spruce to the leaves, and yellow to the center of
the flower.  Let dry.


When dry, use fingertip to apply very light highlights of brass metal paint to enhance details. 

Coat entire piece with Swellegant sealant.  Let dry.

Add jump rings, chain and closure


Monday, December 11, 2017

Clay Gift Tag Ornaments DIY Video


Cindi McGee created this DIY video featuring gift tag ornaments made with Makin's Clay® a few years ago. We thought it was a fun idea so we are sharing it again this holiday season! 


Monday, December 4, 2017

Christmas Gift Tags

Christmas Gift Tags by Steph Ackerman

Getting ready for Christmas, I realized I needed tags.  Makin's Clay® was a great choice to create fun, dimensional accents! 

Supplies:

Makin's Clay - Light Adobe Brown, Concord Blue, Red, White
Makin's ProfessionalⓇ Cutting Mat
Makin'sⓇ Clay Push Mold - Christmas Décor, Christmas Nature
Makin's Clay Cutters - Christmas, Christmas A, Christmas C
Makin'sⓇ Clay Roller and Cutters Set
Beacon Adhesives - 3-in-1
Joy Clair stamps
Memento Inks
Whisker Graphics Twine
Cardstock
Pattern Papers

Instructions:

I rolled out the clay on the cutting mat.

Using a variety of clay cutters, I created an assortment of clay elements.  I used the push molds to create additional embellishments. 


Look at all these amazing clay elements that can be used for a variety of projects.


Now it was time to create my tags.  Using left over scraps, I assembled my tags, I used Beacon Adhesives to adhere the clay pieces.   The pinecones were inked with brown ink and the ornament was inked with red ink.


The mitten was inked with black ink before adhering to the tag.  A snowman was added to the other tag.


Both sizes of pointsettias were created from red clay then added to the tags.  Sentiments were then added.

Makin's Clay® elements are light weight and add almost no weight to a project.   They were perfect to add to my tags.

What do you think?

Saturday, December 2, 2017

Season to Be Jolly Poinsettia Ornament


Materials: 

Makin’s Clay® - Merlot 60g, Grape Leaf 60g 
Makin’s Professional® 
Ultimate Clay Machine®
Cutting Mat
Professional Clay Tools 
Sizzix® Big Shot™
Sizzix® Poinsettia die 
Beacon Mixed-Media Glue™
CreateAlong.com mica powder - Gold 
Round clear plastic ornament 
Decorative ribbon 
Computer & printer
Galaxy Gold Brilliance ink pad 
Tea stained ivory card stock 
Parchment paper 
Scissors 
Paintbrush 

Instructions:

Select the font for your text.  I chose “Princess Sofia”.  Type out the text you want to appear on your paper strip.  I chose “‘’Tis the Season to be Jolly” for the front, and “Fa la la Fa la la Fa la la” for the back.   I sized it to be about 4 1/2” across when printed.

Print onto tea stained ivory card stock (I chose to use tea stained card stock because I liked the “aged/vintage” effect, but it’s optional!).   Trim around verses.  Check to be sure you have trimmed it enough so that it will fit inside the hole in the top of the ornament. 

Use Mixed-Media Glue to mount the verses back to back.  Be sure to attach them so that the verse on the back is not upside down.  

Ink the edges with the gold ink pad.   Carefully insert into the ornament.    


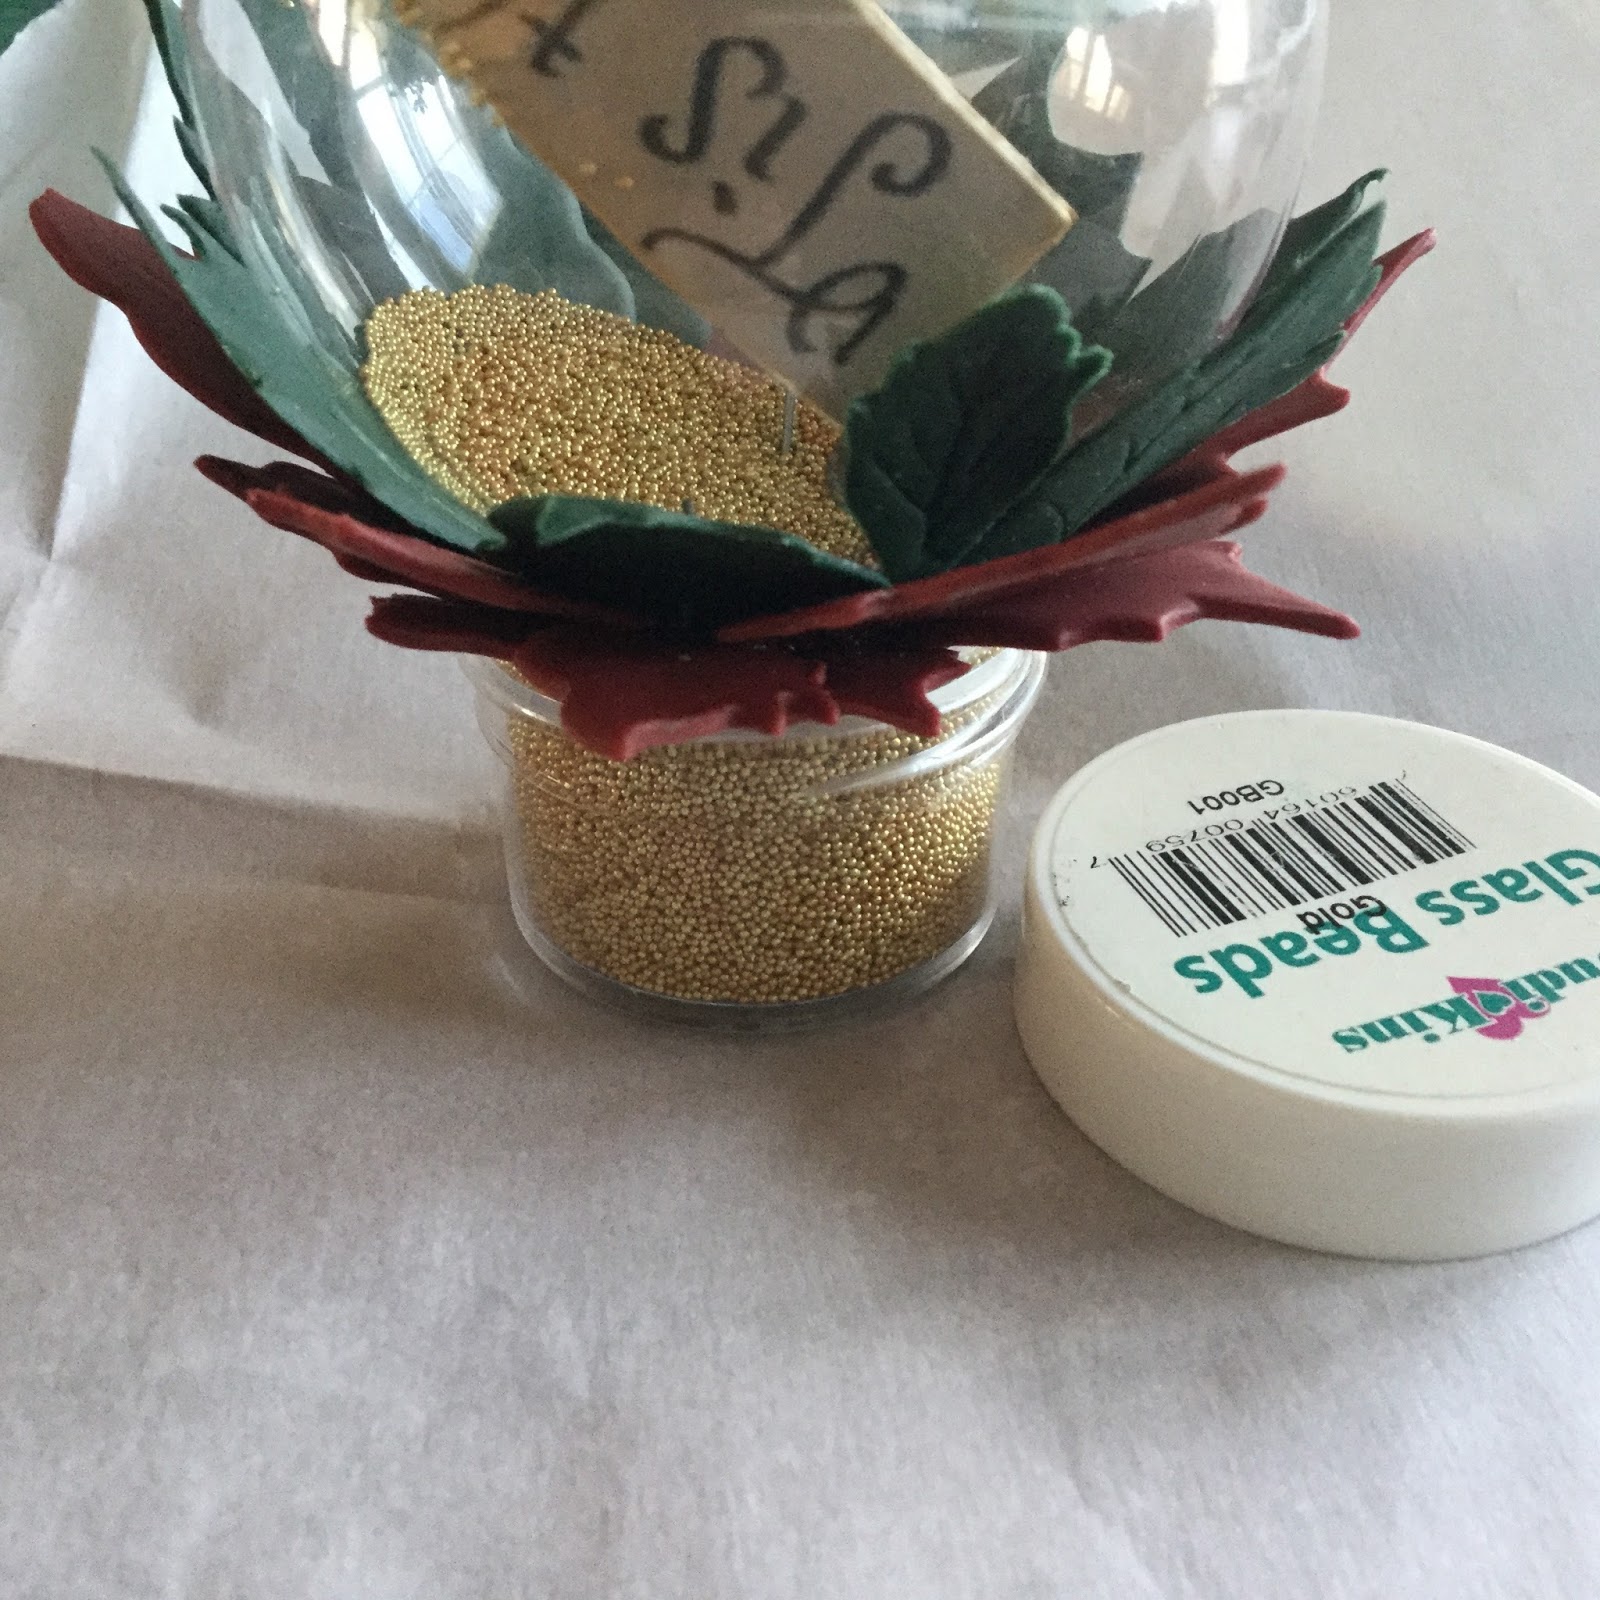
Add about a tablespoon of gold Judikins Glass Beads to the ornament.  Set aside. 


Roll Merlot and Grape Leaf Makin's Clay® in Ultimate Clay Machine® starting on setting #1 and progressing 1 setting at at time until you have rolled it on setting #6.   As you are rolling it, be sure it is the right size to fit the image you wish to cut with the die.  


At this point you can either let the clay sheet dry and then proceed to die cutting, or you can sandwich it between two layers of parchment paper and die cut while it is still fresh. I preferred to do it while it was still fresh for this project, as I planned to add veining to the leaves after cutting.  Follow the manufacturer instructions for the type of die cutting machine you are using.  

Cut 1 set of Grape Leaf petals/leaves and 1 set of the Merlot.


Use fine point tool on Professional Clay Tool to add veins to the leaves while the clay is still fresh.  

Cut all the petals leaves from the center pieces.  


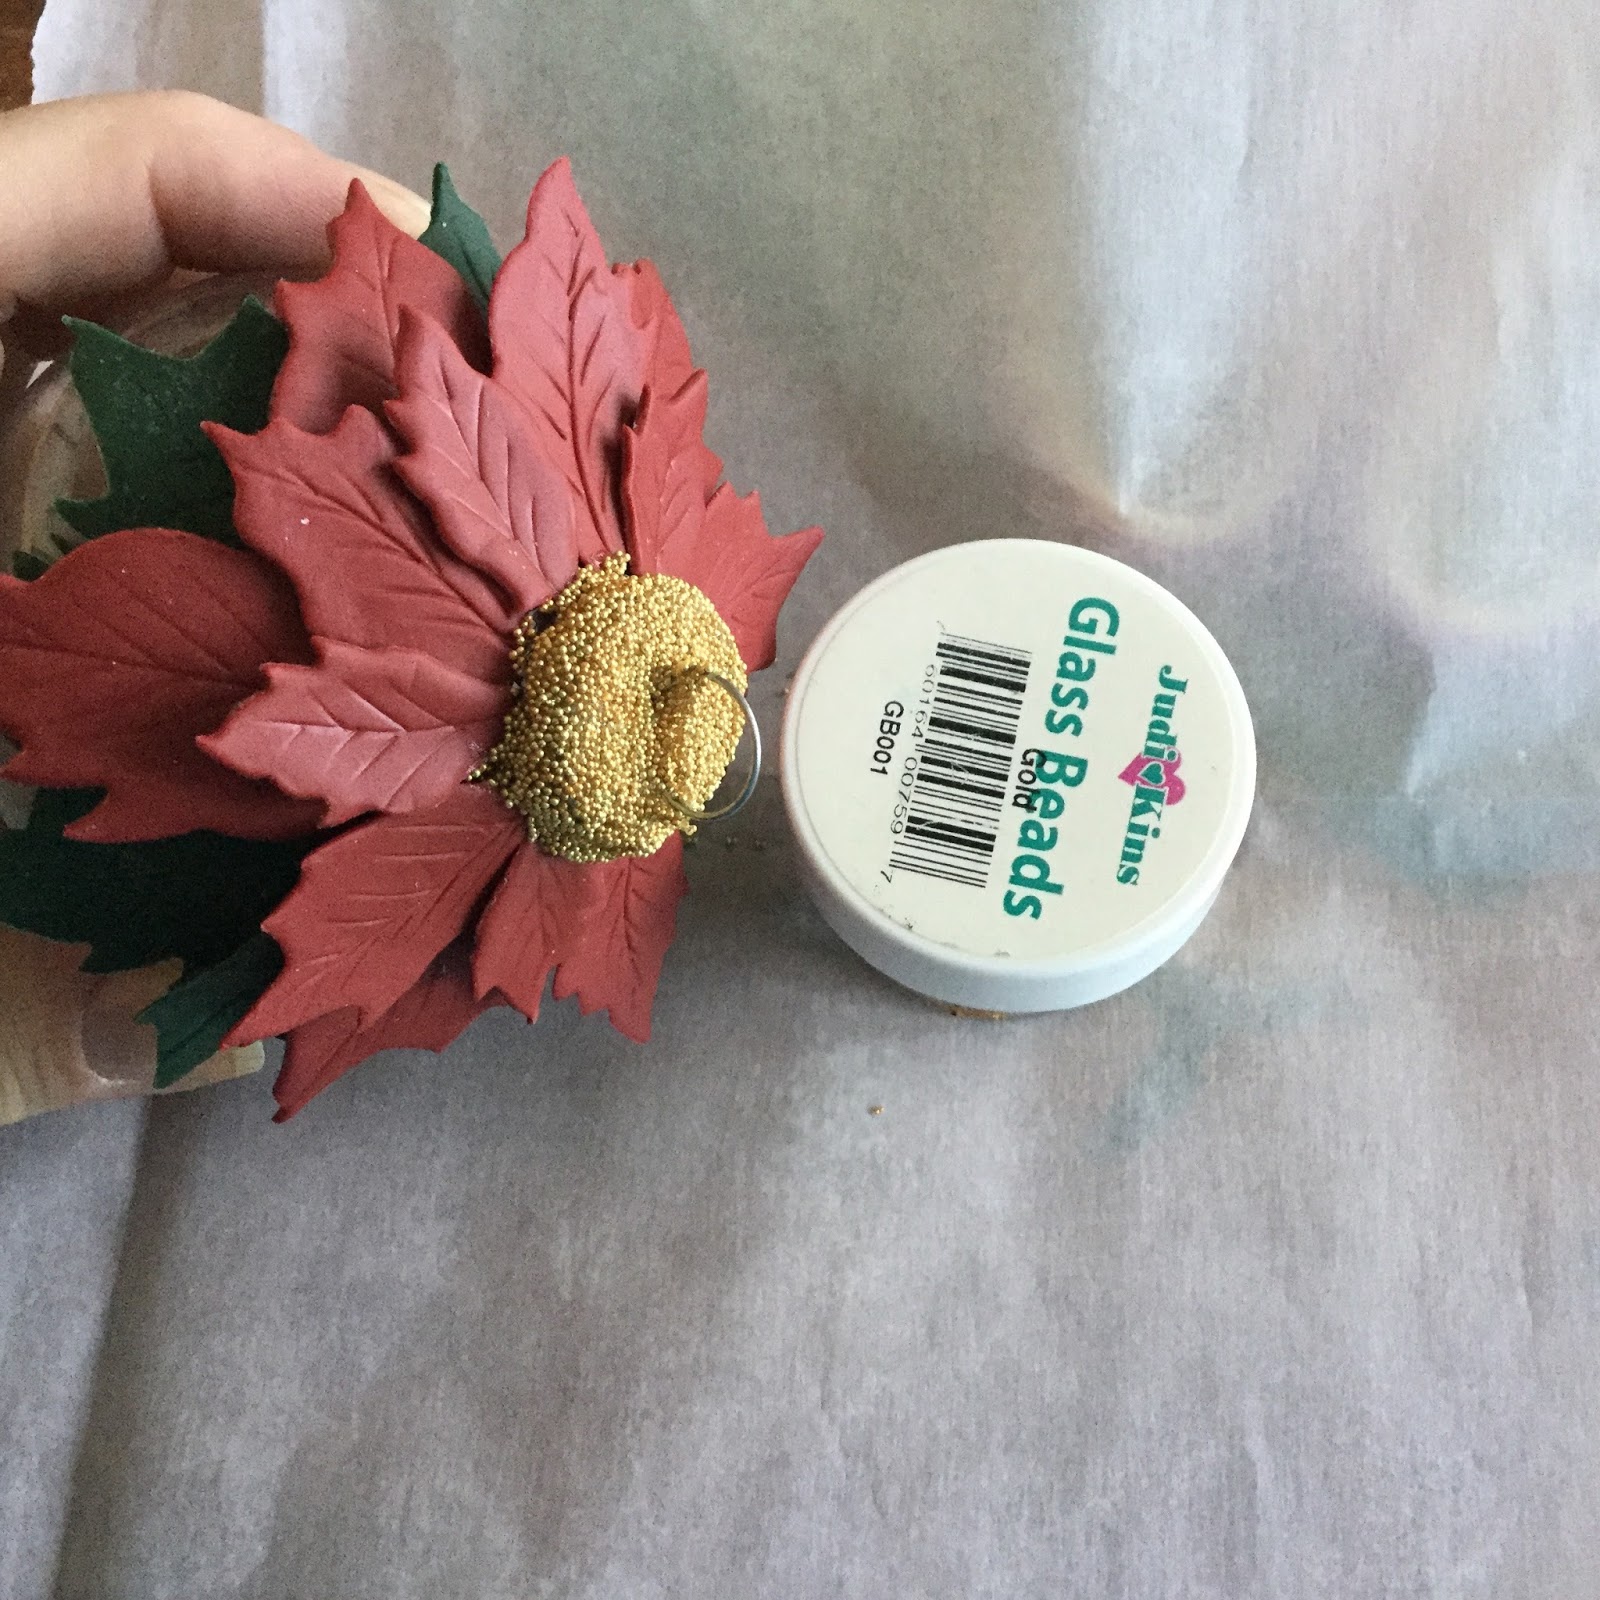
Replace the cover of the ornament.  Using a touch of the Mixed-Media glue to adhere, begin adding the Grape Leaf leaves around the cover.   Then repeat with the largest Merlot petals, then proceed to the next size, and end with the smallest petals.  


Coat entire are of metal cover with glue.  Dip into gold glass beads to coat.  Let dry. 


Use paintbrush to apply a light dusting of gold mica powder over the leaves & petals.  The goal is to highlight the veining and just add a little sheen, not totally coat the petals.

Add decorative ribbon.


Contact us

Name

Email *

Message *