Pages - Menu

Search This Blog

Showing posts with label DIY. Show all posts

Sunday, May 19, 2019

Love Birds Ornament

Love Birds Ornament by Leila Bidler

This is a perfect little gift to brighten someone's day, you could even make it make with your children!

For this project you will need:

Makin's Clay® Natural, approx. 60g or less
Makin's® Clay Roller
Makin's® Clay Cutter of your choice
Makin's® Clay Tool Set 
Gold leaf flakes
Metal leaf adhesive
Needle tool
Hand drill
Chalk pastels (I used raw sienna, burnt umber and dark red)
Soft paintbrush
Firm paintbrush
Twine
Gold/metallic sewing or embroidery thread (and needle)
Superglue

Instructions:

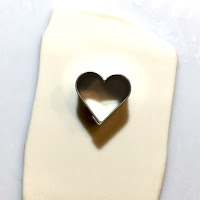
Roll out your Makin's Clay® natural and cut out a center shape. In my example I am using the small heart shaped cutter from the Makin's® Mini Geo 37004 set. 

After cutting out the center shape cut out the basic house form and two stripes for the roof. You can do that freehand, place it on the clay and cut out the shape using you Makin's® Clay Tools. Put one stripe for the roof near the house shape to see where to best trim them/how long to make them.


Take a soft paint brush and wet the "roof" with some water to be sure everything adheres permanently and then use the Rasp from your Makin's® Clay Tools Set to trace lines on the "roof" to mimic wood.

Now use Rasp and Chisel from your Makin's® Clay Tools Set to create alternating lines and dots on the surface. Follow the example below or invent your own fun pattern! Poke a hole also on the center top to be able to string it (you could also skip this and glue a magnet on the back if you with to make a magnet instead of an ornament to hang).

Now we need to color our tiny house, to do that grate off some chalk powder form your chalk pastels, we will first use raw siena and burnt umber on the house and then add also some red for the roof. Wet your paintbrush just slightly, pick up some of the light color and brush it onto the house vertically. Then add some of the darker brown. You want it to be almost "dry brushing" to imitate wood, not a uniform coverage of color. If you do not like what you see or add too much color, no problem at all, just wipe it off with a wet towel and paint over it again.


Now on to making the 2 tiny birds! Start by rolling a small ball of Makin's Clay® Natural with your hands, then shape it into a crop and pinch the rounded end into a tiny head shape: 


 Make a second little bird and with the help of your paintbrush and a drop of water adhere them to the house and with your needle tool give them eyes. 

To complete our ornament we now need a heart shaped bead. Roll a piece of Makin's Clay® Natural into a small egg shaped ball and then use your needle tool to indent the rounded top to form the heart shape. Using your needle tool also poke a hole from top to bottom so we will be able to string it.


Let your creations dry for 24 hours.

After they are completely dry use your soft paintbrush to apply your Metal Leaf adhesive on the birds and the heart shaped bead. Tip: put the bead on a skewer to hold it while applying the glue and the gilding flakes!

When the glue is fresh it is milky-whitish, let it dry for about 10-15 minutes and it will turn completely transparent and sticky. 

The easiest way to apply Gilding Flakes is to keep them in a jar with a lid and to just push in the creation, lift it up, but keep it above your jar and using a paintbrush with firm bristles brush off the excess, back into the jar to use again. 


Use a small hand drill to make the holes in your pattern large enough for needle and metallic floss, if needed.

Thread the metallic floss thru the holes and secure it on the back with small nods. To be sure the nods will hold you can also use a drop of superglue to secure them.


Now you can use some twine that you can pass thru the top hole and the heart shaped bead to hang your ornament.

Saturday, April 20, 2019

Easter Egg Statement Earrings

Easter Egg Statement Earrings by Naomi Scarparo
I love Easter Sunday morning with our family especially the Easter Egg hunt, and it’s always nice to wear something to celebrate the occasion… so I made these Pastel Easter Egg Earrings, to wear on the day.

Materials:

Makin's Clay® white, approx 25g or less
Makin's Clay® yellow, approx 20g or less
Makin'® 
  • Clay Roller
  • Cutters Easter Set - Egg Shape
  • Texture Sheet Set H - Coils
  • Texture Sheet Set A - Sand
  • Clay Tool Set - Chisel

Small circle cutter approx. 1.2cm diameter 
Dusting powder like cornstarch
Chalk pastels (I used pink, purple, yellow, green, and blue)
Gold Leaf
Hard bristle paint brush
Jump rings
Earring Stud post 
Weldbond Universal adhesive PVA 

Instructions:

Roll out your white Makin's Clay® to the thickest setting on your pasta machine, then lightly dust, dusting powder (cornstarch) over the clay. Place the Makin's® Texture Sheet Set H - Coils on top of the white clay, using the clay roller press and roll over the texture sheet, pressing the impression into the clay.


Lightly wipe away dusting powder. Now using your chalk pastels and a finger lightly rub onto the textured clay your colours, using one colour at a time and wiping your finger in between colours.


Using the Makin's® Cutters Easter Set - egg cutter and the mini circle cutter, place on the sheet of clay where you desire the patterns to be on your earrings. 

Tip - put some plastic wrap on top of your textured sheet and press down firmly with the cutters. This will give you perfectly rounded edges… (which I forgot to do, oops… but no big deal… just smooth the edges with you finger tips).

While smoothing the edges, rub a desired chalk pastel colour around the edges. Set aside your egg shapes.


For the decoration on the back of the Easter egg dangle earrings, roll out your yellow clay to a middle setting on your pasta machine, then lightly dust, dusting powder (cornstarch) over the clay. Place the sand texture sheet on top of the yellow clay, using the clay roller press and roll over the texture sheet, pressing the impression into the clay.

Using some plastic wrap on top of your textured sheet and press down firmly with the egg cutter from the Easter set, giving you a smooth edge. Then join the chalk pastel egg shape and the yellow egg shape, smooth sides together.

Line up the egg shapes and circles how you want the dangle earring arrangement to be (like picture below).


Using the Makin's® Clay Tool Set - chisel pointed side, place a hole at the top of the egg and the bottom of the circle, keeping in mind the jump ring size that will be connecting them. Tip - push the chisel pointed side through one side and then turn it over and do the same on the other side. This gives you a clean hole right through.


Set aside to to dry for 24 hours.

Once dried, put Weldbond Universal adhesive PVA glue around the edges of the egg and if desired around the circle edges too, one at a time place, gold leaf around the edges, sticking to the glue. With a bristle paint brush lightly dust off the excess.

Once all the edges are complete, place Weldbond Universal adhesive PVA glue in random areas of the egg and circles (one at a time), then placing gold leaf on the glue areas. Once again using the bristle paint brush lightly dust off the desired amount off. 


Glue stud post onto the small circles above the hold where the jump rings are going to be placed.

To finish the earrings, place jump rings into circle shape and egg shape holes, then use a smaller jump ring to connect them together.


Here are some other ideas and alternatives you can do using this tutorial…

Instead of dangle earrings, You can skip making little circle shapes and just glue the earring posts to the egg shape. Or even make a egg pendant, with a jump ring attached to a necklace chain.


Happy Easter!


Monday, August 20, 2018

Mokume Gane with Makin's Clay®

Mokume Gane with Makin's Clay® by Bea Grob
Lately, I have been experimenting with the Mokume Gane technique with Makin's Clay®.  Right away, yes it did work, but you have to adapt a little bit if you are coming from the oven bake clay. 

Materials:
Makin's Clay® - Vineyard Tones, Peach, Black 
Makin's Professional®
  • Ultimate Clay Machine®
  • Cutting Mat 

Makin's® Clay Cutters, square Set Nr.  36002  
A spray bottle with plain water
Piece of plastic wrapping or household wrap
Cording, earring wires, closures, findings, etc. as desired

Instructions:

For this project I used the set with the Vineyard colors, every color except the brown. You need colors that give some contrast also in value. So I did add the peach color as a light value and the black as dark value.

First, I ran every color through the Makin's Professional®Ultimate Clay Machine® on setting #1 and progressively increased ending on setting #8.

I started with peach and stacked the other colors on top. 

I added some metal leaf to second layer of peach.

The final sheet was black. 


This is what the whole stack of sheets looks like. Don't worry to much if they don't match perfectly. Even though I had roughly the same amount of clay, the squares didn't come out exactly the same.  

Next, I trimmed the edges a bit.  This is what the stack looks like from the side. 


Back to the Makin's Professional® Ultimate Clay Machine®... I ran all the stacked sheets first through the setting # 1 and then stepped up the #8 again. You get a long sheet like this.

The next step is to cut 4 equal squares and then stack them together again (and keept the cut offs, we need them later).


Next, I used a tool to make indentations, here I use the back end of a brush.  Experiment with any of the tools in the Makin's Professional® Professional Tool Kit®, they would also work well!

I ended up with a stack like this. 


The stack is still a little to wide for my taste, so I squeeze it into a log. I took my time and rotated the log quite a bit to squeeze from all sides.

When finished, you can see the distortion on the sides, which is good, so no worries.

Now it is time to make a jewelry form. I ran all the leftovers and cutoffs again through the clay machine to make a uniform color. When it all was mixed together I made sheet on the setting # 1 of the clay machine.

I cut the first piece with a flexible clay blade and stacked it on a second sheet again from the same sheet and made it double thick.


To smooth out the seam I used one of the Makin's® clay tools. Just add a tiny bit of water and smooth it out with the round part.


I cut the first piece with a flexible clay blade and stacked it on a second sheet again from the same sheet and made it double thick.


To smooth out the seam I used one of the Makin's® clay tools. Just add a tiny bit of water and smooth it out with the round part.


In the meantime the stack had a little bit of time to begin to dry. Usually, you want to put unused clay
 into a zip lock bag together with a damp paper towel to prevent drying out. But for cutting slices from the log it is easier if it has dried just a bit, but of course not completely. If it is to soft, then you have to let is sit another 10 minutes or so. It also depends a little bit on area you live in.


I started cutting off slices from my log. I used more a sawing motion then running quick through the log. You can't cut really thin, so I did run it through the clay machine again to get an elongated piece which I then use to cover up the jewelry pendant form.

I wrapped the pieces around the edges  of the pendant form and cut them flush on the backside.

To make a hole I  used use a piece of a straw on the first pendant.

For the second pendant I added a hole through the top of the pendant. I used a needle tool and with a drilling motion to run it through. 


I also made some beads, again I used the leftover as a base and then wrapped it with the slices. To get  even sized beads I use the Makin's® Clay Cutter, square Set Nr.  36002 to cut out squares from the sheets and then I rolled it into a core bead. 

Next, I sliced the cane again and formed them a bit over my knuckle. This makes it easier to wrap the core bead from the scraps.
The next day I was ready to turn my pieces into a completed jewelry set. 


Contact us

Name

Email *

Message *