Pages - Menu

Search This Blog

Showing posts with label gift. Show all posts

Sunday, May 19, 2019

Love Birds Ornament

Love Birds Ornament by Leila Bidler

This is a perfect little gift to brighten someone's day, you could even make it make with your children!

For this project you will need:

Makin's Clay® Natural, approx. 60g or less
Makin's® Clay Roller
Makin's® Clay Cutter of your choice
Makin's® Clay Tool Set 
Gold leaf flakes
Metal leaf adhesive
Needle tool
Hand drill
Chalk pastels (I used raw sienna, burnt umber and dark red)
Soft paintbrush
Firm paintbrush
Twine
Gold/metallic sewing or embroidery thread (and needle)
Superglue

Instructions:

Roll out your Makin's Clay® natural and cut out a center shape. In my example I am using the small heart shaped cutter from the Makin's® Mini Geo 37004 set. 

After cutting out the center shape cut out the basic house form and two stripes for the roof. You can do that freehand, place it on the clay and cut out the shape using you Makin's® Clay Tools. Put one stripe for the roof near the house shape to see where to best trim them/how long to make them.


Take a soft paint brush and wet the "roof" with some water to be sure everything adheres permanently and then use the Rasp from your Makin's® Clay Tools Set to trace lines on the "roof" to mimic wood.

Now use Rasp and Chisel from your Makin's® Clay Tools Set to create alternating lines and dots on the surface. Follow the example below or invent your own fun pattern! Poke a hole also on the center top to be able to string it (you could also skip this and glue a magnet on the back if you with to make a magnet instead of an ornament to hang).

Now we need to color our tiny house, to do that grate off some chalk powder form your chalk pastels, we will first use raw siena and burnt umber on the house and then add also some red for the roof. Wet your paintbrush just slightly, pick up some of the light color and brush it onto the house vertically. Then add some of the darker brown. You want it to be almost "dry brushing" to imitate wood, not a uniform coverage of color. If you do not like what you see or add too much color, no problem at all, just wipe it off with a wet towel and paint over it again.


Now on to making the 2 tiny birds! Start by rolling a small ball of Makin's Clay® Natural with your hands, then shape it into a crop and pinch the rounded end into a tiny head shape: 


 Make a second little bird and with the help of your paintbrush and a drop of water adhere them to the house and with your needle tool give them eyes. 

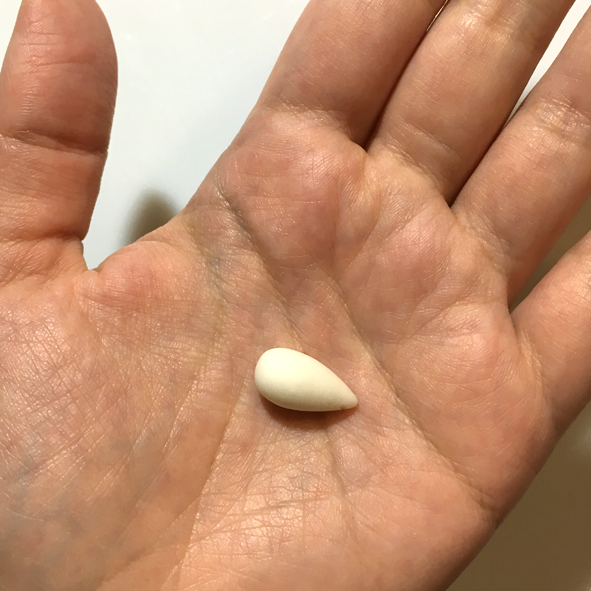
To complete our ornament we now need a heart shaped bead. Roll a piece of Makin's Clay® Natural into a small egg shaped ball and then use your needle tool to indent the rounded top to form the heart shape. Using your needle tool also poke a hole from top to bottom so we will be able to string it.


Let your creations dry for 24 hours.

After they are completely dry use your soft paintbrush to apply your Metal Leaf adhesive on the birds and the heart shaped bead. Tip: put the bead on a skewer to hold it while applying the glue and the gilding flakes!

When the glue is fresh it is milky-whitish, let it dry for about 10-15 minutes and it will turn completely transparent and sticky. 

The easiest way to apply Gilding Flakes is to keep them in a jar with a lid and to just push in the creation, lift it up, but keep it above your jar and using a paintbrush with firm bristles brush off the excess, back into the jar to use again. 


Use a small hand drill to make the holes in your pattern large enough for needle and metallic floss, if needed.

Thread the metallic floss thru the holes and secure it on the back with small nods. To be sure the nods will hold you can also use a drop of superglue to secure them.


Now you can use some twine that you can pass thru the top hole and the heart shaped bead to hang your ornament.


Sunday, November 11, 2018

Laundry Scent Booster Bird Sachets


Laundry Scent Booster Bird Sachets by Patricia Roberts-Thompson
Join me in making these scented sweet bird sachets, perfect for tucking into a lingerie drawer, or hang them up in your closets! Fun and easy to make with Makin’s Clay®.  One 120g package will easily make 4 to 6 birds.

Materials:

Makin’sClay® White 120g
Makin’s Professional® Ultimate Clay Machine®  
Makin’s® Texture Sheet Set D 38004 Woodgrain, or texture of your choice
Acissors, needle tool, paintbrush, small hole cutters
Art-C Gold paste, Art-C Turquoise
Inka Gold paste, blue, red , turquoise and Platinum
Black acrylic paint  
Americana DuraCoat Gloss Varnish, cornstarch, white glue, seedbeads size 6 or 3mm pearls or 4mm crystals
Laundry Scent Booster, I used ‘Gain’
White glue
25mm glass or stone cabochons, or glass nuggets
Glass or tile to work on.

Directions: 

Fig 1:  Cardinal - Print the pattern, then cut out the paper cardinal shape on the bottom. Each bird measures approximately 4 inches in length and 2 inches high. Condition a third of a package of white Makin’s Clay®, and roll it on a number 3 setting of the Makin’s Professional® Ultimate Clay Machine®. Dust a texture sheet with cornstarch and texture the sheet of clay if desired. Using a needle tool, scribe around the shape as a guide to cut, flipping the pattern over to make a second one facing the opposite direction. These birds need to be two sided to work. I used scissors to cut my birds, but a sharp craft knife can work also. Use a needle tool to mark the details of the bill, cheek and wing and tail and also mark where the eyes will be placed. I used a size 6 seed bead for the eye of the cardinal for each piece. To make the pocket that will hold the laundry scent booster chips, I placed a glass nugget in the wing area of the back side of the bird, then turned the bird over and placed it on a ceramic tile (glass works well also) The idea is to get the head and all the edges of the bird to stick to the tile so that these parts dry as flat as possible which makes gluing the pieces together much easier. If the clay doesn’t want to stick to the tile, spray a tiny amount of water on the back, wait 30 seconds or so and try again. I found it easier to cut some small holes over the glass nugget area while the nugget is in place, though you could poke some holes before placing, or even drill them after the bird has dried. I used two different sized bootlace ferrules to make my holes. The only thing you need to be aware of is that the holes should be smaller than the scent booster chips. Let the bird parts dry for 24 hours then, unmold the glass nugget from the back and if it has not completely cured allow a bit more time before assembling. When dried you can either paint each part now, or wait until it is fully assembled to paint. 

Assembly:  If you want the bird to hang, prepare a loop of yarn, string of narrow ribbon. Moisten the edges of the bird, keeping all water away from the pocket. Apply a bit of white glue to all edges on both pieces, again making sure the pocket stays dry. For the cardinal, I added a piece of yarn by dipping the ends in glue and placing it below the head. Add your scent booster chips in the pocket, they should heap up on the one side since when both pieces are together there is room for all the chips. Now press both sides together, matching as well as you can. You may need to hold the edges a bit to make sure they stick together properly. You will probably have some small differences which can be trimmed with a sharp knife, scissors or scraped with a rigid craft blade. When the glue has dried you can paint your bird. For the Cardinal, I used a base coat of copper and followed up with some Inca Gold Lava (red) and some gold Art-C paste for the bill, finally some black acrylic paint for the bib of the Cardinal. Lastly, I added a bit of gloss varnish, just to the black area.


Fig 2:  Bluejay. See general directions for the method. Cut the Bluejay pattern and use it to make two sides facing opposite directions. I used a 4mm crystal for the eye. On the blue jay I used a 25mm round glass cabochon, which gave me a more uniform pocket. Other things you could use would be a flat round stone, or even make your own form from aluminum foil. I painted my bluejay before assembling, and then had to touch it up after gluing the parts. I used Inca Gold Blue for the crest and back of the jay, Inca Gold Platinum for the belly, and black acrylic paint for the chest markings. When dried I touched up the black bits with gloss varnish. The advantage to this is not messing up the other side by holding the bird while wet. The photo shows only a small amount of chips, I added more before assembling. This one doesn’t have the hanger.


Fig 3:  Finch. See general directions for the method. The finch is a fun one to do, as you can get more creative with your color choices – realistic or fantastical. Cut the Finch pattern and use it to make two sides facing opposite directions. I used a 4mm crystal for the eye. And a 25mm glass cabochon to form the pocket. I used Art-C Turquoise paste on the body, Art-C gold paste for the bill, then a little Inca Gold platinum over the turquoise in the chest and belly area. The fourth bird on the cover photo was painted with Inca Gold platinum, gold and purple.


 The scent lasts a really long time, and it is possible to separate the layers in the pocket area with a sharp craft knife and add fresh scent booster chips, and re-glue.
These birds will make wonderful gifts, have fun with this project!

Sunday, May 7, 2017

Moms Rule Canvas

Moms Rule Canvas by Iris Rodriguez
Hello Makers!


May brings flowers (the result of those April showers), warmer weather and Mother’s Day.  In my humble opinion, moms are the best and that is why they rule. Fittingly, I decided to make a mixed media canvas expressing such a sentiment. The rulers are made of stamped clay. Yes, you could use real rulers, but then you would be breaking the rule(r) and you don’t want to do that...sorry had to throw that corny pun in there, could not resist.  Now, on to the canvas!

Materials:

Small Substrate; Canvas, Wood or Medium Density Fiber (MDF) Board
Makin's Clay® Natural, Red
Makin's® Roller and Cutter Set
Chipboard letters or Makin's® Clay Alphabet Cutter Set
White Gesso
Acrylic Paint (desired color for background; black and yellow and/or gold)
Clear drying adhesive 
Paint brush
Ruler Stamp
Paper Towels
Baby Wipes

Instructions:

Preparing the Substrate

1.   Start out by painting the substrate, I used a 6” x 6 “ MDF Clayboard. I chose purple, light purple and antique gold (matte). I brayered some of the colors, to give that random, distressed look.


Making the Rulers

1.   Roll Natural clay to a little less than 1/4" thick.  Stamp the ruler stamp onto the clay and trim the excess clay. I knew I wanted to put something in the center, a heart, or the lettering. For now, I blocked it off with a piece of clay. As I kept making my rulers, I laid them out on the canvas around the blocked area, to determine what pattern I wanted to make. I ended up making 14 individual rulers.


Because the nature of Makin’s Clay® make it’s so easy to stamp and mold, it's easy to create several pieces quickly and without mess.  If the clay begins to dry, it’s very easy to trim the excess clay with a cutting tool or scissors. After completing the rulers, let the rulers cure for 24 hours.

1.   Gesso the rulers. Then apply desired colors. I used a bright yellow and antique gold (matte). Tip: I used masking tape, sticky side out to hold down the rulers and keep from slip and sliding while painting them.


1.   Apply black paint into the crevices; with a paper towel or baby wipes, lightly rub off the paint on relief areas only.


1.   Using this technique will naturally stain the entire ruler a little, giving it that antiqued look. You could stop here and go with that look, or you can give it a cleaner look by taking a very flat thin brush or your fingers and touching the relief areas.  

Making the Hearts and Words
 
1.   To make the hearts, make teardrop shapes, then cut a triangle in the center of the wide area of teardrops. Then round out the cut area and shape a pointy tip at the bottom. Make your hearts fun and whimsical by giving them a wonky pointy curve and if it’s uneven, even better.

2.   To make letters, simply lay them out on the canvas to determine a good fit, then paint the letters.


1.   Assemble the pieces and glue them onto the substrate. If it is necessary to cut the rulers; you can do so with scissors or a cutting tool; make sure to touch up the edges with paint, as you will see the natural white color of the clay, when you cut the ruler.


2.     Give to mom, see her smile and make her day.

Contact us

Name

Email *

Message *