 |
| Love Birds Ornament by Leila Bidler |
This is a perfect little gift to brighten someone's day, you could even make it make with your children!
For this project you will need:
Makin's Clay® Natural, approx. 60g or less
Makin's® Clay Roller
Makin's® Clay Cutter of your choice
Makin's® Clay Tool Set
Gold leaf flakes
Metal leaf adhesive
Needle tool
Hand drill
Chalk pastels (I used raw sienna, burnt umber and dark red)
Soft paintbrush
Firm paintbrush
Twine
Gold/metallic sewing or embroidery thread (and needle)
Superglue
Instructions:
Roll out your Makin's Clay® natural and cut out a center shape. In my example I am using the small heart shaped cutter from the Makin's® Mini Geo 37004 set.
After cutting out the center shape cut out the basic house form and two stripes for the roof. You can do that freehand, place it on the clay and cut out the shape using you Makin's® Clay Tools. Put one stripe for the roof near the house shape to see where to best trim them/how long to make them.


Take a soft paint brush and wet the "roof" with some water to be sure everything adheres permanently and then use the Rasp from your Makin's® Clay Tools Set to trace lines on the "roof" to mimic wood.


Now use Rasp and Chisel from your Makin's® Clay Tools Set to create alternating lines and dots on the surface. Follow the example below or invent your own fun pattern! Poke a hole also on the center top to be able to string it (you could also skip this and glue a magnet on the back if you with to make a magnet instead of an ornament to hang).


Now we need to color our tiny house, to do that grate off some chalk powder form your chalk pastels, we will first use raw siena and burnt umber on the house and then add also some red for the roof. Wet your paintbrush just slightly, pick up some of the light color and brush it onto the house vertically. Then add some of the darker brown. You want it to be almost "dry brushing" to imitate wood, not a uniform coverage of color. If you do not like what you see or add too much color, no problem at all, just wipe it off with a wet towel and paint over it again.


Now on to making the 2 tiny birds! Start by rolling a small ball of Makin's Clay® Natural with your hands, then shape it into a crop and pinch the rounded end into a tiny head shape:

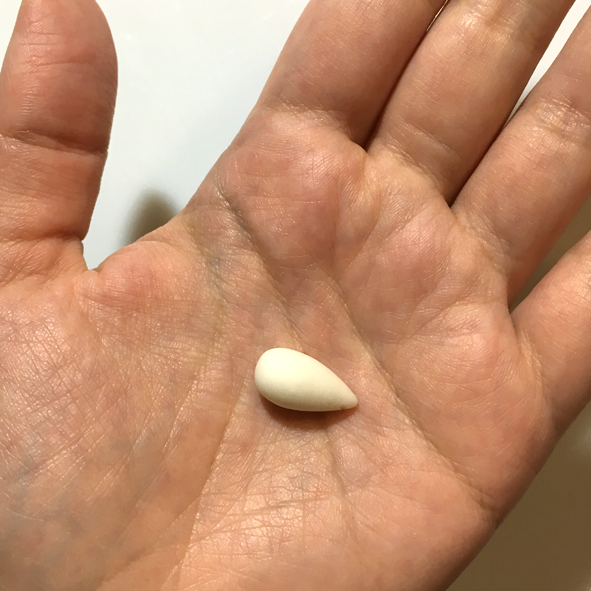


Make a second little bird and with the help of your paintbrush and a drop of water adhere them to the house and with your needle tool give them eyes.
To complete our ornament we now need a heart shaped bead. Roll a piece of Makin's Clay® Natural into a small egg shaped ball and then use your needle tool to indent the rounded top to form the heart shape. Using your needle tool also poke a hole from top to bottom so we will be able to string it.


Let your creations dry for 24 hours.
After they are completely dry use your soft paintbrush to apply your Metal Leaf adhesive on the birds and the heart shaped bead. Tip: put the bead on a skewer to hold it while applying the glue and the gilding flakes!
When the glue is fresh it is milky-whitish, let it dry for about 10-15 minutes and it will turn completely transparent and sticky.
The easiest way to apply Gilding Flakes is to keep them in a jar with a lid and to just push in the creation, lift it up, but keep it above your jar and using a paintbrush with firm bristles brush off the excess, back into the jar to use again.


Use a small hand drill to make the holes in your pattern large enough for needle and metallic floss, if needed.
Thread the metallic floss thru the holes and secure it on the back with small nods. To be sure the nods will hold you can also use a drop of superglue to secure them.


Now you can use some twine that you can pass thru the top hole and the heart shaped bead to hang your ornament.


