Pages - Menu

Search This Blog

Showing posts with label handmade card. Show all posts

Monday, August 6, 2018

Sea Themed Card with Polymer Clay Accents DIY Video - Makin's Clay® Design Studio


In this DIY episode from the Makin's Clay® Design Studio from our MakinsClayUSA YouTube channel, Cindi McGee shares how to create custom accents for paper crafting projects.  She uses Earth Tones & White Makin's Clay®, along with our Makin's® Sea Shell Push Mold, to make dimensional shells for this handmade card.  


Thursday, June 28, 2018

"Happy Birthday" Card with Polymer Clay Dress Accent

"Happy Birthday" Dress Card by Iris Rodriguez
Hello Makers!
Ever feel sassy on your birthday and want to put on your best clothes and paint the town red? Not only does this card make a cute gift, but also may inspire that special someone to get out there and paint the town red and invite you along. How fun is that? Lol! If not, it’s okay. A nice quiet birthday is fun too. This cute red dress card was made with the Black Makin’s Clay® and Coil Texture Sheet from Set H.
Materials:
  • Makin's Clay®– Black  
  • Makin's Professional® Cutting Mat
  • Makin's Professional® Ultimate Clay Machine® 
  • Makin's®– Texture Sheet, Set H (Coils)
  • Makin's®– Clay Roller
  • Prima Marketing – Finnabair Fire Ruby Metallic Wax
  • Cardstock-Black, Red
  • Scrapbooking Paper
  • Ribbon-black
  • Rhinestones
  • Sentiment Stamp
  • Imagine-Nocturne VersaFine Clair ink, clear embossing powder
  • Aleene’s Clear Glue

Instructions:


Get a dress pattern from the internet, or draw your own. Keep in mind the desired card size and therefore the dress size. Scale your image on the computer.
To make a template, use chipboard and graphite paper. A hard surface, like the chipboard, helps to guide the knife around the clay, when cutting out the dress.
Place graphite paper over the chipboard, with the darker side down. Place the image over the graphite paper. Trace over the image with pencil or pen. 
Cut out the pattern with scissors or precision knife.


Using the Makin's Professional® Ultimate Clay Machine® roll out a sheet of Black Makin’s Clay® to the third thickest setting.

Place the texture sheet over the sheet of clay and press firmly into the clay with a roller.
Cut out the dress. Use the chipboard to guide the knife. Do not press the dress into the clay, it will distort the stamped pattern.
To give the dress a little movement and dimension. Make slight folds by pinching the clay down the center. Pinch the down on the edges. No need to drape over anything, Makin’s Clay® will keep its shape.

Let the dress dry for 24 hours to cure.
Now it’s time to embellish the dress. Rub the metallic wax with your fingers on the raised areas. Glue a ribbon on the waist.
Cut a piece of scrapbooking or other paper to desired size. Ink the edges. Glue onto black cardstock.
Stamp the sentiment onto a red cardstock paper and emboss. Assemble the card.

Monday, June 25, 2018

Beach Girl Greeting Card


Design Team Member Steph Ackerman recently shared this cute handmade greeting card with Makin's Clay® seashell accents.  Steph used the Makin's® Sea Shells push mold to make her dimensional embellishments.  Makin's Clay® is perfect for paper crafts as it is lightweight, flexible, and acid free when dry. 

Friday, November 10, 2017

Autumn Card


Design Team Member Steph Ackerman recently shared this lovely Autumn card with a Makin's Clay® accent.

Sunday, January 15, 2017

Sending You a Note Card


Design Team Member Steph Ackerman recently shared this all occasion greeting card, with a wonderful Makin's Clay® feather accent, here on her blog.   Makin's Clay® is great for creating embellishments for paper crafts as it is lightweight and flexible when dry, and can be push molded, cut with clay cutters, die cut, craft punched, and more.

Saturday, December 10, 2016

Merry & Jolly Holiday Cards


Design Team Member Steph Ackerman recently shared these "merry & jolly" holiday cards on her blog.  She used Makin's Clay® and our Christmas Nature & leaves push molds to create her holly  and leaves for her paper poinsettia accents.


Saturday, December 3, 2016

Visions of Sugar Plums Holiday Card


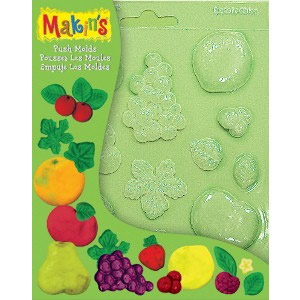
Cindi McGee recently shared this holiday card with a bit of a different holiday theme.  Cindi used Makin's Clay® and the Makin's® Fruits push mold to create her sugar plum accent.  Her blog post includes a DIY video showing how she created this card.

Wednesday, November 30, 2016

Holly Holiday Card


Design Team Member Martha Lucia Gomez recently shared this pretty holiday card with Makin's Clay® accents on her blog.   Martha used Makin's Clay® and the Makin's® Christmas Nature push mold.

Monday, June 20, 2016

Gift Card Envelope by Irit Shalom

Design Team Member Irit Shalom recently shared this colorful gift card envelope here on her blog.   She used Makin's Clay® to create her charming fairy embellishment.   Makin's Clay® is ideal for paper crafting as it is lightweight and flexible when dry, and acid free when dry so it is safe for memory books also.

Thursday, December 17, 2015

Christmas Cheer Card by Steph Ackerman

It's not too late to make a special handmade holiday card for someone special, or a gift tag!  Design Team Member Steph Ackerman recently shared this great holiday card here on her blog!  She used Makin's Clay® and our Christmas Decor push mold to create her dimensional embellishment.


Thursday, May 23, 2013

Card Embellishments with Makin's Clay®

Makin's Clay® remains lightweight and flexible when dry, making it a great alternative for creating custom embellishments for hand-made cards.  Here's a simple card designed by Stephanie Bernard to inspire you to try it yourself - Cindi Bisson

Supplies:

Makin’s Clay®:
120g Red Clay
120g Blue Clay
Recommended Makin’s® Tools:
Roller & Cutters
Flower Cutter
Other Materials:
Sugarloaf Products, Inc Alphabet Stamps
Sugarloaf Products, Inc Black Stamp Pad
Mara Mi Patterned Paper
Bazzill White Cardstock
Therm O Web Zots Adhesive
10 Business Cards or 10 card size pieces of card stock
Scissors or Paper Cutter


Directions:

Mix equal amounts of red and blue clay.
 
Roll purple clay out to the thickness of five business cards.

Stamp ‘Thank You’ onto clay.

Cut around stamped image, as shown.

Cut three purple flowers.

Roll white clay out to the thickness of five business cards.

Cut one white flower.

Use leftover clay to form mini balls for the center of flowers.

Add a white flower to stamped image.

Let clay air dry.

Cut patterned paper into one 5x7 card.

Adhere stamped clay to card.

Cut White cardstock squares slightly larger then purple flowers

Adhere purple flowers to white cardstock squares and add to card.

Contact us

Name

Email *

Message *