Pages - Menu

Search This Blog

Showing posts with label gears. Show all posts

Sunday, March 10, 2019

Geared Heart Pendant

GEARED HEART PENDANT by Patricia Krauchune 
I love using small pieces of left over clay to make a new project.  Nothing goes to waste if you use Makin's Clay®!

Supplies:

Small piece of dried Makin's Clay® (any color)
6 Jump rings
Large, medium and small gear
Watch stem
DecoArt® Extreme Sheen Copper paint
Tin paint, Aged Bronze paint 
Paintbrushes 
Small screw
Patina paint
Drill to make small holes (or similar tool - Makin's Clay® is easily drilled with a pick tool, even after it is dry!)
Craft knife or carving tool
Clay tool to make "carved" lines 
Jewelry pliers 
Bead chain
Krazy® Glue or strong clear drying adhesive such as Beacon 527®
Makin's Professional® Cutting Mat 

Instructions:

Draw a heart shape on a piece of dried clay. 

Carve out the heart shape and refine the edges.

Drill small holes as shown in the picture. 

Attach jump rings to the holes you just drilled.


Texture the heart by carving some lines.

Start layering part by first painting on copper, tin, and then aged bronze metallic paints. 


Stack the three gears starting with the largest and ending with the smallest. Push a watch stem into the holes in the gears and glue to the heart front. 

Add a tiny screw to the base of the heart. 

Lastly, use a little patina paint to age the piece. 

Add bead chain.


Tuesday, February 5, 2019

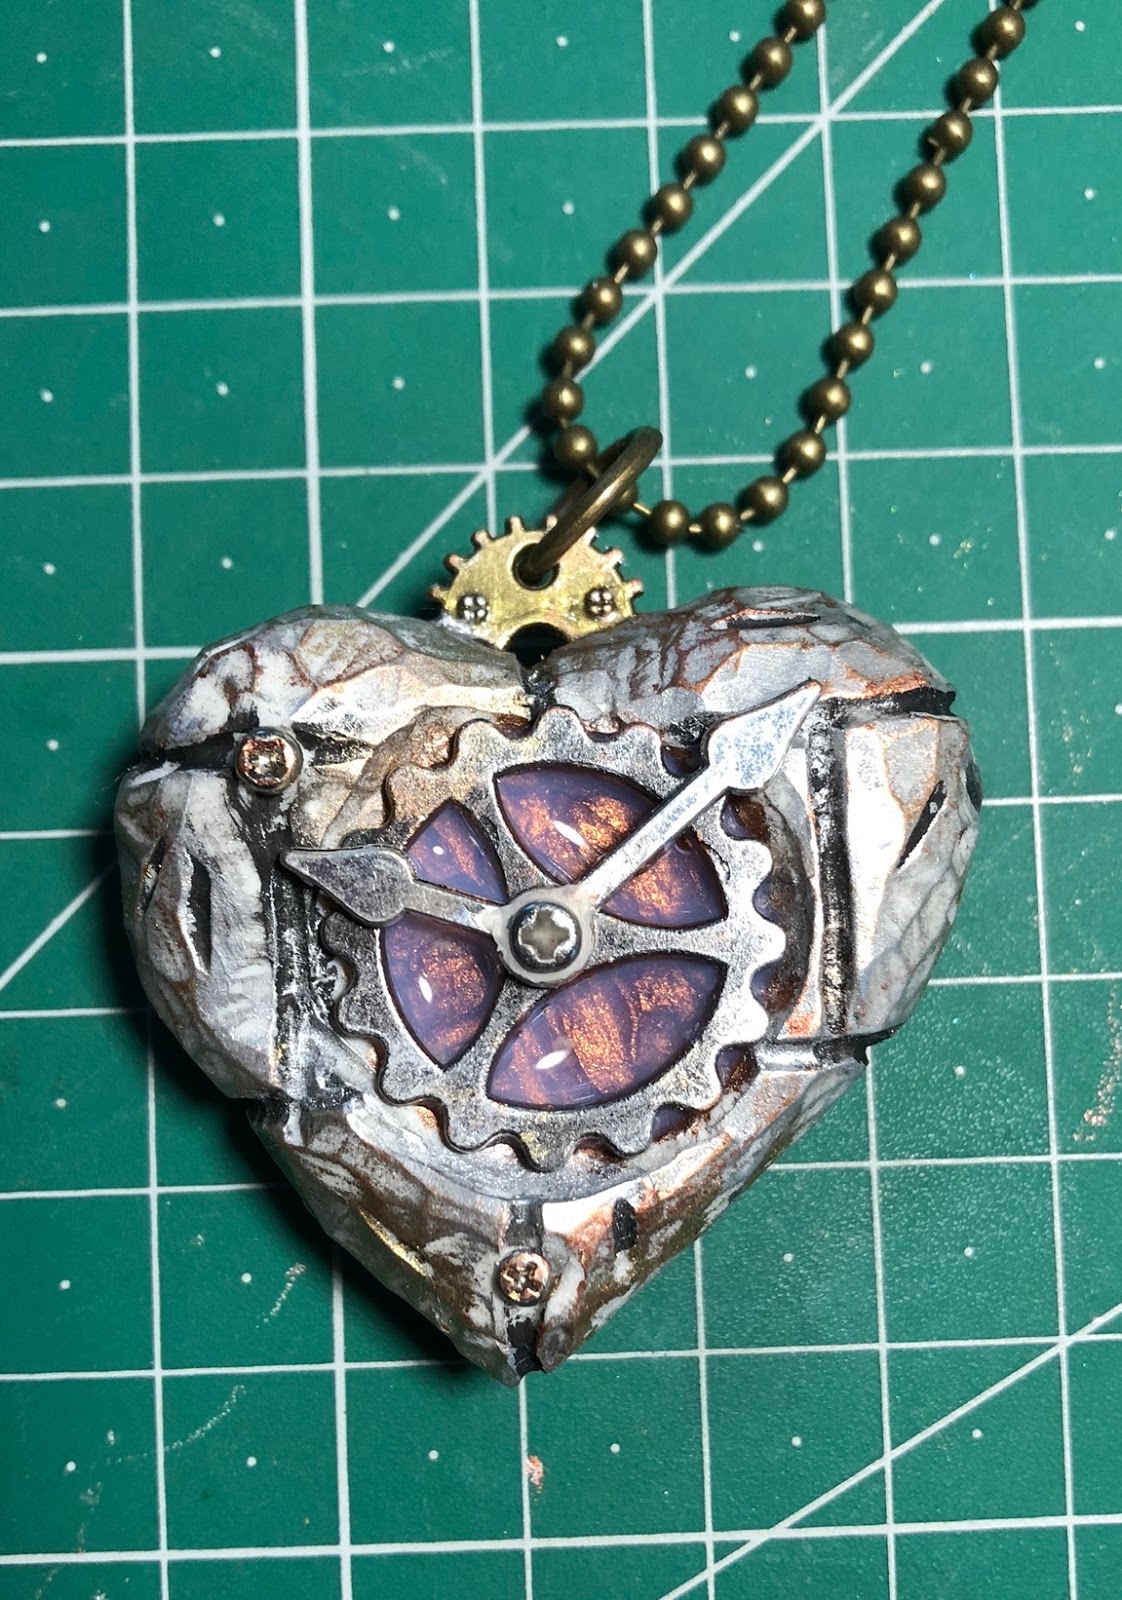
Hard Hearted Carved Polymer Clay Heart Pendant


Hard Hearted by Patricia Krauchune

I love the fact that there is no waste with Makin’s Clay®. To demonstrate that, I left a package of clay opened for a couple of months to dry out.
 Here’s how I proceeded!
Supplies:
  • Makin's Clay® - White 
  • Makin's Professional® Cutting Mat  
  • Carving knife
  • Linoleum cutter
  • Large gear, Small Gear
  • Clock hands
  • 5 Minute Epoxy 
  • Art C® Wax
  • Small screws
  • Diamond Glaze
  • Bead chain 
  • Jump ring

Instructions:
Draw a heart shape onto some totally dried out white clay. Cut out with a scroll saw.
Next, using a sharp knife, round off the edges. HINT: Draw a center line around the middle of the edge and round toward the line.

Draw some lines then use a linoleum cutter to make some grooves.
Hollow out an area for the large gear and place the gear over the opening.

Cut a groove at the top of the heart to hold a small gear that will be the bale.  Epoxy the gear into the groove.
Epoxy a small screw through the hole in the clock hands and gear.  Set aside to cure. 


I also added some small screws to the front and back.

The heart was “antiqued” with Art C® wax.  A bit of Diamond Glad was added to the center of the gear.

A jump ring was added to the top gear and the pendant is hung with a bead chain.

Sunday, November 25, 2018

Winged Steampunk Bottle


The Steampunk genre was made up in the 80s; inpired by fiction writers Jules Verne, H.G. Wells and many others.  Flying machines and submarines are devices that embody the genre, along with the cool corsets and Victorian dresses. One rule about steampunk is that your devices/machinery has to be made out materials that existed in the Victorian era; retrofit them with steampower tech. Another rule is that you use your creations for good (it’s supposed to be a utopian world). With that in mind, I know bottles existed in the Victorian era; so, my bottle gets to have wings, fly and send positive messages. Aaah…so fun to imagine. I made my little bottle using Makin’s® Clay Gears Texture sheet and black Makin’s Clay®. Sorry, it’s not steampowered yet, working on it though, lol!     

Materials


Instructions
Start out by selecting a bottle. Rinse it out and let it dry completely.
Using Makin's Professional® Ultimate Clay Machine, roll out a sheet of Black Makin’s Clay® to the second thickest setting (setting #2).

Making the sheet metal. Ensure that the clay sheet will wrap around the bottle completely. 
Wrap the sheet of clay around the bottle, cut out the excess clay. 

Add glue to the clay and adhere to the bottle. Make a faux sheet metal by adding indentations with the blunt side of the clay blade.  

Add divots (depressions) on the edges with a stylus. This is simulates welded sheet metal.

Making the Wings. Download wings templates from the internet or draw them out. Trace the wings onto chipboard. You only need one. If you flip the wing horizontally in the opposite the direction, you can make the mirror side.
Place the wing template over the sheet of clay and cut out with scissors or precision knife. 
Place the gears sheet over the clay and push in one gear at time into the clay in a random fashion. If you place the whole sheet over the clay, they look perfectly linear and simply does not look right.

Making the Embellishments. I used a Steampunk theme mold to make the embellishments. Push in the Black Makin’s Clay® into the mold, cut any excess clay.
Allow all your clay pieces to cure for 24 hours. 


After all the piece cure, paint them with Black Gesso. The black Gesso make makes everything look uniform and the metallic wax adheres better.
Color the bottle, wings and embellishments with Baroque Gilder’s Paste waxes; Celtic Bronze, German Silver and Silver. Glue all your piece to the bottle. You can use soft cloth or your fingers. Really, your finger are the better tool. I used one finger for each color, lol! The best and faster way to clean your fingers is with rubbing alcohol or baby wipes. Then you wash with soap and water. 
All you have left to do is adhere all our pieces to the bottle and now you have a yourself a little cool steampunk device.

Sunday, July 8, 2018

Open Heart Steampunk Pendant

Open Heart Steampunk Pendant by Patricia Krauchune
This month I decided to used some of the scrap dried clay I have accumulated after almost 4 years on the Makin's Clay® Design Team. I will show you, through this project, how there is no waste with Makin's Clay®. Let's get started! 

Supply List:

Leftover Dried Black & Red Makin's Clay®                   Heart Punch                     Sandpaper
ART C® Wax in Gold/Silver/Copper                             Krazy® Glue                    Scissors
1 Large and 1 Small Gear                                            2 Oval Jump Rings           1 Small Brad
Beadalon® Wildfire™ Bead Weaving Thread                 Linoleum Cutter               Small Key
Beacon™ Fast Finish Decopauge                                  Japanese Screw Punch

Recommended Makin's® Tools:

Makin's Professional® Cutting Mat

Instructions:

Here's a drawer where I put all the leftover pieces of clay from previous projects.  You will see that nothing goes to waste.

From a piece of paper, make a heart shape pattern and trace onto a piece of leftover dried Makin's Clay®.*

Cut out the heart with scissors.

*If you do not have any leftover clay, roll some out on the #1 setting of the Makin's Professional® Ultimate Clay Machine® and let it dry for several days.

Using the original heart pattern, cut out a smaller heart from the center of the pattern.  Now trace the cut out section onto the heart shaped piece of clay.


Sand the edges till smooth.  I punched some holes into the heart pattern, then transferred the alignment onto the clay, then punched the holes out using a Japanese Screw Punch.


I layered a small gear over a larger gear and used a small brad to secure together.   Texture was added with a linoleum cutter.


At this point, I used some ART C® waxes to give the appearance of metal.  I used Gold, Copper and Silver wax.

I punched out a small heart from some leftover red clay.


Beadaolon® Wildfire™ Bead Weaving Thread was used to capture the gears in the center of the heart. I used Krazy® Glue to secure the little red heart.  A little key was added to the heart bottom using an oval jump ring and a larger oval jump ring was added to the top to attach a chain.

The final step was to seal the heart using Beacon™ Fast Finish Decoupage.


There you have it, a cool little pendant made from leftover clay.  Nothing is wasted using Makin's Clay®!


Tuesday, November 28, 2017

Butterfly & Gears Steampunk Decorative Panel


Design Team Member Bea Grob recently shared this Butterfly & Gears Steampunk Decorative Panel.  She used Makin's Clay® to die cut her gear embellishments.   Makin's Clay® has a lightweight and flexible quality that makes it perfect for die cutting!

Monday, June 26, 2017

Love Never Rusts Assemblage


Design Team Member Iris Rodriguez recently shared this creative assemblage project featuring Makin's Clay® - "There are times in my mixed media projects, I am in need of special effect. Although, manufactured embellishments are great, I use them all the time, you can't reshape them. So this is when Makin's Clay® comes in super handy. For this project I sculpted the heart, then cut out the center, painted it and glued to the box."  Find out more about how Iris created this project here on her blog.

Sunday, November 6, 2016

Steampunk Angels Tag

Steampunk Angels Tag by Irit Shalom

Design Team Member Irit Shalom recently shared another of her detailed mixed-media tags - this one with a "steampunk & angels" theme.  Irit used Makin's Clay® to mold her angels embellishment.

Thursday, May 26, 2016

Memory Box by Lucy Reese


MEMORY BOX
Designed by Lucy Reese

SUPPLY LIST:

Makins Clay® - Earth Tones
Makins Clay® Cutting Mat
Makins Clay® Roller
Makins Clay®- Lace Texture Sheet - Set
Xacto Blade
Jewelry Shoppe - Antique Silver Hammered Teardrop
Metal Embellishments
ArtC Trinket Box
Inka Gold- IceBlue & Violet
Glossy Accents
Lumiere Paints- Metallic Olive Green, Halo Violet Gold, & Pearl Violet
Staz On- Black
Deep Red Stamp - Quantum Background
Crafters Workshop - Mini Gears & Cogs Stencil
Donna Downey - Numbers Stencil

INSTRUCTIONS:

1. From the Makins Clay® Earth Tones pack choose the green and purple, twist them together to marbleize and roll out to desired thickness.

2. Lay the Lace Texture Sheet on top of your freshly rolled clay and using your fingers press down until you see that the cavities are filled. You may also use your clay roller for this step as well. 


3. Now take your teardrop jewelry finding press it evenly into your beautifully textured clay.

4. Grab your X-acto knife a trim away the excess.


5. To highlight the texture, I chose Inka Gold in IceBlue. Swipe it on with your finger, give it a moment, and then buff it to a shine.


6. Time to give it even some more shine by adding a nice coat of Glossy Accents. Which also seals and protects the piece. Remember, Glossy Accents will go on cloudy but turns clear when dry. While your focal piece is setting up, grab the metal trinket box and get started on the 2nd half of this project.


7. Using the Lumiere paint in Metallic Green Olive paint the entire box. You may also Gesso before adding the Lumiere paint if you choose to do so.

8. After your paint is dry, add some interest by using the mini cogs and gears stencil with the Lumiere in Halo Violet Gold. Let dry.

9. For more interest, I chose to use Staz On in black with the Quantum Numbers stamp by Deep Red.


10. I wanted to bring in some silver to help tie in the teardrop. Here I added the Art Alchemy paint to the numbers stencil.

11. For some final touches, I decided to frame the focal with some metal gears and cogs that I cut in half. The key, tag, and twine were in my stash and made a cute addition. To finish off, use the Inka Gold in Violet to add some color the the edge of the lid. 


Contact us

Name

Email *

Message *