Pages - Menu
Search This Blog
Showing posts with label butterflies. Show all posts
Friday, August 16, 2019
Butterflies in Flight Wall Art
Design Team Member Leila Bidler recently shared this colorful Butterfly wall art made with Makin's Clay®. Leila used a craft punch to cut butterflies from sheets of dry Makin's Clay®. You can die cut sheets of dry Makin's Clay® too!
Wednesday, July 24, 2019
It's a Beautiful Day Calendar Page
Design Team Member Nancy Nickel recently shared this pretty calendar page embellished with tiny punched Makin's Clay® butterflies. Thin sheets of dry Makin's Clay® are perfect for using with craft punches, die cutting machines, and more. And, Makin's Clay® is acid free when dry so it's safe for scrapbooking and all types of paper crafts!
Saturday, April 27, 2019
Butterfly Polymer Trading Coins
![]() |
| Butterfly Polymer Trading Coins by Bea Grob |
Let's make some Artist Trading Coins from Makin's Clay®. It is all the rage right now, the Artist Trading Coins, so I jumped on the band wagon and made my own version of Trading Coins.
Materials:
Makin's Clay® - Concord Blue, Olive, White
Makin's Professional® Ultimate Clay Machine®
2 1/4" Round circle cutter
Script rubber stamp, butterfly rubber stamp
Butterfly die and die cutting machine
Embossing ink
Embossing powder (pink)
Makin's® Leaves Push Mold
Kraft colored cardstock
Tacky glue
Faux rhinestones
Instructions:
I started off with some Concord Blue Makin's Clay® which I ran through the Makin's Professional® Ultimate Clay Machine® on the setting #4.
I put the sheet on a tile and then added some script with a rubber stamp, by pressing it into the clay.
Next I used a 2 1/4” circle cutter to make some round shapes from the printed sheet.
Next, I ran some white clay starting at setting #1 and progressing through setting #9, the thinnest setting. Again I placed it onto a tile and then I dusted the whole sheet with some cornstarch.
My next step was to add some stamping with embossing ink.
Next I sprinkled some red embossing powder onto my butterflies.
And yes, you can heat set it with the heat gun. Just make sure that you aren't to close to the clay and that you move the heat gun around all the time. And a nice side effect it does try your clay at the same time, especially because we have the thinnest sheet possible.
I also made some leaves with the leaves push mold. I simply pressed in some green clay, which I have previously mixed using some olive and white clay.
Next I sanded the blue base for the coins with a simple nailfile, just to make sure that I have a nice and smooth edge.
Now comes the fun part, putting all together. I had my coins made with craft colored cardstock (the size of those is 2.5 inch, which is the size a trading coin is usually) , my blue/gold circles from Makin's Clay®, my butterflies and my leaves. I have also grabbed some bling in form of rhinestones.
I used tacky glue to assemble everything together.
I hope you give them a try too, I think they are pretty cute.
Until next time.
Bea
Saturday, January 26, 2019
Altered Bottle Challenge - "Garnet & Wings"
Anita Buckowing has started a Facebook challenge group called BOTTLE UP! 2019. If you'd like to join the fun, here's what the group is about:
“Welcome to BOTTLED UP! 2019.
This is a themed project-based group that is open to all with the hope that all participants have fun and enjoy sharing their creations and maybe learn something too.
This Group was inspired by a post on MyModernMet.com that detailed a ceramic artist that created unique bottles for 100 days straight. After discussion with a few friends, we decided to challenge participants to create a unique bottle every two weeks (total of 26 bottles in 2019).
Since some folks like themes to help provide direction to their creative energy, we decided to publish a schedule (each month has a birthstone color theme and every two weeks has a subject theme).”
While I am not sure I will be able to meet the challenge and keep up with creating a bottle every 2 weeks, I have challenged myself to create at least one a month!
It’s a fun way to think outside my normal “clay jewelry” box these days. It’s also a great way to showcase not only my favorite glass etching products from etchall®, but to show and share with the group the broad range of applications of another of my favorite versatile products - Makin’s Clay®!
Materials:
Glass bottle
Makin’s Clay® - Red
Makin’s Professional® Ultimate Clay Machine®
Makin’s Professional® Cutting Mat
Instructions:
Make a sheet of Red Makin’s Clay® by rolling through the Ultimate Clay Machine® beginning on setting #1, and increasing one setting at a time to setting #8. Let sheet dry overnight. Cut to as size that will fit through your die cutting machine.
Following manufacturer instructions, cut desired number of butterflies from dried sheet of Makin’s Clay®. Makin’s Clay® remains flexible after drying and is lightweight, not brittle, etc. A great option for die cutting to add dimension to your projects. Use clay tool, or craft knife, to remain any unwanted pieces that remain after cutting.
If you'd like more information on how I created the etched glass effect on the bottle, find those instructions here.
Use Beacon Mixed-Media Glue to mount clay butterflies to the bottle where desired.
If you have the desired color faux gemstones, apply as desired to make “flight trails” behind butterflies. If you only have clear/silver gemstones, a great way to color them is with a touch of alcohol ink. Non-adhesive faux gemstones can be substituted and adhered with the same Mixed-Media Glue.
Add a bit of glow inside your bottle and highlight your etched butterfly details with a string of LED lights. These lights from FloraCraft® can be turned off and on with a simple twist. I used a touch of the Mixed-Media Glue to actually adhere the plastic battery case to the bottle top.
Wrap organza ribbon around the rim of the bottle and up far enough to cover the light case. Tie a bow and the bottle is complete!
Monday, March 5, 2018
Floral Accessory Hanger
Hi everyone, Steph Ackerman here with a new project for Makin's Clay®.
With Spring finally in the air, I'm thinking of butterflies and flowers. I found this floral hanger that I thought could be used to hold hats, head bands, hair bows or even jewelry.
Supplies:
Makin's Clay® - White, Red
Makin's ProfessionalⓇ
Makin'sⓇ
Beacon Adhesives - 3-in-1
Prima Metallic Paint
Mod Podge Mold
Floral Hanger
Instructions:
Paint the floral hanger with Prima metallic paint and put aside to dry.Mix both red and white clays together until you achieve a nice marble effect.
Use the Ultimate Clay Machine® to create a nice thin layer of clay. Start on setting #1 and move the settings until you get the thickness you desire.
I stopped at setting #5. Look at that gorgeous sheet of clay!
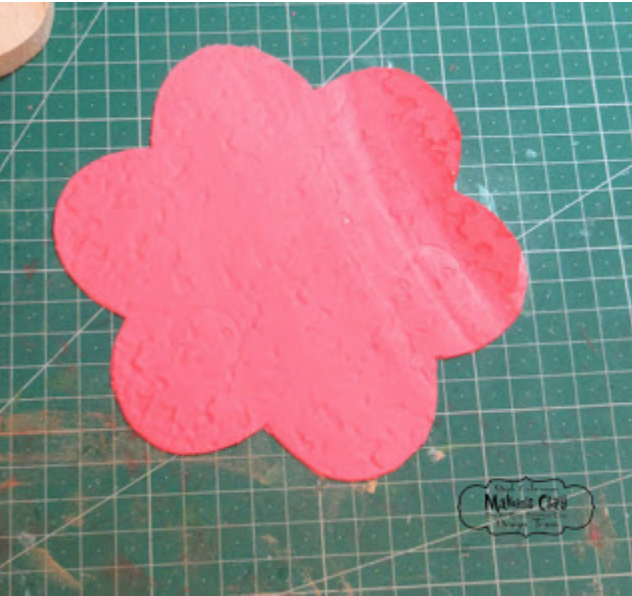
Next, place the texture sheet over the clay and use the roller to impress the design into the clay. The harder you press, the more detail is impressed into the clay.Place the floral hanger over the clay and use the chisel to cut the clay to fit.
Because I was working with damp clay, there are no tears in the clay when cutting with the chisel.
Use Beacon Adhesives to adhere the clay to the hanger. Allow to dry then use the chisel to cut a hole in the clay and reinsert the hanger.
Use a mold to create butterflies from the remaining red and white clays.
Add assorted flowers and buttons to the left side. Then place butterflies on top of them for a 3 dimensional effect. Since I had some extra butterflies, I added them along the right side.
Isn't it sweet? Do you know a little princess who would love this in her room?
Thanks for stopping by.
Thursday, March 23, 2017
Spring Butterflies & Flowers Wall Plaque
Design Team Member Steph Ackerman recently shared this cheerful springtime mixed-media wall plaque. Steph used Makin's Clay® to create her dimensional butterfly accents.
Tuesday, March 21, 2017
Fairy Collage Frame
| Fairy Collage Frame by Irit Shalom |
Hello my dear crafty friends and welcome to my very last inspirational post as part of the Makin's Clay® Design Team It's not a real tutorial, but just a kind of " how to make this project" with photo steps.
Product list:
Makin's Professional® Cutting Mat
Makin'sR Roller & Cutter set
Beacon 3-in-1 Adhesive™
Assorted molds
Pentart Acrylic paints
Die Versions Die
$1 shop frame
Instructions:
As the first step I made those two Makin's Clay® hearts using white Makin's Clay® rolled thin and die cut with Die Versions XL Heart die. As you can see the die cutting was just partial, the intricate details are embossed onto the clay instead of cut from it. The technique leaves you with fantastic elements for your projects.
I used Pentart Acrylic paints (some are metallic) to paint all dry clay shapes. Don't try to paint them perfectly, just add some color over the shapes and let them dry.
Next, I arranged the shapes over the clay hearts and make the collage of vintage shapes, fairies and butterflies. Beacon 3-in-1 Adhesive holds the pieces together. Arrange the whole collaged piece over the frame.
Saturday, February 4, 2017
Butterflies in Blue Bottle
Sunday, January 29, 2017
Decorative Clock
Design Team Member Lucy Reese recently shared this creative clock embellished with Makin's Clay®. What a great example of the broad range of applications of Makin's Clay®!
Tuesday, January 3, 2017
Butterflies & Bulbs Bottles of Hope
![]() |
| Butterflies & Bulbs Bottles of Hope by Steph Ackerman |
Bottles of Hope are small glass bottles covered with polymer clay and given to cancer patients. They symbolize a wish and a hope for health. This project was started in 1999 by a Rhode Island cancer survivor and has spread internationally. Bottles are made by artists, students, survivors, seniors and many more who volunteer their time and love. Learn more about this worthwhile project, see a gallery of many creative bottles and more here on their website.
Supplies:
Makin's®
- Roller and Cutters set
- Clay Tool set
- Clay Cutters - Stars, Suns, Butterflies
- Texture Sheets - Set H
Beacon Adhesives - 3-in-1 Adhesive
Sizzix® Dies & Big Shot™ Machine
Tattered Angels Glimmer Mists
Instructions:
I found these cute little light bulb bottles and knew they'd be perfect for the Bottles of Hope. I wrapped them with white clay working the clay around the bottles and sealing the edges together. Don't worry about the imperfections because those imperfections give the bottles character. Use the mallet from the Tool Set to finish the edges around the light bulb.
I let the clay dry approximately 48 hours then added color with assorted Tattered Angels Glimmer Mists.
I wanted a base for each bottle, so I die cut hardened red clay using a Sizzix die (see my earlier post on how I prepared the clay). I often die cut fresh clay, but I wanted to use clay I had already prepared. I used Beacon Adhesives to adhere the die cuts to the base.Next I selected an assortment of clay cutters.
Using the Roller, I rolled out yellow clay and the lightest color of clay in the Earth Tones collection. Using one of the Texture sheets from Set H, I used the Roller to embed the design into the clay.
From the textured clay, I cut small butterflies.
Add butterflies randomly about the bottles.
And you now have some sweet bottles to give away to brighten the day of someone facing cancer.
Thanks for stopping by today.
Steph
Friday, April 29, 2016
Free Bird Mixed-Media Canvas by Lucy Reese
Design Team Member Lucy Reese recently shared this creative mixed-media canvas - she used Makin's Clay® to create her bird which she textured with Texture Sheets, and some of her flower accents which she made with our Floral push mold.
Subscribe to:
Posts (Atom)