 |
| Fairy Collage Frame by Irit Shalom |
Hello my dear crafty friends and welcome to my very last inspirational post as part of the Makin's Clay® Design Team It's not a real tutorial, but just a kind of " how to make this project" with photo steps.
Product list:
Makin's Professional® Cutting Mat
Makin'sR Roller & Cutter set
Beacon 3-in-1 Adhesive™
Assorted molds
Pentart Acrylic paints
Die Versions Die
$1 shop frame
Instructions:
As the first step I made those two Makin's Clay® hearts using white Makin's Clay® rolled thin and die cut with Die Versions XL Heart die. As you can see the die cutting was just partial, the intricate details are embossed onto the clay instead of cut from it. The technique leaves you with fantastic elements for your projects.

I used Pentart Acrylic paints (some are metallic) to paint all dry clay shapes. Don't try to paint them perfectly, just add some color over the shapes and let them dry.
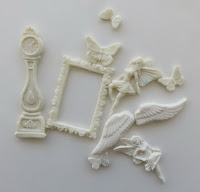
Next, I arranged the shapes over the clay hearts and make the collage of vintage shapes, fairies and butterflies. Beacon 3-in-1 Adhesive holds the pieces together. Arrange the whole collaged piece over the frame.


No comments:
Post a Comment