Pages - Menu

Search This Blog

Showing posts with label mobile. Show all posts

Saturday, June 23, 2018

Polymer Clay Feathers Wind Chime

Polymer Clay Feathers Wind Chime by Bea Grob 

I'm back with another project with Makin's Clay®, some bead and wire to make a wind chime or chandelier.

Supplies:

Makin's Clay® 60g Straw, Blue, Green 
Several colors of Decofoil (this is a good project to use up leftovers
Steel Rule Die Feather and Flower (or any other shape you like)
A top Ring, mine was in a starform, but plain circle would work too
An assortment of Beads and Crimp Beads
Wire I used Soft flex Nylon coated Beading wire Diameter .019 inch,  49 Strands

Tools:          

Makin's® Clay Roller
Makin's Professional® Ultimate Clay Machine®
Sidecutter for cutting wire
Crimp plier

Instructions:   
 
I started by rolling the clay through the Makin's Professional® Ultimate Clay Machine®, beginning on setting #1 and proceeding through each setting ending on #5.  I made three sheets from the three colors. The color doesn't matter so much as we going to go over it in the next step.

Whenever I want to use Decofoil on a large piece I spray the rolled out clay and let it set for about 1 minute. Just to make sure that it is sticky enough to pull of the metallic from the foil

Next, I started applying only parts of the foil. As usual, I do burnish a bit and then rip it off like a Band-Aid. As you can see I did use first all my leftovers and I used different colors of foil.

When most of the clay is already covered you can go on easily with the foil allover and use an old giftcard to burnish the foil. Sometimes it takes several passes until the foil decide to stick.


At the end I had these pieces all covered with foil from both sides, as you can see.

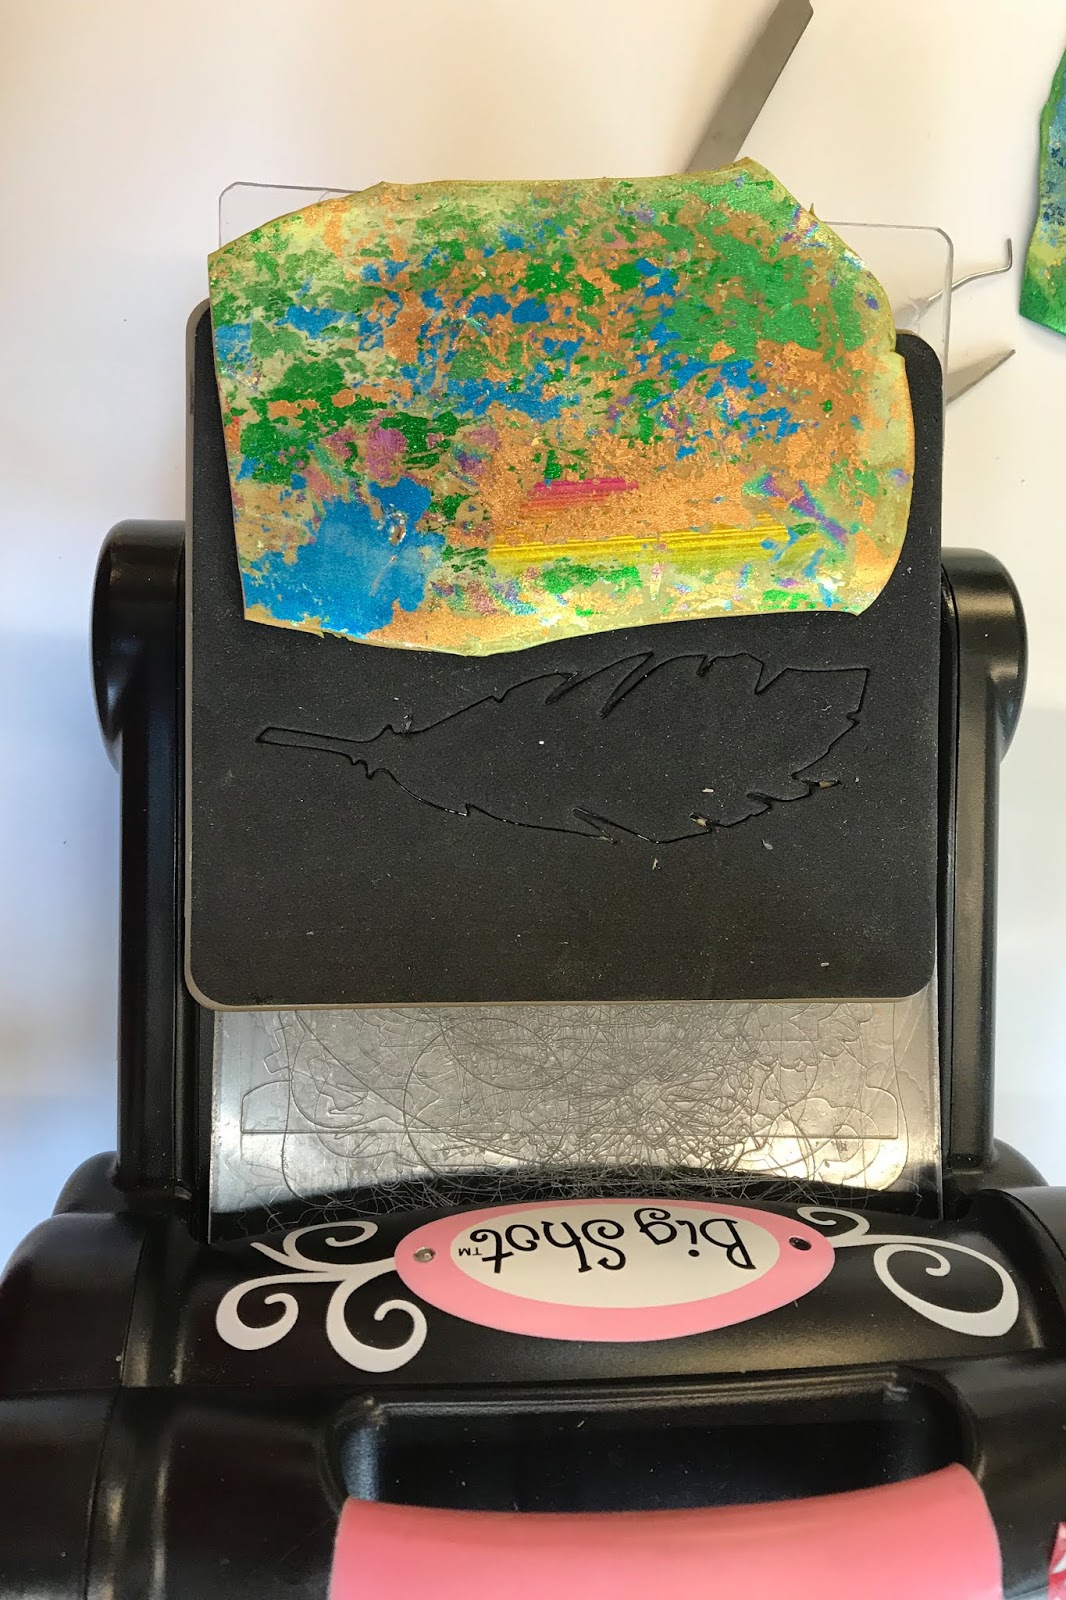
I let it dry completely over night and the next day I ran it through the Big Shot die cutting machine with a Steel Rule die. I made Feathers and flowers.

I had no exact plan how many of those feathers I needed, so in the end I had 4 leftover and also some flowers, but I certainly can use them in other project.

I grabbed an assortment of beads, my ring and the feathers and flowers.

Next, I punched with a handheld punch some holes at the top, I also snipped off the feather stalk at the top.  I  prepared 12 wires as I was going to use 12 feathers.


Now I had to string up everything. I started with a crimp bead and then added first the feather and then the beads. To attach them to the ring I made a loop which I secured again with a crimp bead.


Tuesday, August 8, 2017

Faux Fused Glass Mini Fish Mobile


 Faux Fused Glass Mini Fish Mobile by Patricia Krauchune
For my August Makin's Clay® project, I decided to try a technique that I learned from Mihaela Georgescu. I wanted to see whether this technique worked on Makin's Clay® and it worked like a charm. Follow along and you can learn how to make faux fused glass! 

Supply List:

Makin's Clay® - Black                 Krazy® Glue                           Weldbond™
Small piece of driftwood              Fishing Line                             DecoArt Triple Thick Gloss Glaze™
4 Eye Pins                                     4 Fish Hooks                            Glass Beads (optional)
4 Mini Eye Screws                       Black NeoPaque® Paint           Nail Art Foils 
2 Larger Eye Screws                     by Jacquard®

Recommended Makin’s® Tools:

Makin's Professional® 
  • Cutting Mat 
  • Ultimate Clay Machine® 


Instructions:

Roll out a small piece of Black Makin's Clay® on the #1 setting on the Makin's Professional® Ultimate Clay Machine®. Make 2 fish patterns*, one small and one larger. Trace onto the clay making 2 fish of each size. Let the clay firm up a few hours then cut out the fish. I used scissors. 
* My larger fish measures 1 1/2", the smaller fish is 1" long. 


Let the fish dry for 24 hours. When the fish are dried, lightly sand the edges smooth. Insert an eye pin into the top edge of each fish and use Krazy® Glue to hold the eye pins in place. I used a needle to make a pilot hole before inserting the eye pins. 


Paint the front, back and sides of the fish with the Black Jacquard® NeoPaque® paint. Let dry completely. While the paint is drying, glue the two larger eye screws into the top of the driftwood. Evenly space the four smaller eye screws into the bottom of the driftwood and glue these in place with the Krazy® Glue. 


Here's the fun part. When the paint on the fish is totally dry you are going to brush a light coat of Weldbond™ Glue over the surface. Next put a small piece of the nail art foil on top and burnish with your finger. Lift the foil off...it is OK to have some spots of the fish not covered with the foil. If you want a little more of the foil on the fish add a little more glue and reapply the foil to the area you want covered. Let dry completely then do the other side of the fish. 


Your fish should look like mine. When both sides are completely dried, brush a generous amount of DecoArt Triple Thick Gloss Glaze™ to the fish, letting one side dry completely before reversing to do the other side. When the glaze is totally dry it will be crystal clear. The final step is to attach the fishing hooks to the fishing line and tie to the eye screws. I added three little glass beads above each hook. I also filed down the sharp point on the fishing hook. The fish are suspending from the fishing hook...you can add a drop of Krazy® Glue to where the hook meets the eye pin. 


Here is your cool faux fused glass mobile. You can do this technique to make jewelry or any other project you might want to be Makin! See you next month! 


Tuesday, March 29, 2016

Springtime Flowers, Shades of Pink Aplenty with Makin's Clay®!


Illuminated Spring Flowers by Cindi McGee- https://www.pinterest.com/pin/501588477227821488
Flowers, flowers, everywhere!  Seeking some floral inspiration for your spring projects?  Our Makin's 
Clay® Pinterest Boards are full of blooms of many types!    Today we are sharing just a few of our favorite blossoms in shades of PINK!  Check out our Pinterest Boards for many more.   Whether push molded, extruded, cut with clay cutters, die cut, or hand made - Makin's Clay® is a great way to make flowers to accent your creative projects! 

Floral Push Mold, Large 4 Piece Flower Cutter Set, 
3 piece Flower Cutter Set, Flower/Leaf Cutter Set 

Caned Flower by Lisa Haney - https://www.pinterest.com/pin/501588477227820773/
Pink Blossom Pendant by Martha Lucia Gomez - https://www.pinterest.com/pin/501588477227821037/
Altered Flowerpot & Flowers by Madeline Arendt - https://www.pinterest.com/pin/501588477227820725/
Fairy Flower Mobile by Carole Monahan - https://www.pinterest.com/pin/501588477227820828


Contact us

Name

Email *

Message *