Pages - Menu

Search This Blog

Showing posts with label Mixed Media. Show all posts

Saturday, June 23, 2018

Polymer Clay Feathers Wind Chime

Polymer Clay Feathers Wind Chime by Bea Grob 

I'm back with another project with Makin's Clay®, some bead and wire to make a wind chime or chandelier.

Supplies:

Makin's Clay® 60g Straw, Blue, Green 
Several colors of Decofoil (this is a good project to use up leftovers
Steel Rule Die Feather and Flower (or any other shape you like)
A top Ring, mine was in a starform, but plain circle would work too
An assortment of Beads and Crimp Beads
Wire I used Soft flex Nylon coated Beading wire Diameter .019 inch,  49 Strands

Tools:          

Makin's® Clay Roller
Makin's Professional® Ultimate Clay Machine®
Sidecutter for cutting wire
Crimp plier

Instructions:   
 
I started by rolling the clay through the Makin's Professional® Ultimate Clay Machine®, beginning on setting #1 and proceeding through each setting ending on #5.  I made three sheets from the three colors. The color doesn't matter so much as we going to go over it in the next step.

Whenever I want to use Decofoil on a large piece I spray the rolled out clay and let it set for about 1 minute. Just to make sure that it is sticky enough to pull of the metallic from the foil

Next, I started applying only parts of the foil. As usual, I do burnish a bit and then rip it off like a Band-Aid. As you can see I did use first all my leftovers and I used different colors of foil.

When most of the clay is already covered you can go on easily with the foil allover and use an old giftcard to burnish the foil. Sometimes it takes several passes until the foil decide to stick.


At the end I had these pieces all covered with foil from both sides, as you can see.
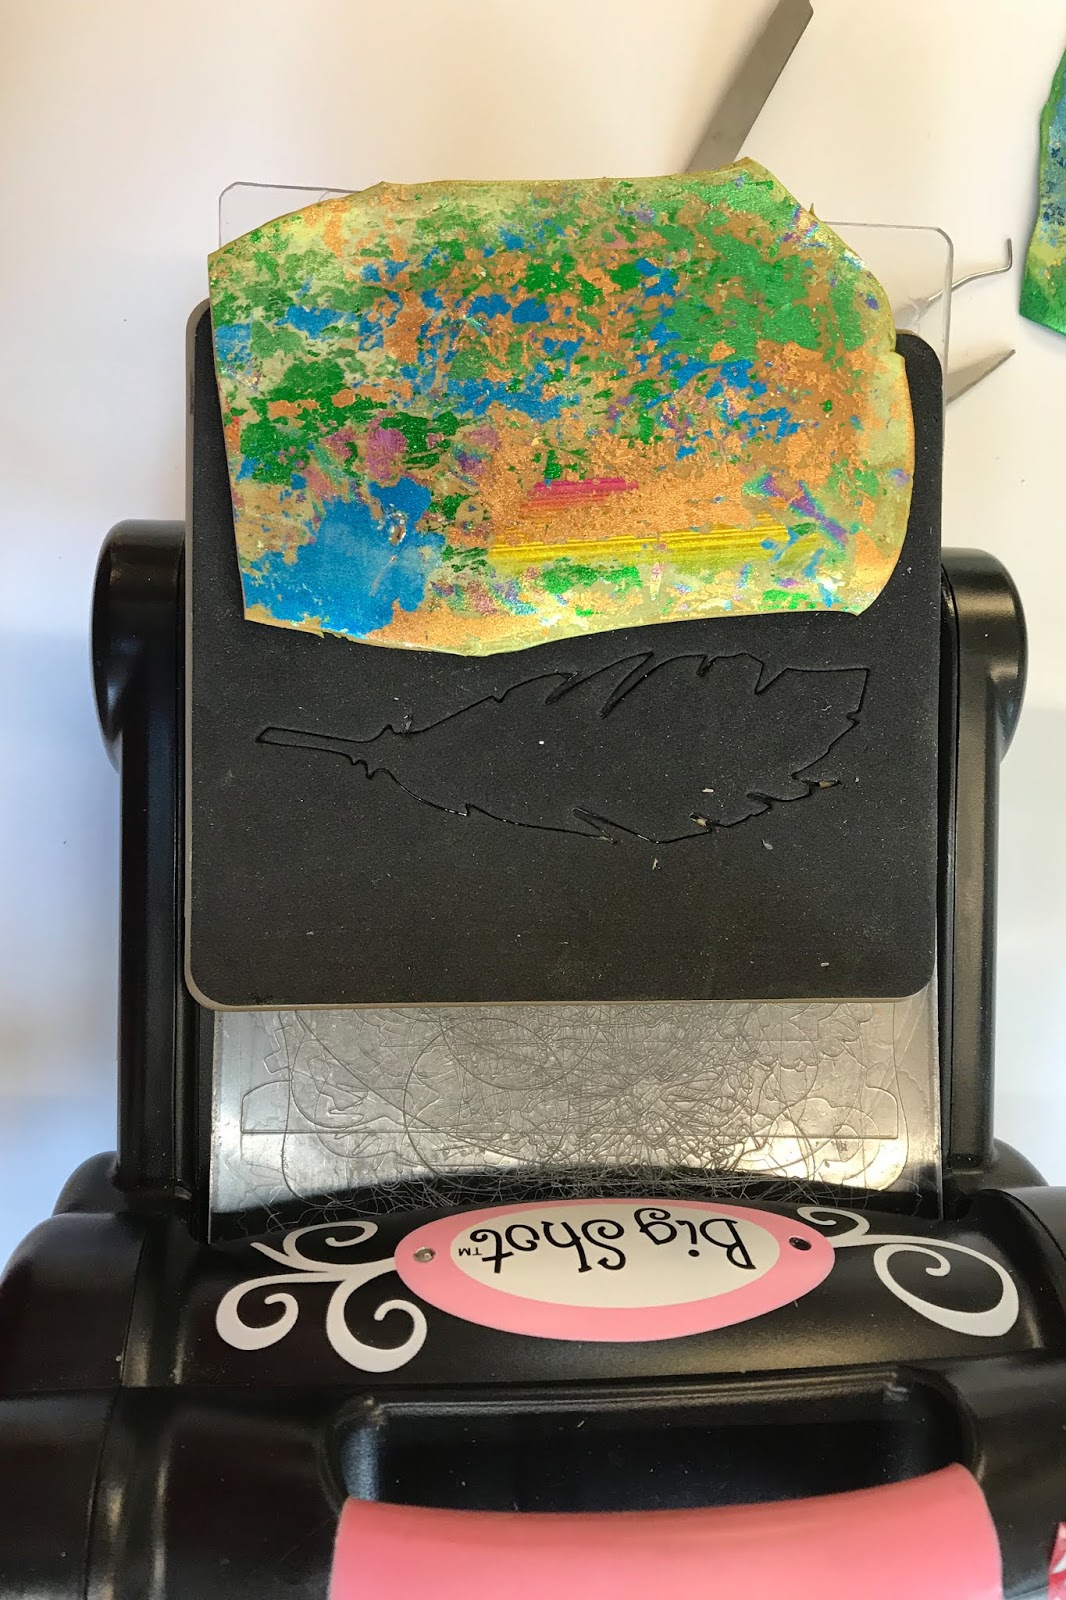
I let it dry completely over night and the next day I ran it through the Big Shot die cutting machine with a Steel Rule die. I made Feathers and flowers.

I had no exact plan how many of those feathers I needed, so in the end I had 4 leftover and also some flowers, but I certainly can use them in other project.

I grabbed an assortment of beads, my ring and the feathers and flowers.

Next, I punched with a handheld punch some holes at the top, I also snipped off the feather stalk at the top.  I  prepared 12 wires as I was going to use 12 feathers.


Now I had to string up everything. I started with a crimp bead and then added first the feather and then the beads. To attach them to the ring I made a loop which I secured again with a crimp bead.


Friday, November 3, 2017

Blessings Canvas Panel


Blessings Canvas Panel by Steph Ackerman

Supplies:

Makin's Clay - Persimmon, White, Green
Makin's ProfessionalⓇ 


Makin'sⓇ 


Beacon Adhesives - 3-in-1
Joy Clair stamps - Fall Leaves
Tattered Angels spray inks, paints
Memento Inks
Spellbinders dies
Raffia
Doily
Canvas Panel

Instructions:

Roll white clay in the clay machine on setting #1.  Reduce the setting on each pass until you have the
thickness you need for your project.
I wanted to add texture to a canvas panel, so I placed the clay on the canvas panel.  Then I used the roller to roll out the clay so it fit the panel.

Next, I scrunched the clay to give it some texture.

I carefully unfolded the clay and glued it to the canvas panel.  Once it dry, I cut off the excess which I put aside for another project.


Using assorted Tattered Angels spray inks, I added color to the background.   Once it dried, I inked over the textured background.
Using left over white and green clays, I created assorted sized leaves using the Leaves push mold.  To simulate the colors of all, I inked the leaves with a variety of colors.  Next, I poured on embossing powder and heat set quickly for a shiny effect.
Roll out light adobe clay and use oval clay cutters to cut 6 large ovals and 3 small ovals.  Adhere 3 pieces together to create each pumpkin.  While still wet, clay will adhere to clay.  But if you need to you can add adhesive. 

Add the larger pumpkins to the canvas then paint the bottom edges.  Add the small pumpkin on top of the larger ones.  Place die cut swirls behind the pumpkins and scatter the clay leaves.  Roll up some little scraps of clay to create the pumpkin stems then paint them brown.  Glue the stem behind the pumpkins.  
Stamp the phrase on white cardstock using green ink.  Die cut and add to pattern paper then place on top of a doily.  Adhere to the canvas.  

Glue raffia to the lower left corner surrounding the pumpkin.

Glue raffia to the top of the panel pulling the doily forward creating a 3 dimensional effect.


Are you ready for fall?

Thanks for stopping by.

Saturday, September 23, 2017

Beauty is a Light in the Heart


Design Team Member Bea Grob recently shared this great mixed-media project.  Bea used Makin's Clay® to create the dimensional heart element for her piece.   Makin's Clay® takes a variety of finishes beautifully - including inks, paints, markers, gel pens, leafing pens and more.

Tuesday, September 5, 2017

Fall Banner


Hi everyone, Steph Ackerman here today with a Fall Banner.

Supplies:

Makin's® Clay - White, Terra Cotta, Earth Tones, Brown
Makin's Professional® Cutting Mat
Makin's® Ultimate Clay Machine
Makin's® Texture Sheets
Makin's® Roller and Cutter Set
Beacon® Adhesive - Tacky Glue
Mod Podge Letter Mold
Spellbinders dies
Sizzix Dies
Canvas

Instructions:

Using the Earth Tones clays, condition clay.  Place the green, brown and beige clays together.  Run through clay machine, starting at setting 1.  I repeated this process, moving the dial to the next setting until I had the dimension I wanted at setting 5.


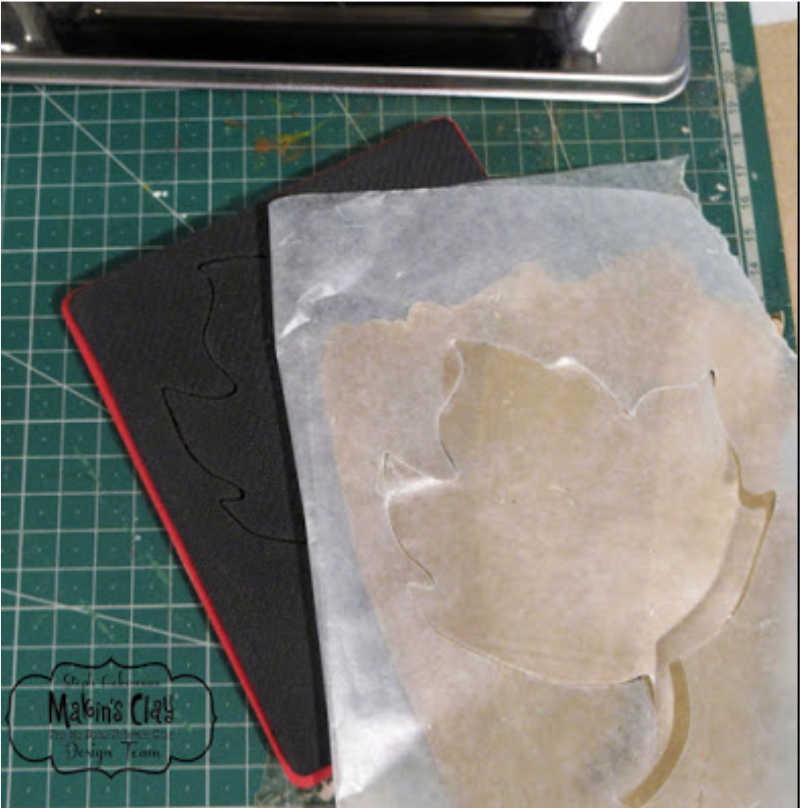
Place the clay between 2 sheets of wax paper, then use a Sizzix die to create the leaves.  Die cutting
fresh clay does not harm dies and the wax paper keeps the clay from sticking to the dies.

The clay die cuts beautifully!  No torn, ragged or uneven edges!


Use texture sheets and the clay roller to add texture to each leaf.  Paint over the textured leaves with assorted colors of paint.

Run brown clay through the clay machine as indicated above.  Do the same with white clay.  Then
use Spellbinders dies to die cut 4 scalloped circles from the white clay.  Again, since the clay was fresh, I placed it between 2 layers of wax paper first.
I allowed the brown clay to dry overnight, then die cut circles from the brown clay using Spellbinders dies.  Since the clay had hardened, there was no need to place the clay between 2 layers of wax paper.  Again the clay cut evenly and without issue. 
Now it was time to assemble the leaves.  Using Beacon Adhesives, I adhered the brown circle to the white scalloped circle and then to the painted leaves.


Next I conditioned additional green clay and ran it through the clay machine as indicated above.

Since the clay was fresh, I placed it between 2 layers of wax paper and die cut it with Spellbinders dies.  Again, the wax paper protects the die and allows for easy die cutting.

To create the letters, I used a Mod Podge mold with Terra Cotta clay.  Next, I placed the letters in the center of the brown circles.  Finally, I die cut acorns from scraps of white and brown clay dry clay using Spellbinders dies.   The white acorns didn't look quite right, so I inked them with brown ink before placing them on the larger brown acorn.  Using Beacon Adhesives, I adhered the acorns to the smaller leaves and placed them on the circles around the letters.


I cut assorted canvas banners, placed them on twine and added the leaves on top. 


Now I'm ready for fall.  Are you?

Thanks for stopping by.

Steph

Friday, August 11, 2017

Silver Lining Assemblage


Hello Makers!

I am fond of quotes and words in art. The idiom “Every cloud has a silver lining” goes back to around 1634. The meaning to this phrase …there is hope in a difficult situation. Today we still use this phrase and still manages to motivate me when I see in writing or think of it. This assemblage celebrates this very old, but still relevant phrase; made using Makin’s Clay® and a wooden substrate. 

Materials:

Makin's Clay® - White
Makin's® 

  • Clay Tools - Roller 
  • Water Drop Clay Cutters 

Makin's Professional® 

  • Cutting Mat
  • Ultimate Clay Machine™

White Gesso
Acrylic Paints: Blue or Aqua, Gray, Payne’s Gray, Titanium White, Titan Buff
DecoArt® Frost White Metallic Lustre™ Wax
DecoArt® Craft Twinkle Gel Silver Glitter
Baroque Gilders Iris Blue Paste
Wooden shallow cradled substrate (7 in. x 5 in.)
Tracing paper
Stylus
Micron Permanent Fine tip ink pen (.05 mm)

Instructions:

I used the lid of a cigar box measusing 7 in. X 5 in. I primed the lid with gesso. Then painted it with Payne’s Gray, light blue, Titan Buff, and Titanium white. I used Payne’s Gray as the undercolor because it make the brighter colors standout and left parts of it to simulate darker areas of a stormy sky.


I first drew my design on tracing paper to determine size and placment of the various pieces. Using the illustrations on the paper, I traced my design onto the clay with a stylus, then I cut the clay.  I like to use tracing paper because later on when I need to determine lettering position relative to the the clouds I can see through the paper.

Cut out a piece of tracing paper to fit the inside the of the box and stamp the words on tracing paper as well.

Draw the design. Use the smallest Water Drop clay cutter to trace the drops.


Roll white clay through the Ultimate Clay Machine™ on setting #1. Use these sheets for the clouds. Or you can roll out clay using a roller.  Trace the clouds onto the clay using a stylus or something pointy but not sharp.


Stamp the words. Use the stamped words on the tracing paper as your guide. An alternative is to stamp the words first, then trace the clouds over the words. The tracing paper allows you to see words on the clay. I made clouds using both methods and both work equally well.

Cut the clay. Then smooth out the edges.  

Cut out the drops using Makin’s Clay Water Drop cutter.  Stamp the words “has a” on the water drop cut outs. Let the clay dry for 24 hours.


Paint all the pieces using Titanium white acrylic paint. Use a permanent ink fine tip black pen to paint in the letters. I used a Micron pen .05 tip. 


Rub on DecoArt® Frost White Metallic Lustre Wax with your fingers or use cotton cloth on the cloth.  For the water drops use DecoArt® Frost White as well as Gilder’s Paste Blue Iris. Use Blue on the sides and a little in front; ensuring to blend both colors. Making the sides darker gives the water drops more dimension.

Add glitter around the edge of the clouds. Can’t have a quote about silver lining without bling.

Then glue all your pieces to substrate.

Here are some close up pictures.


Contact us

Name

Email *

Message *