Pages - Menu

Search This Blog

Showing posts with label banner. Show all posts

Tuesday, September 5, 2017

Fall Banner


Hi everyone, Steph Ackerman here today with a Fall Banner.

Supplies:

Makin's® Clay - White, Terra Cotta, Earth Tones, Brown
Makin's Professional® Cutting Mat
Makin's® Ultimate Clay Machine
Makin's® Texture Sheets
Makin's® Roller and Cutter Set
Beacon® Adhesive - Tacky Glue
Mod Podge Letter Mold
Spellbinders dies
Sizzix Dies
Canvas

Instructions:

Using the Earth Tones clays, condition clay.  Place the green, brown and beige clays together.  Run through clay machine, starting at setting 1.  I repeated this process, moving the dial to the next setting until I had the dimension I wanted at setting 5.


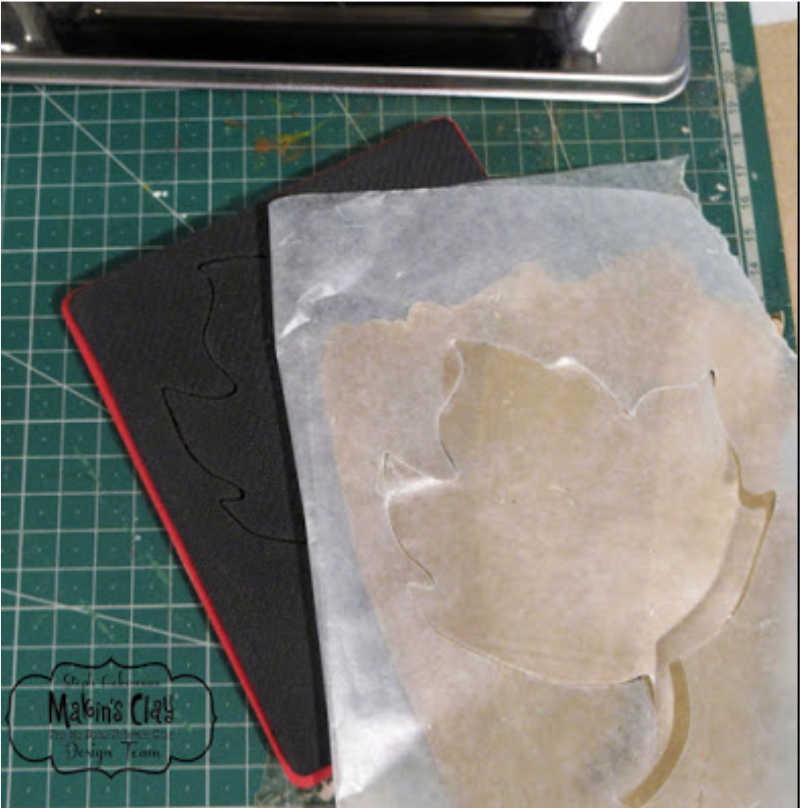
Place the clay between 2 sheets of wax paper, then use a Sizzix die to create the leaves.  Die cutting
fresh clay does not harm dies and the wax paper keeps the clay from sticking to the dies.

The clay die cuts beautifully!  No torn, ragged or uneven edges!


Use texture sheets and the clay roller to add texture to each leaf.  Paint over the textured leaves with assorted colors of paint.

Run brown clay through the clay machine as indicated above.  Do the same with white clay.  Then
use Spellbinders dies to die cut 4 scalloped circles from the white clay.  Again, since the clay was fresh, I placed it between 2 layers of wax paper first.
I allowed the brown clay to dry overnight, then die cut circles from the brown clay using Spellbinders dies.  Since the clay had hardened, there was no need to place the clay between 2 layers of wax paper.  Again the clay cut evenly and without issue. 
Now it was time to assemble the leaves.  Using Beacon Adhesives, I adhered the brown circle to the white scalloped circle and then to the painted leaves.


Next I conditioned additional green clay and ran it through the clay machine as indicated above.

Since the clay was fresh, I placed it between 2 layers of wax paper and die cut it with Spellbinders dies.  Again, the wax paper protects the die and allows for easy die cutting.

To create the letters, I used a Mod Podge mold with Terra Cotta clay.  Next, I placed the letters in the center of the brown circles.  Finally, I die cut acorns from scraps of white and brown clay dry clay using Spellbinders dies.   The white acorns didn't look quite right, so I inked them with brown ink before placing them on the larger brown acorn.  Using Beacon Adhesives, I adhered the acorns to the smaller leaves and placed them on the circles around the letters.


I cut assorted canvas banners, placed them on twine and added the leaves on top. 


Now I'm ready for fall.  Are you?

Thanks for stopping by.

Steph

Friday, February 17, 2017

Winter Banner

Winter Banner by Irit Shalom
Hello my dear crafty friends and welcome to my new Makin's Clay® tutorial.  This time I decided to make a mixed-media Winter banner.

Materials:

Makin's Clay®  -  Black and White
Makin's®

  • Roller & Cutter Set
  • Push Molds - Christmas Decor, Christmas Nature 

Makin's Professional®

  • Ultimate Clay Machine™
  • Cutting Mat 
Decorative round frame push mold 
Light blue, white, yellow, red paint 
Stencil 
Ribbon 
Scissors
Paintbrush 


Instructions:

1. Roll black Makin's Clay®  using Ultimate Clay Machine® beginning on setting #1 and ending on setting #2. Hand cut the flag shapes as shown and let them dry.

2. Mix white clay with blue acrylic paint and make the light blue color piece of clay.
Roll to setting #3 and tear part of clay to fit the banners as shown.


3. Use stencil and texture paint to make the background squares and let them  dry.
Punch holes over each piece for the ribbon.

4. Cover the edges of torn pieces with clear  glitter texture paint and let them dry. When dry they look translucent and not so white.


5. Use Christmas Nature and Christmas Decor push molds to make large star, ice skate, bow, snowflakes and mitten, and decorative round frame mold to piece behind large star for the banner.
Use white clay and then paint the parts into the desired colors.

6. When dry paint the molded shapes into gold, red and shiny clear colors.


7. Arrange the parts over the banner and glue them with Beacon 3-in 1 Adhesive™.  Tie the ribbons.

 And now to some close ups of the finished project:

Wednesday, June 8, 2016

Fourth of July Patriotic Banner by Lisa Haney


Fourth of July Patriotic Banner 
Designed by Lisa Haney

This festive Patriotic Banner is a great way to decorate your home or even a picnic table, etc. to celebrate the 4th of July!   Makin's Clay® is an ideal medium for projects like these, as choosing Makin's Clay® instead of card stock for your project will help ensure your banner is ready to use year after year!   Why not create a festive banner to celebrate each season?


Supplies:

Makin’s Clay®
Red, White, and Blue

Recommended Makin’s® Tools

Other Materials:
Jump Rings
Pliers


Method

Create a sheet of white Makin’s Clay® by running it through the Makin’s Professional® Ultimate Clay Machine® starting with the largest setting.  Move the setting of the clay machine down one setting at a time until the clay has been run through the #4 setting. 


Cut out 14 stars using the next to the smallest star cutter from the Makin’s Clay® Star Cutter Set and 3 stars using the smallest star cutter from the set.  Poke holes in two opposite points of the stars using the stylist from the Makin’s Clay® Mixing Ruler™.


Create a sheet of red clay on the #5 setting of the clay machine (remember to step the clay down each setting of the clay machine). Cut out red stars using the smallest star cutter.  Place the red stars immediately on the larger white stars.


Create a sheet of blue clay on the #4 setting of the clay machine.  Cut out the letters ‘HAPPY 4TH OF JULY’ using the Makin’s Clay® Cutter Set –  Alphabet set.  Place immediately on the red stars.  To make the ‘4’, cut out an ‘L’ and an ‘I’.  Trim down the ‘L’ and add to the ‘I’.  Let the stars dry.


Add a jump ring to each side of the stars.  Connect each star with a little bit larger jump ring. Connect the smaller white between each word.


Hang and enjoy!


Contact us

Name

Email *

Message *