 |
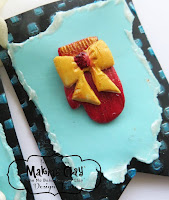
| Winter Banner by Irit Shalom |
Makin's Clay® - Black and White
Makin's®
- Roller & Cutter Set
- Push Molds - Christmas Decor, Christmas Nature
Makin's Professional®
- Ultimate Clay Machine™
- Cutting Mat
Decorative round frame push mold
Light blue, white, yellow, red paint
Stencil
Ribbon
Scissors
Paintbrush
Instructions:
1. Roll black Makin's Clay® using Ultimate Clay Machine® beginning on setting #1 and ending on setting #2. Hand cut the flag shapes as shown and let them dry.
Roll to setting #3 and tear part of clay to fit the banners as shown.
3. Use stencil and texture paint to make the background squares and let them dry.
Punch holes over each piece for the ribbon.
4. Cover the edges of torn pieces with clear glitter texture paint and let them dry. When dry they look translucent and not so white.
Use white clay and then paint the parts into the desired colors.
6. When dry paint the molded shapes into gold, red and shiny clear colors.


7. Arrange the parts over the banner and glue them with Beacon 3-in 1 Adhesive™. Tie the ribbons.


No comments:
Post a Comment