Pages - Menu

Search This Blog

Showing posts with label bee. Show all posts

Wednesday, March 27, 2019

Honeycomb & Bee Pendant

HONEYCOMB & BEE PENDANT by Cindi McGee
Materials:

Makin’s Clay® 60g Persimmon, Black
Makin’s Professional®

  • Cutting Mat
  • Ultimate Clay Machine®
  • Ultimate Clay Extruder® - Slot Disc 11
Makin’s® Texture Sheet Set -  C -  Honeycomb 
Clay blade
JudiKins™ Big Bee rubber stamp 
Staz-on Jet Black permanent ink pad
Black cording
Beacon® Tacky Glue 

Instructions:

Roll Persimmon clay to setting #1 on clay machine. Place texture sheet over clay and roll both through machine again on setting #1. 

Place onto cutting mat. Determine approximate finished size of piece based upon the stamp you are using.  

Use the guidelines on the mat to cut a square (mine was 6 cm x 6 cm). Then use the guideilnes to cut the corners to make a hexagon. Since my square was 6 cm, I cut in 2 cm on each side to make the slant cuts. 
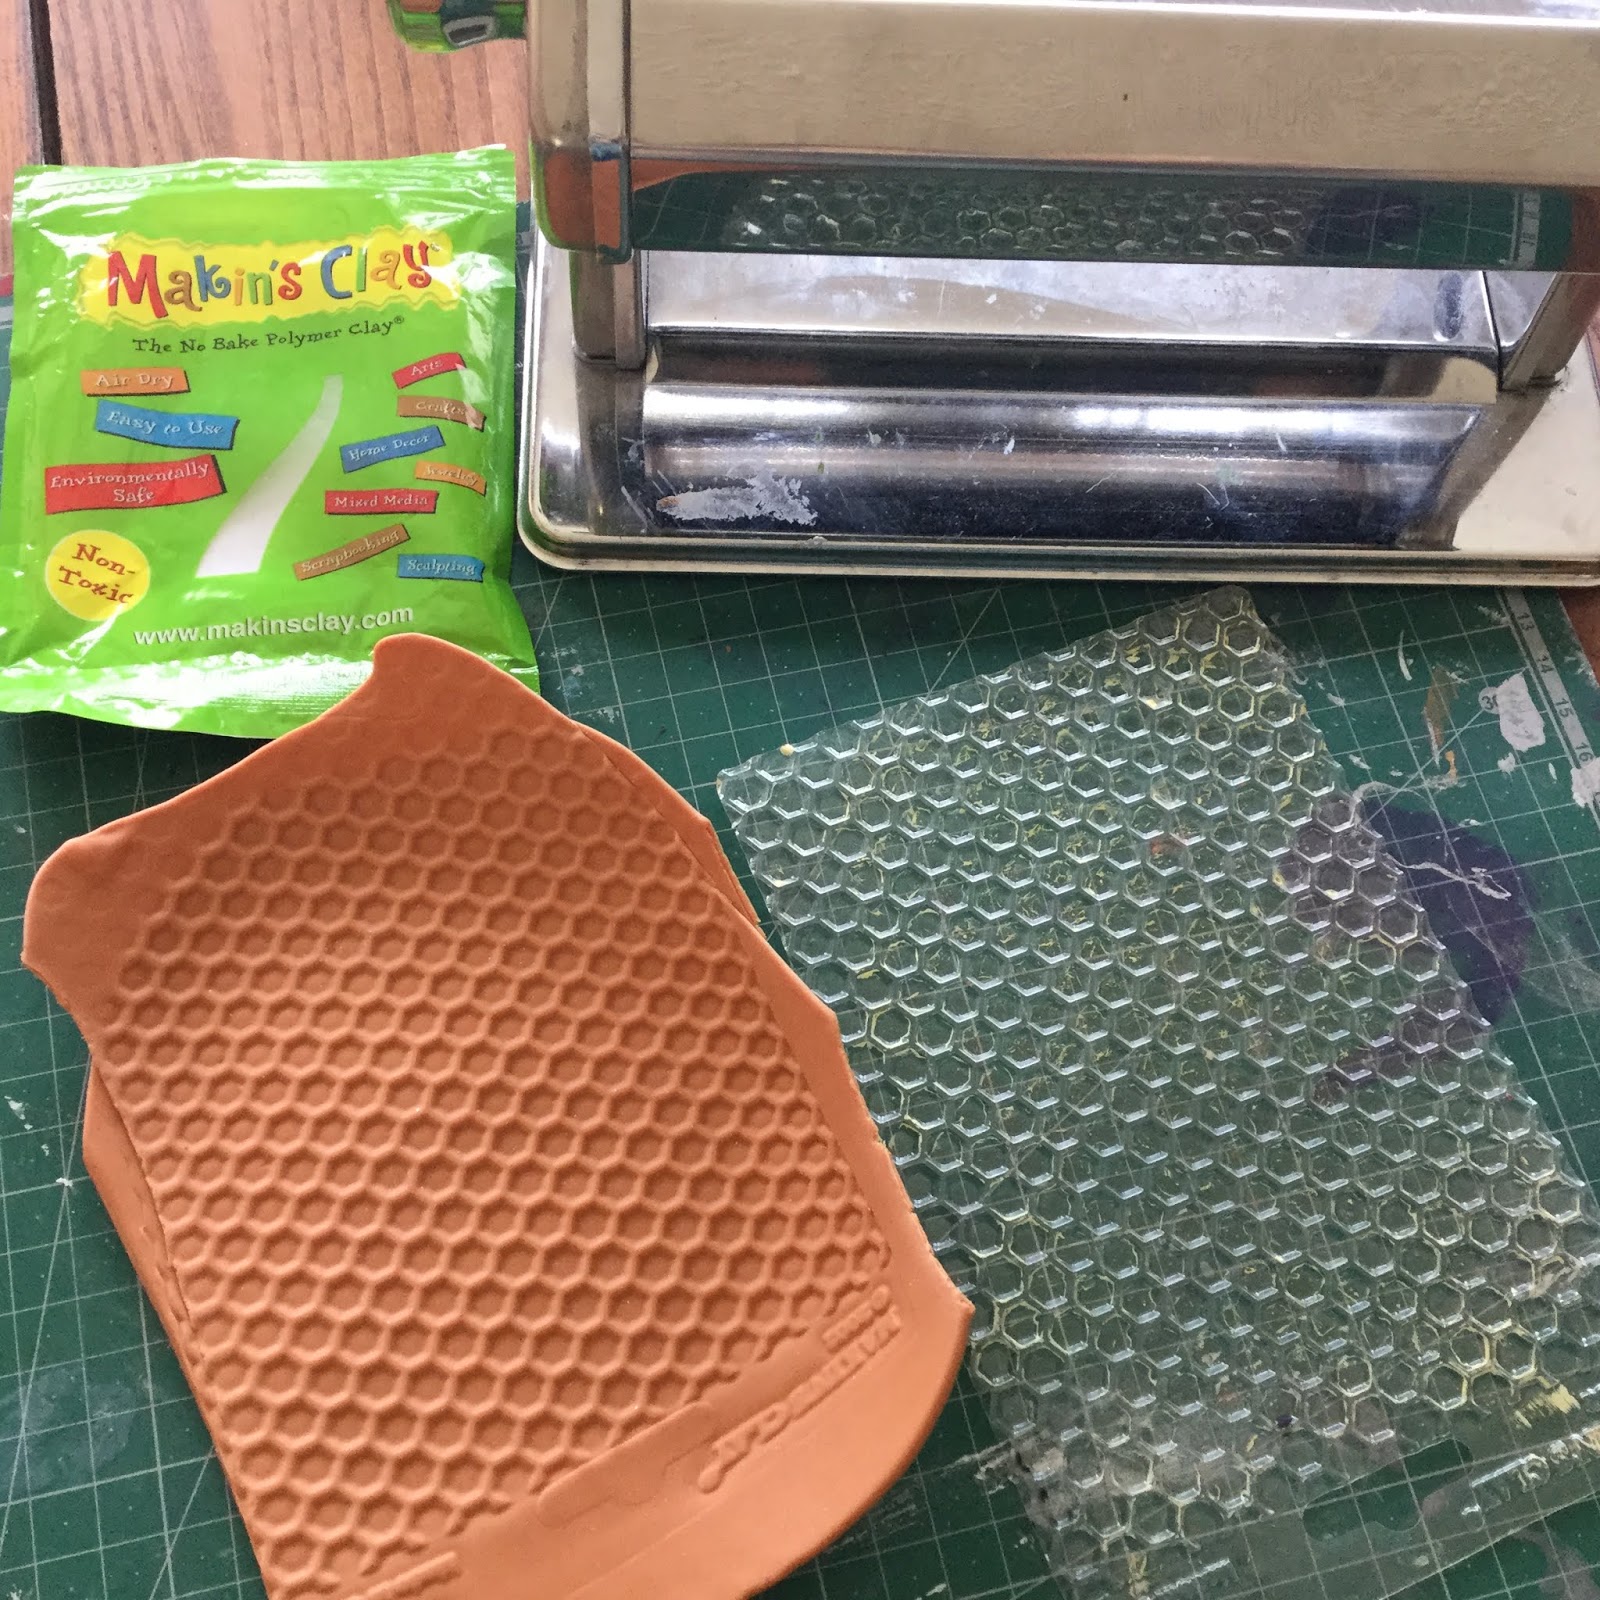


Ink stamp with permanent black ink. Carefully impress tamp into clay to transfer ink and pattern into clay. 

Roll remaining clay to setting #1 on clay machine. Place texture sheet over clay and roll both through machine again on setting #1. 

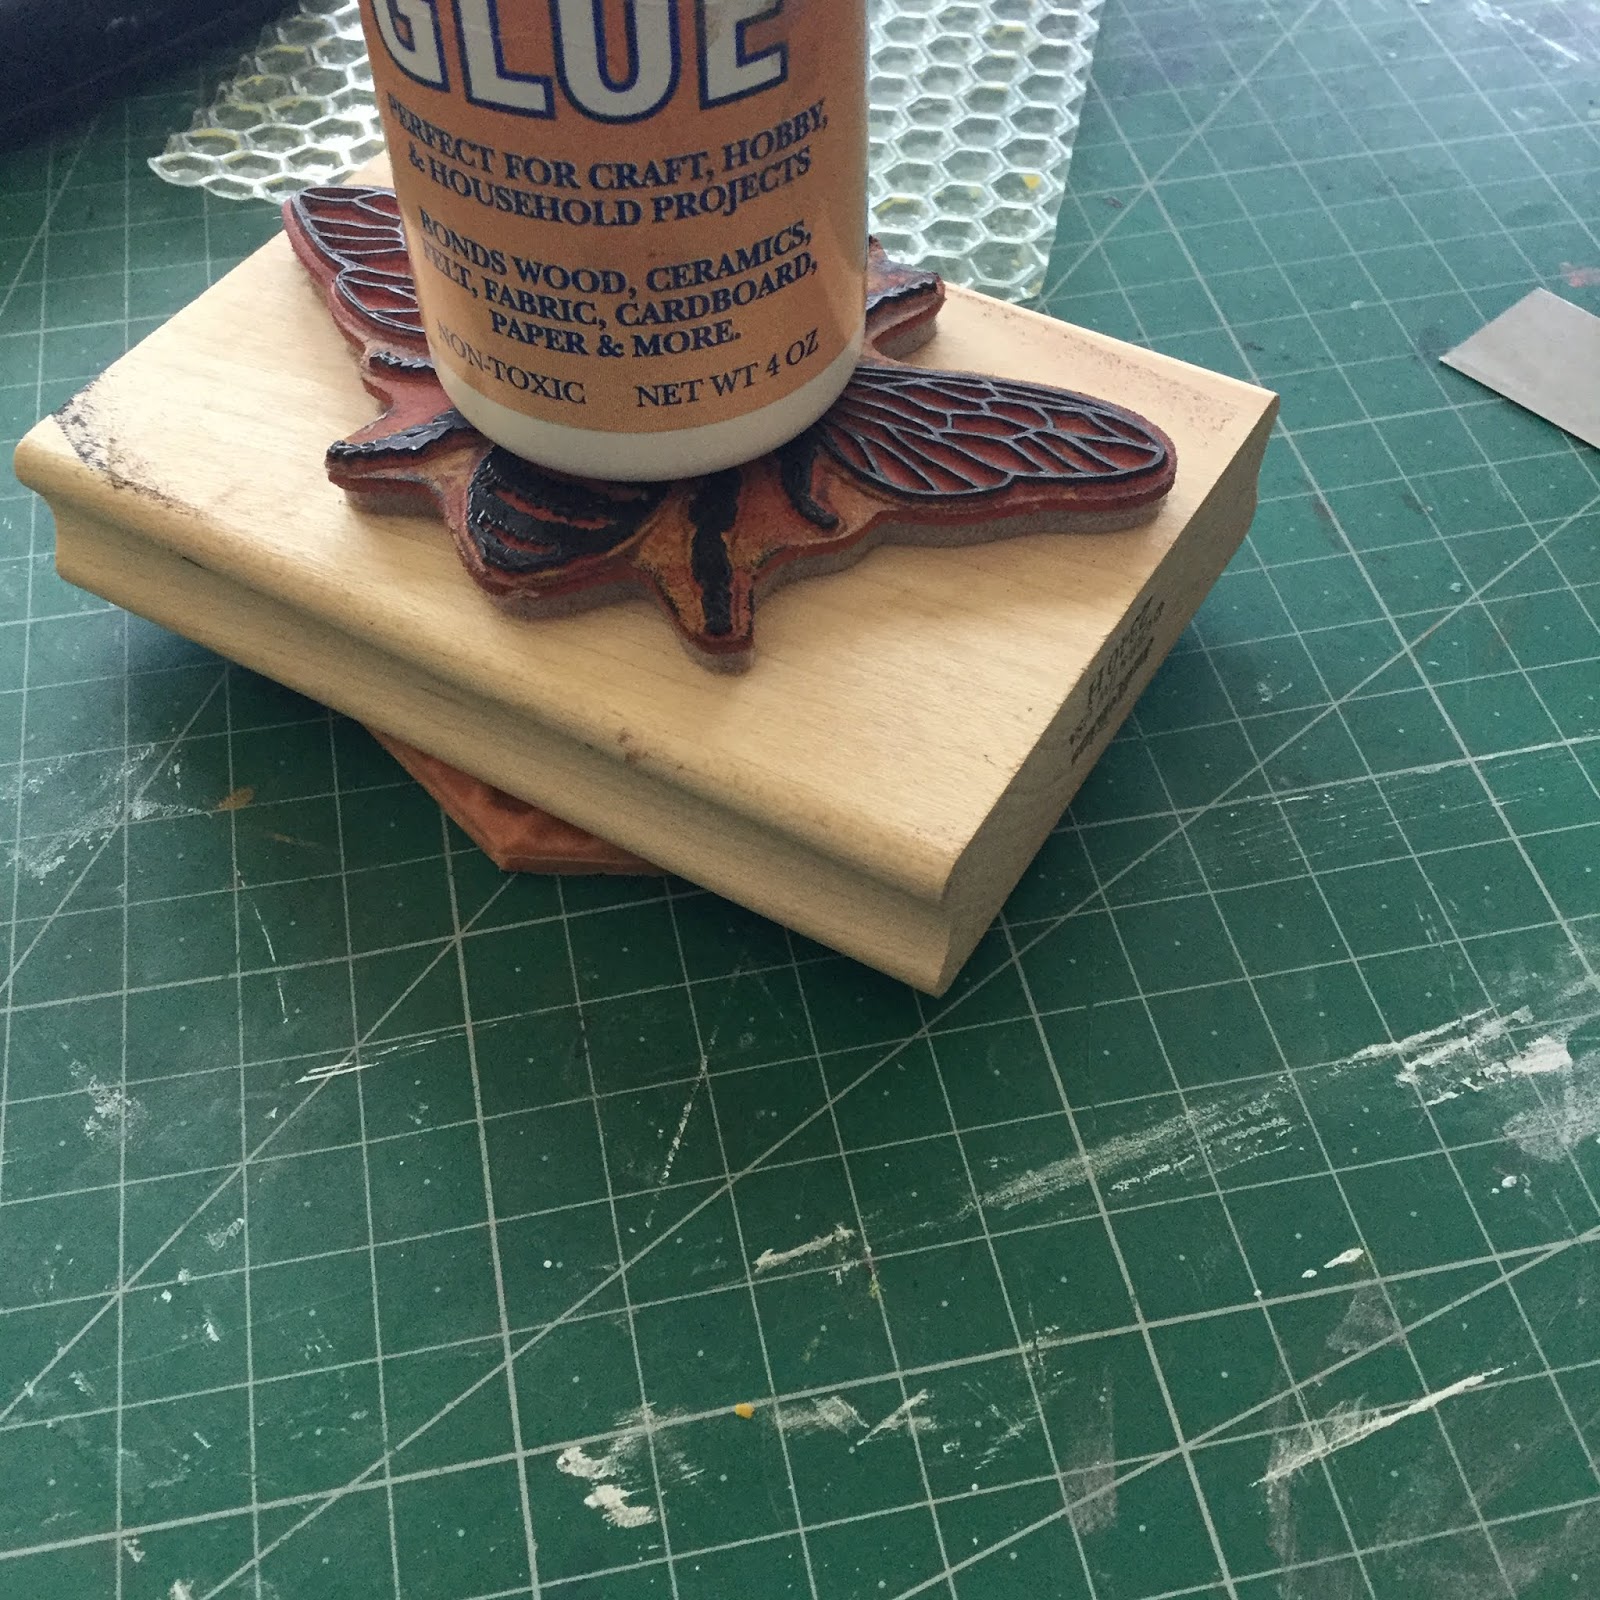
Use the first hexagon as a template to cut another.  Add tacky glue to the back and mount the two pieces together so the honeycomb is on both sides. Make a hole at the top fo cording. Use something to weigh down and ensure it dries flat - I used the stamp with the glue bottle - it was just heavy enough to ensure it remained flat yet not heavy enough to effect the texture. Let dry 24 hours. 


Extrude black clay strand.  Add tacky glue to edge of honeycomb and then add black strand around outer edge. Trim to fit as needed.  Let dry 24 hours. 


Add black cording. 

Tuesday, August 14, 2018

Miniature Bee Skep


Today, Design Team Member Patricia Krauchune shares this adorable little Makin's Clay® bee skep!  Pat used the Makin's Professional® Ultimate Clay Extruder® when making this charming piece.  We think it would be adorable decorating a potted plant!

Monday, August 22, 2016

Bee & Hive Clip-On by Donna Budzynski

Bee & Hive Clip-On
Designed by Donna Budzynski
Materials:

 *Earth Tones 120g multi-pack - Persimmon
 *Yellow
 *Black
Lobster Clasp
Jump Rings

Tools:
Makin's® Professional™ Ultimate Clay Extruder® - Round Disc #5
Pliers
Wire
Beacon™ 3-in-1 Adhesive

Instructions:

Gather all supplies. 

Place Persimmon clay from the Earth Tone multi-pack into the Ultimate Clay Extruder™.

Place round Disc #5 into cap, replace cap and turn handle to extrude clay.


Coil clay into hive shape.  

Cut a small amount of wire and make an eye loop. 

Add a bit of 3-in-1 Adhesive to end and insert into the top of the hive while clay is still fresh.  


Make a small impression in bottom coil to appear as an opening of hive. 

Roll a small amount of black clay and gently press into impressed area for hive opening.  (If clay is still fresh, no additional adhesive is needed.  If dry, add 3-in-1 adhesive to mount). 

Mix Persimmon clay with a small amount of Yellow clay.  Roll in your hands and make a head and body. 

Roll two small strips of black clay and wrap around body to make stripes.  Make a small stinger from black clay and mount on end of body.


Make a second eye loop from wire.  Add a bit of 3-in-1 adhesive and insert into top of bee body while clay is still fresh. 

Cut two small pieces of wire for antennas.  Roll out two small balls if black clay to put on the ends of wire for the tops of the antennas.  Add a touch of 3-in-1 and mount balls to top of wires, then add a touch of 3-in-1 and insert antennas into the head of the bee while the clay is still fresh.  

Let hive and bee dry 24 hours. 

Add jump rings and lobster clasp and hook to a back pack, or a gift bag.  This would be an adorable accent for a gift basket with honey! 


Wednesday, December 23, 2015

Floral Wall Hook by Irit Shalom


FLORAL WALL HOOK
Designed by Irit Shalom 

Hello my dear crafty friends and welcome to my new Makin's Clay® post! Today I am going to share an altered/recycled project that became a lovely home deco piece.  I have this wall hanger for ages and I don't really like the cheap look of paper over it, also the roses are pretty. So with some work and some Makin's Clay® I made a hanger that I do like and will use on my wall.

Materials:

Makin's Clay® - Terra Cotta, Brown, Olive, White
Makin's® Ultimate Clay Machine™
Makin's® Texture Sheet Set D
Makin's® Clay Tools
Makin's Professional® Clay Tool Set
Makin's® Leaves Push Mold
Wall hook
Earth Safe Finishes Iridescents paints
Beacon™ Tacky Glue
Honecomb die, die cutting machine
Chipboard

Step by step instructions:


1.Roll 20 gram of Terra Cotta and 20 gram of Brown Makin's Clay® together to create a "log". Flatten it slightly with clay roller for use in the Ultimate Clay Machine™.

2. Use your Ultimate Clay Machine™ on setting #2 and make a mix that imitates wood. It should be the hanger size, around 3x4''.

3. Use clay roller from the tool set and wood grain texture from Texture Sheet Set D  over this piece.


4. Cut the textured clay with straight cutting tool from Makin's Clay Professional clay tools set to fit the hanger as shown. Glue the clay " wood" over the hanger with Tacky Glue.

5. Use Leaves push mold , the roller and olive green Makin's Clay to make some leaves .

6. Use flower and bee molds to make 2 big flower and 2 bees with white clay. I used some Russian molds that
work perfect with Makin's clay.Let then dry and trim the edges if needed.

7. Paint the leaves and flowers with Earth Safe Finishes Iridescents paints. Those paints are Gel Medium based and leave fantastic shiny look over
Makin's Clay shapes. The only problem is that this paint has a very long drying time, not minutes, but even hours.


8. And now  for the finished project! I added a heat embossed chipboard honeycomb die cut on the back and arranged those leaves, flowers and bees.


Close up to the shapes- can't show the shine on those photos, but it looks gorgeous.


Contact us

Name

Email *

Message *