 |
| HONEYCOMB & BEE PENDANT by Cindi McGee |
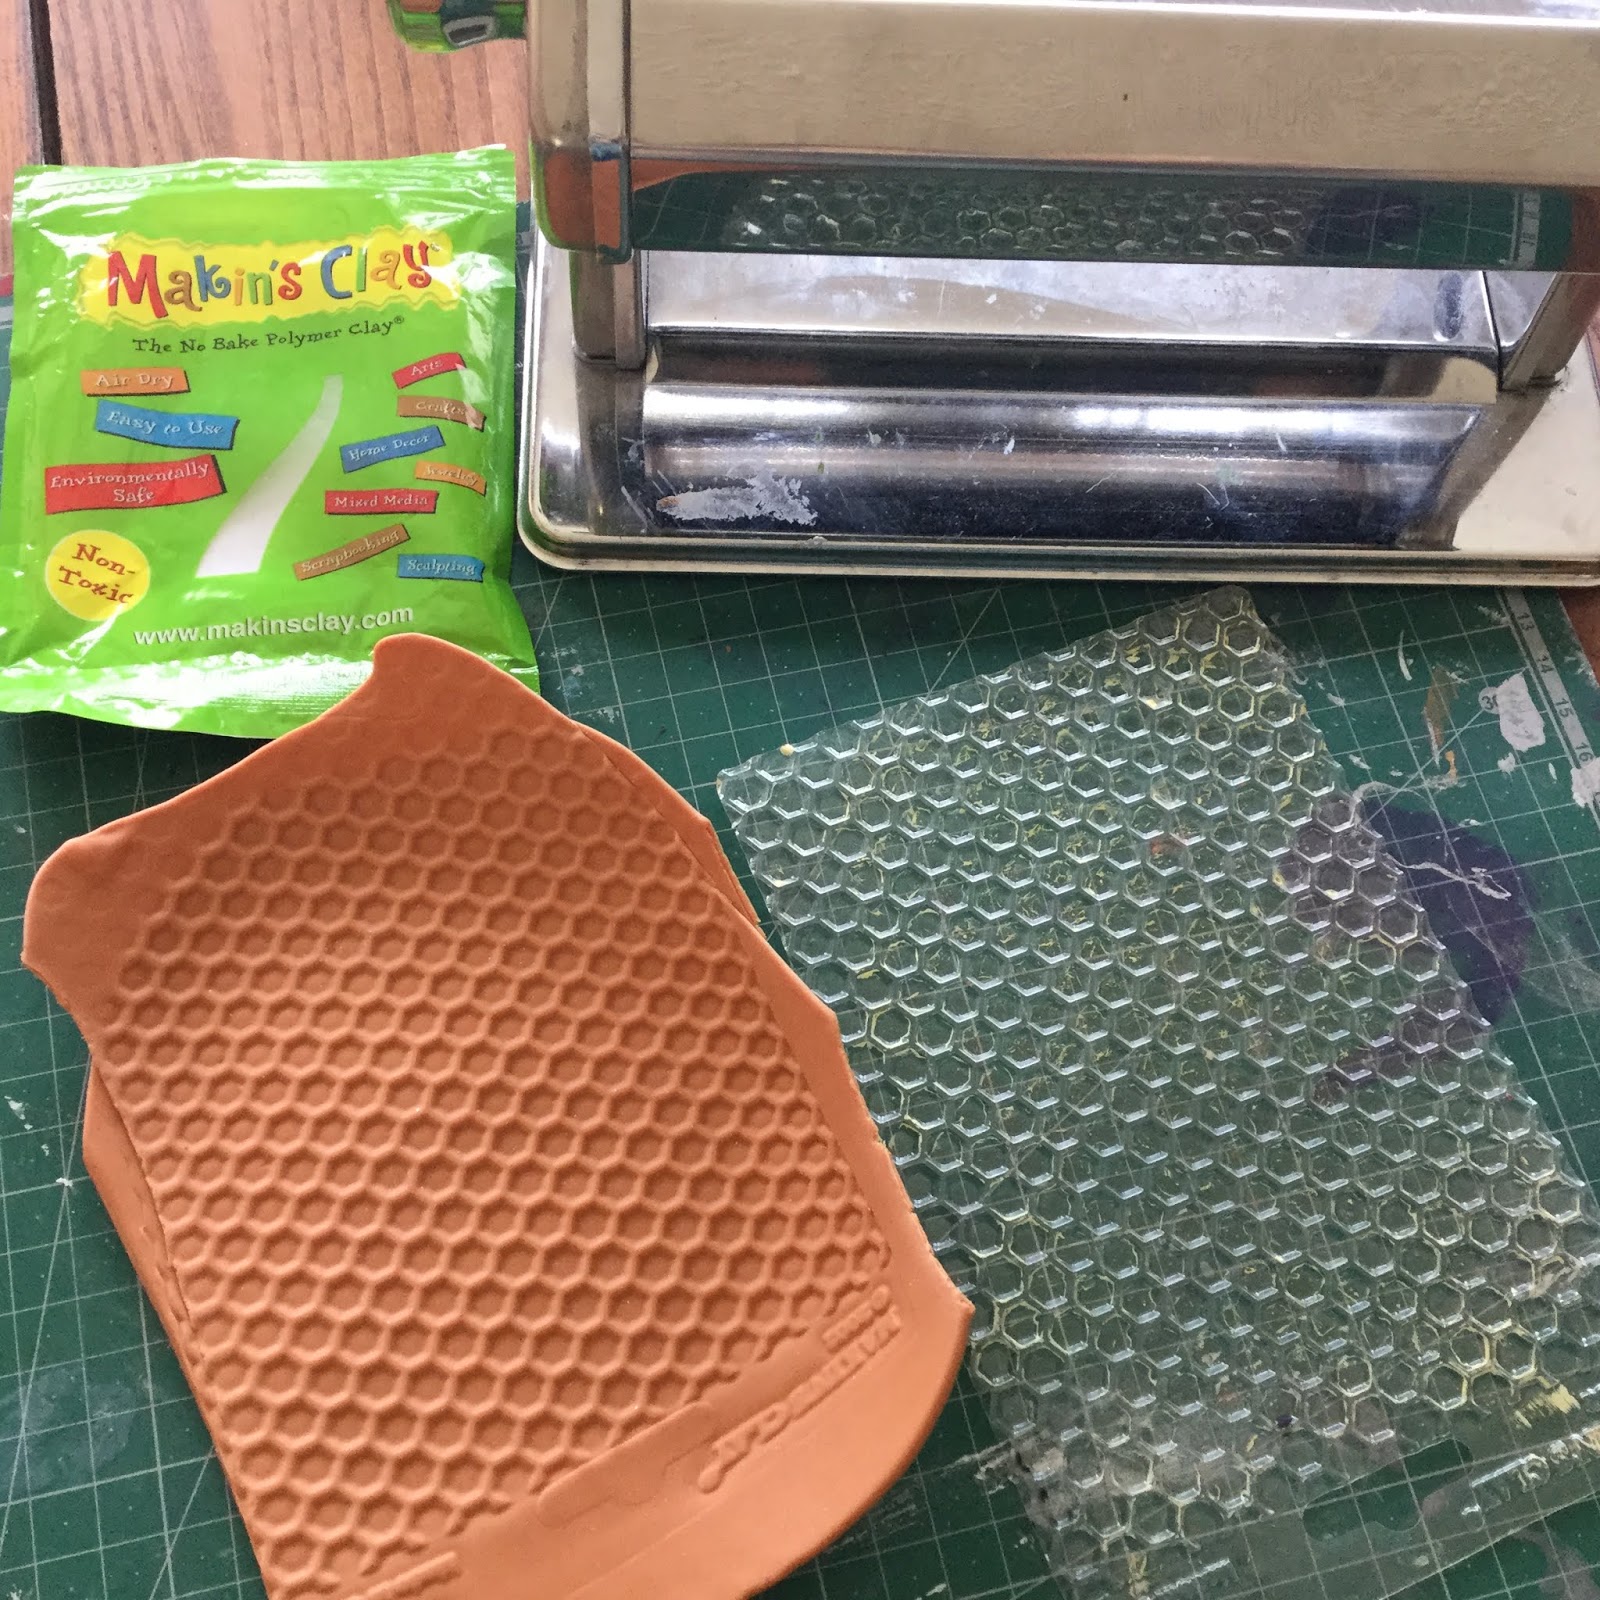
Makin’s Clay® 60g Persimmon, Black
Makin’s Professional®
- Cutting Mat
- Ultimate Clay Machine®
- Ultimate Clay Extruder® - Slot Disc 11
Makin’s® Texture Sheet Set - C - Honeycomb
Clay blade
JudiKins™ Big Bee rubber stamp
Staz-on Jet Black permanent ink pad
Black cording
Beacon® Tacky Glue
Instructions:
Roll Persimmon clay to setting #1 on clay machine. Place texture sheet over clay and roll both through machine again on setting #1.
Place onto cutting mat. Determine approximate finished size of piece based upon the stamp you are using.
Use the guidelines on the mat to cut a square (mine was 6 cm x 6 cm). Then use the guideilnes to cut the corners to make a hexagon. Since my square was 6 cm, I cut in 2 cm on each side to make the slant cuts.


Ink stamp with permanent black ink. Carefully impress tamp into clay to transfer ink and pattern into clay.
Roll remaining clay to setting #1 on clay machine. Place texture sheet over clay and roll both through machine again on setting #1.
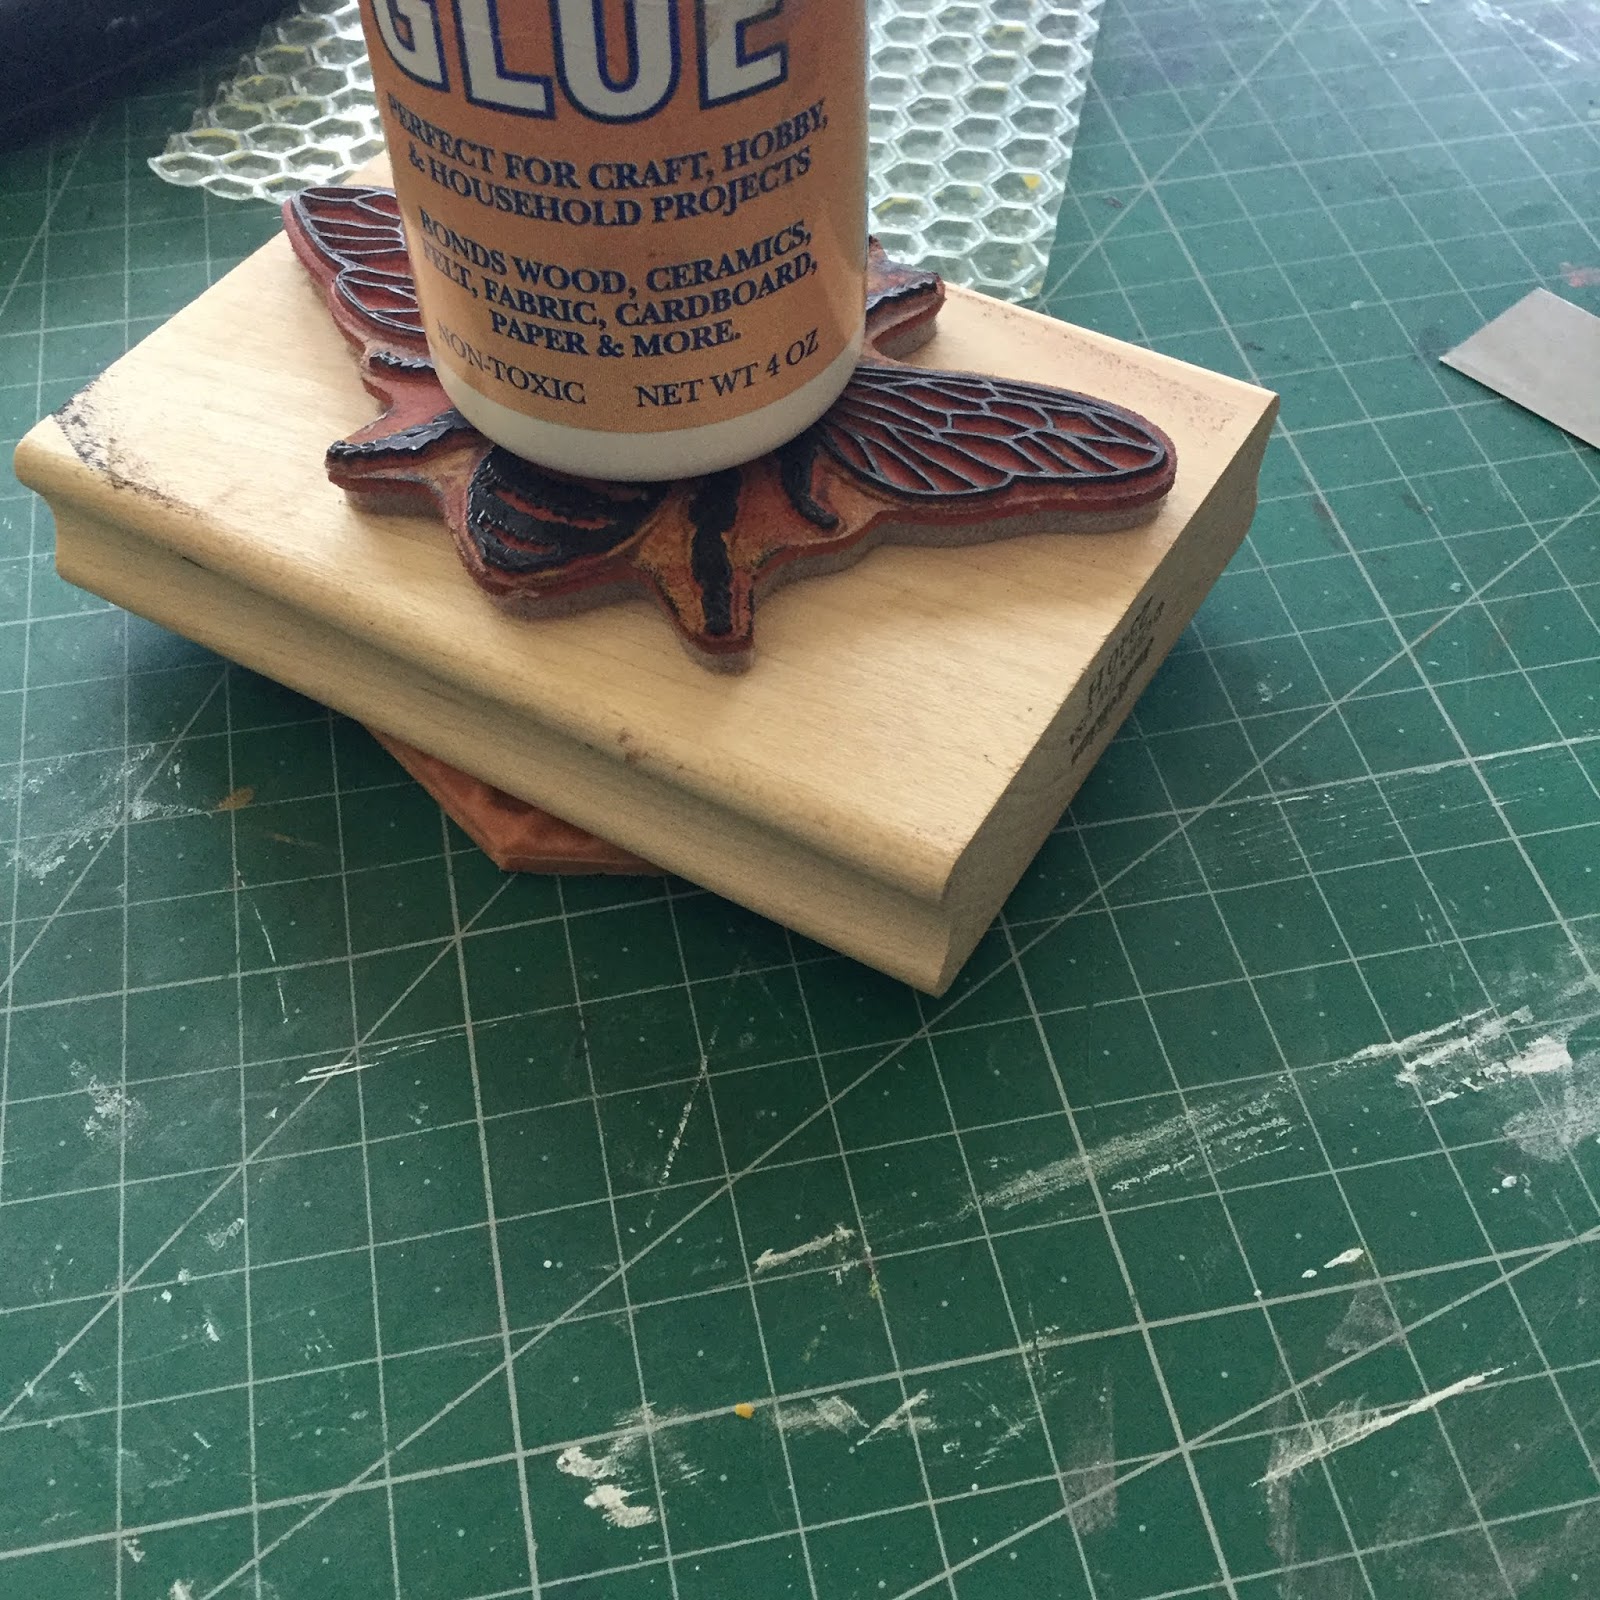
Use the first hexagon as a template to cut another. Add tacky glue to the back and mount the two pieces together so the honeycomb is on both sides. Make a hole at the top fo cording. Use something to weigh down and ensure it dries flat - I used the stamp with the glue bottle - it was just heavy enough to ensure it remained flat yet not heavy enough to effect the texture. Let dry 24 hours.


Extrude black clay strand. Add tacky glue to edge of honeycomb and then add black strand around outer edge. Trim to fit as needed. Let dry 24 hours.


Add black cording.
1 comment:
BEEutiful!
Post a Comment