 |
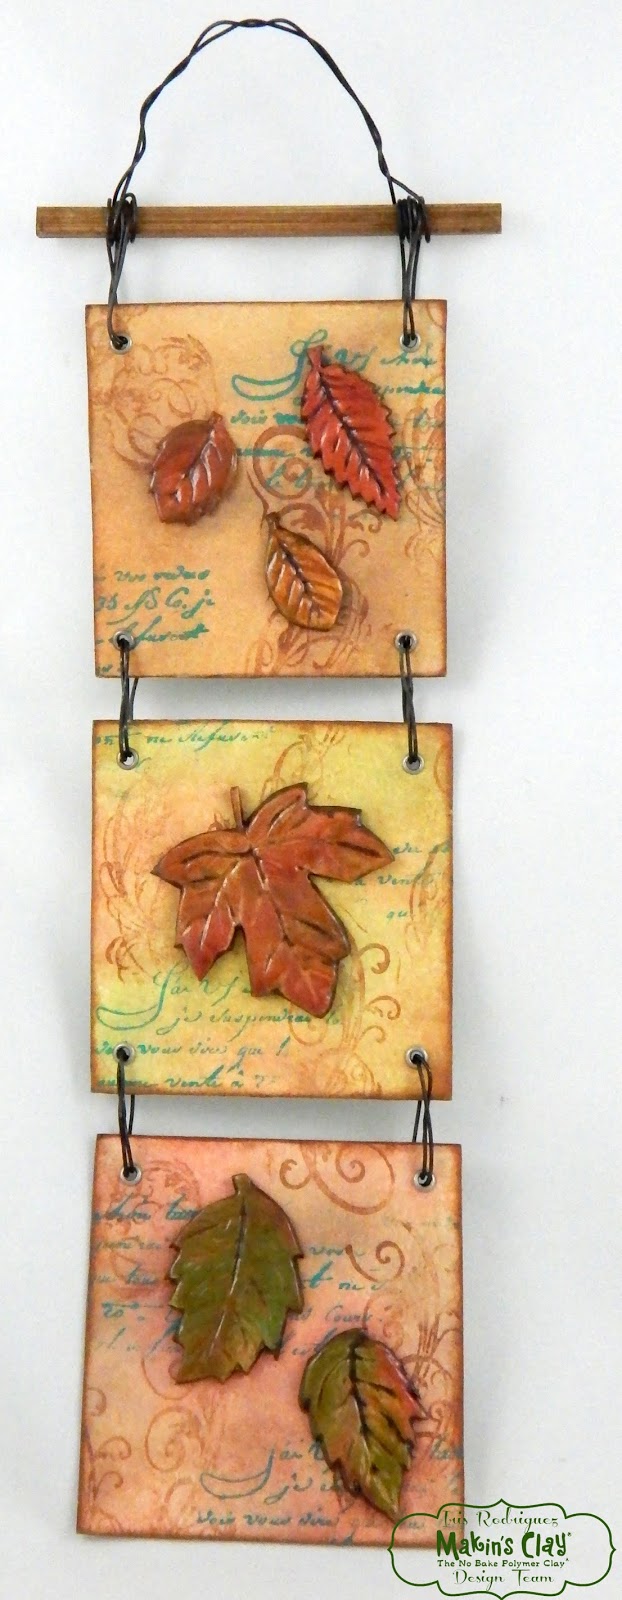
| Fall Leaves Wall Hanging by Iris Rodriguez |
Fall is my favorite time of the year. I enjoy the temperatures, the colors, and the fresh, crip air. In honor of my favorite season, I made this fall leaves wall hanging using the Makin's Clay® Leaves mold.
Materials:
Makin's Clay®– White clay
Makin's®– Leaves Push Mold
Makin's Professional® Cutting Mat
Imagine Inks-VersaMagic – Dew Drop 4 pack Southwest; Brilliance Dew Drop- Moonlight White, Galaxy Gold
Watercolor paper – Cold Press, 300 GSM - 140 lbs
Chipboard
1/8 Inch Hand Punch, Circle
Eyelets for Scrapbooking
20 Gauge steel wire
Sculpey Satin Clay Sealer
Precision Knife
Brayer
Wooden round or square rod
Baby wipes
Heating tool

 Cut out excess clay with a precision knife. Let the clay cure for 24 hours. While the clay is drying, work on the substrate; watercolor paper squares.


After adding all the color inks, add a little sparkle by blending in Brilliance Galaxy Gold, then Moonlight White to all three squares. Ink the edges.
Stamp images randomly on all squares. Continue to blend in the inks, if necessary.

 Punch holes on the corners of the squares. Add eyelets and attach the squares by wrapping the wire at each connection point. Wrap around twice and secure the end by twisting the on the backside.
 Attach a wooden rod by looping the wire on each end and across, leaving enough of a loop to hang.
 Once the 24 hours have elapsed, the leaves will have cured. Add Raw Umber acrylic paint to the leaves and wipe off the raised areas, leaving paint in the crevices. Let it dry.
 Use your fingers or Brushstix to color the leaves with VersaMagic Inks; Gingerbread, Red Brick, Turquoise Gem and Brilliance Galaxy Gold. Add the colors randomly. Do not blend the colors, it kind of dulls the colors. Heat set the ink with a heating tool. Ensure to seal the leaves with a satin clay sealer, which also adds vibrancy.
Imagine Inks-VersaMagic – Dew Drop 4 pack Southwest; Brilliance Dew Drop- Moonlight White, Galaxy Gold
Watercolor paper – Cold Press, 300 GSM - 140 lbs
Chipboard
1/8 Inch Hand Punch, Circle
Eyelets for Scrapbooking
20 Gauge steel wire
Sculpey Satin Clay Sealer
Precision Knife
Brayer
Wooden round or square rod
Baby wipes
Heating tool
Instructions:

Make the clay leaves by pushing the clay into the leaves mold.
 Cut out excess clay with a precision knife. Let the clay cure for 24 hours. While the clay is drying, work on the substrate; watercolor paper squares.
Cut three squares to a desired size. Using sponge dauber or other small sponge color ink the squares with the VersaMagic Dew Drop Southwest 4-pack set inks.


After adding all the color inks, add a little sparkle by blending in Brilliance Galaxy Gold, then Moonlight White to all three squares. Ink the edges.


Stamp images randomly on all squares. Continue to blend in the inks, if necessary.

Glue the squares to the chipboard by adding a layer of Medium Gel, then lay down the squares and burnish with fingers or pass a brayer over it. Although, the clay is lightweight, adding a little strength with the chipboard, will keep the watercolor paper from warping once the leaves are glued. Once the gel dries, cut the squares.
 Punch holes on the corners of the squares. Add eyelets and attach the squares by wrapping the wire at each connection point. Wrap around twice and secure the end by twisting the on the backside.
 Attach a wooden rod by looping the wire on each end and across, leaving enough of a loop to hang.
 Once the 24 hours have elapsed, the leaves will have cured. Add Raw Umber acrylic paint to the leaves and wipe off the raised areas, leaving paint in the crevices. Let it dry.
 Use your fingers or Brushstix to color the leaves with VersaMagic Inks; Gingerbread, Red Brick, Turquoise Gem and Brilliance Galaxy Gold. Add the colors randomly. Do not blend the colors, it kind of dulls the colors. Heat set the ink with a heating tool. Ensure to seal the leaves with a satin clay sealer, which also adds vibrancy.
Glue the leaves to the squares.


