Pages - Menu

Search This Blog

Showing posts with label kids craft. Show all posts

Wednesday, March 29, 2017

Neon Flower Book Marks


Design Team Member Lisa Haney recently shared some colorful neon flower book marks she made with Makin's Clay®.


The neon colors truly POP off the black clay background.  For more great examples of flower themed book marks made Neon & Black Makin's Clay® check out our post from last year here.

Tuesday, March 28, 2017

Easy Magnets - A Kids Craft


Easy Magnets by Donna Budzynski's Granddaughter
March is Youth Art Month so when my granddaughter wanted to create magnets for her school locker I thought it would be a perfect project for Makin's Clay®! 

Materials Needed:

Makin’s Clay® - Color of choice - We used Olive & Persimmon
Makin’s® -
   Clay Roller
   Clay Cutters  – I used the 3 piece Round & Oval sets
   Texture Sheet Sets  
Makin’s Professional® Cutting Mat
Magnets
Beacon Power-Tac Adhesive™
Iridescent by Ann Butler


Instructions:

Use clay roller to roll clay to about 1/8" thick. 

Place texture sheet over rolled clay and apply even pressure with roller to transfer texture to clay.


Use clay cutters to cut desired shapes.  Let dry 24 hours. 

Apply Iridescent to the clay, rub off lightly.


Adhere magnet to the back of each clay piece using Power-Tac adhesive. 


That’s it you are done!

Friday, March 24, 2017

Clay Easter Egg Ornaments Kid Craft


Clay Easter Egg Ornaments - A Kid's Craft by Erin Reed

March is Youth Art Month, so lets make a kids clay craft!!  My 2 younger kids love to color, and to color on something different, like clay and textured clay, and they thought that this idea was awesome!!!
Materials: 

Makin's Clay® - White 
Makin's Professional® Cutting Mat
Makin's® 
  • Clay Tools 
  • Texture Sheets set H and C
Oval or round clay clutters in desired size
Crayola "Extreme" Markers - Note: we recommend using non-water based markers. 
Spray sealant

Instructions:
1) Roll out white Makin's Clay® with the clay roller to about 1/8" thick and cut out as many oval shapes as you can, if you do not have an oval cutter, then circles work too.  Shape each shape into a egg looking shape with your hands.  To create a hole to hang your eggs, either make a small hole in the top while the clay is still fresh, or let dry 24 hours then punch a hole with a heavy duty hole punch.
2) Add some texture to the eggs by placing a Makin's® texture sheet over the egg and gently pressing to transfer the texture to your egg.  Adjust the shape with your hands as needed if adding the texture effects it.  I used the all 4 from Set H and the Lace from Set C, but really any fun texture would look really cool!


Let the eggs dry until you can pick them up without them "drooping".  Let the kids have fun coloring them, we used washable markers, which may smear, but paint would work too!  Let the eggs dry for 24 hours.  If using non-permanent markers, once the markers have dried on the clay it is recommended you seal the finished eggs with a spray sealant to help eliminate smearing of the markers.    Add ribbons when the eggs are finished. 


Here is a video on how I prepped the eggs and my kids coloring and talking about their decorated eggs.  

https://youtu.be/wGOMiGzF0zI

Erin Reed - Designer & Artist
Blog
YouTube
ETSY
Instagram

Wednesday, March 1, 2017

Chocolate Rabbits Stretch Bracelet DIY Video


In this DIY video, Cindi McGee shares a super quick & easy way to make a fun Easter bracelet with Makin's Clay® and the Makin's® Easter Clay Cutter Set, for a special little one in your life.  This project is easy enough for the kids to help - Perfect for Youth Art Month!   Use your bunnies to create bracelets, magnets, pencil toppers, and more!  


Monday, July 25, 2016

Fish Key Chains by Erin Reed


Fish Key Chains made by Erin Reed with Makin's Clay®

Fish Key Chains
Designed by Erin Reed

I wanted to make something fun for the boys (my boys and nephews) for the summer, but what little crafty items do you give to boys - key chains!!!  They do not have to use them just like a key chain as what little boys have keys? But, as a backpack fob or vacation bag zipper pull, why not?!?!?

Materials: 

Makin's Clay® - White
Makin's Clay® Clay Tools 
Makin's® Cutting Mat
Gem - Eyelet Outlet
Beads
Hemp
Key Ring
Gem Tac Glue - Beacon

Instructions:

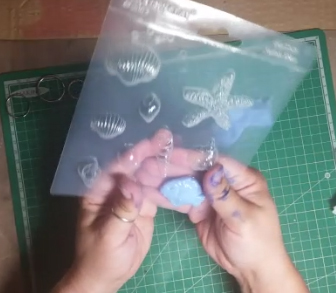
1) I used some of the amazing white Makin's Clay® mixed with blue DecoArt Traditions paint to make 8 fish from the Makin's® Sea Shells push mold in a fun light blue color.  Then I painted the fish with the same blue paint to highlight the details and added in little gem for the eye.


2) While the fish dry, roll out the white clay with the clay roller and cut out 8 circles with the largest cutter from the 3 piece Circle Clay Cutter set.   String on the key chain top and then some pony beads in white and seal the ends of it with the clay disk.  Paint the edges fo the disc blue to match the fish.  Glue on the fish, one to each side and spray with a sealant to protect the fish.


Close up view of fish key chains made with Makin's Clay®

Here is a video tutorial of the entire process!!

What little kid or adult would not want these super cute little fish?
Have a beachy summer, get our there and make some fun beach summer crafts!! 


Thursday, July 21, 2016

"Summer Blue" Floral Necklaces by Donna Budzynski

Floral Necklaces by Donna Budzynski made with Makin's Clay®

"Summer Blue" Floral Necklaces 
Designed by Donna Budzynski

I designed these with the help of my grandkids. They wanted to make a necklace out of clay and I thought why not use Makin’s Clay®, it is lightweight, non-toxic, hypoallergenic and perfect for all ages - the perfect option for our summer necklaces!  They wore them to the movies and told everyone they made them! They were a walking billboard!

We nicknamed Donna's necklaces "Summer Blue" Floral Necklaces because her pretty clay color reminds of a bright summer sky!

Materials:

Testors White Acyrilic paint

Tools:

Makin’s Clay® Cutting Mat
Makin’s Professional® Ultimate Clay Machine® or Rolling tool
Makin’s® Clay Cutters – Round
Floral stamp of choice
Hemp cord
Toothpick

Instructions:
 
1.     Gather your blue Makin’s Clay® and your paint. 


2.     Add some paint to the Makin’s Clay® Blue to make it a light ocean blue.  

3.     Once the paint was added I took a hint off of the Makin’s Clay® blog! After adding paint to clay, put into a plastic bag and mix in the bag.  FYI….Great tip’s can be found here on the blog!


4.     Once your clay and paint are mixed thoroughly, either roll out using your Makin’s® roller tool or the Makin’s Professional® Ultimate Clay Machine® to about 1/8" (setting #2).


5.     Stamp your image into the clay.


6.     Using Makin’s® round cutter, cut out your images.  We used the largest cutter in the 3 piece set.   Make a hole for your hemp. 


7.     Set aside to let dry. This won’t take long. Mine were dry in a few hours (Makin's Clay® is usually fully dry in 24 hours depending upon your atmospheric conditions - a thin piece like these will take much less time!)

8.     Once dry, using a paintbrush add paint into the stamped image. Lightly wipe away paint with a damp paper towel, leaving paint inside of image.


9.     Add hemp cord to length and enjoy!


Contact us

Name

Email *

Message *