Pages - Menu

Search This Blog

Showing posts with label Canvas Corp. Show all posts

Tuesday, December 20, 2016

Coiled Holiday Tree Card


Coiled Holiday Tree Card by Erin Reed 

This month Makin's Clay® challenged it's Design Team members to select a Pin from our Tutorials & Techniques Board or our Polymer Clay Inspiration Projects Board and create a project using Makin's Clay® based upon the chosen pin.  Our goal was not to have our designers simply copy of the projects, yet be inspired to perhaps try a new technique, or create a project style they might not normally have considered. 

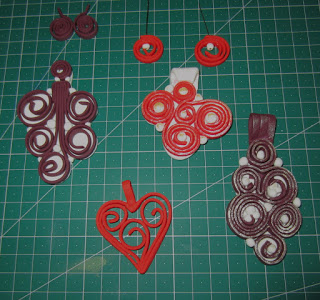
Hi all, Erin here today.  I just recently went to a wine and painting class with some friends and the painting we did there used swirls to create a tree, and I thought why can't that translate into a card?  Then I was browsing through the Makin's Clay® Tutorials & Techniques Pinterest board and I came across this fun technique using the Makin's Professional® Ultimate Clay Extruder® to make extrusions and then turn them into swirls, and it seemed like a match made in heaven!!

https://www.pinterest.com/pin/501588477234460867/

Materials: 

Makin's Clay® 
  • Vineyard Tones - Grape Leaf, Merlot
  • Earth Tones - Straw 
Makin's®
  • Christmas Nature Push Mold 
  • Clay Tools 
Makin's Professional®

  • Ultimate Clay Extruder® - Disc #7, Disc #4
  • Cutting Mat
Card - Canvas Corp Brands
Ink - Brutus Monroe
Beacon 3-in-1 Adhesive™

Instructions:
1) Start with the Straw clay.  Using the Christmas Decor push mold make a star for the top of the tree.  Set aside to dry.


2) Using the Ultimate Clay Extruder® with disk 7, make extrusions from the Grape Leaf green clay. Take the extrusions and turn them into swirls and place them into a triangle cut paper as a guide to make a tree shape.

3) Remove triangle shaped paper, and glue swirls into place on Canvas Corp burlap stitched card with Beacon 3-in-1 Adhesive™.


4) Use the extruder and disk 4 with the Merlot clay  and cut
symmetrical size pieces and roll into little balls.  Glue decorative balls and star onto tree.  Ink edges of card with Brutus Monroe green ink.


Here is a full video tutorial on how I made this swirl clay Christmas tree card.
https://www.youtube.com/watch?v=okkW76AfiwA

Now you have a fun cute card to give to a special person for Christmas.  You can also translate this idea into a decorative canvas or an ornament!!

Erin Reed - Designer & Artist
Blog
YouTube
ETSY
Instagram

Thursday, August 1, 2013

Mixed Media ART Mosaic

While at the CHA Create-n-Connect Show last week I taught a Mixed Media ART Mosaic workshop which included Makin's Clay® pieces that were stamped and foiled.....it turned out very cool for each of the students.....Here is one of the class samples:

The clay tiles in the above project were placed all around the edge of the canvas.....here is how is was done:


Materials: 
Beacon Adhesives Fabri Tac, Felt Glue, Fast Finish Decoupage & 527 Multi Use Glue
Rubber Stamps: EZ-De’s by Ann Butler Designs and KellyCraft Innovations
                             Ann Butler Designs by Unity Stamp Company
8” x 10” Canvas by CanvasCorp
Makin’s Clay®: White or Black
Makin’s Clay® Cutters: Rectangle or Square
Colorbox Chalk Ink: Popcorn by Clearsnap
Foils by Clearsnap  
Trim by Expo International
Gesso by Earth Safe Finishes
Velcro® Removable Picture Hangers
Decorative Paper of choice (8 ½” x 11”)
Tools:
Paint Brush, Scissor, Paper Trimmer, Acrylic Block, KellyCraft Get-It-Straight Laser Square with 2 – 4  blocks the height of canvas (optional), Pencil, Toothpick, Ziplock Bag, Baby Wipes

Instructions: 
  1. Print saying of choice onto decorative paper.
  2. Apply gesso to front and edges of canvas, let dry.
  3. Using paper trimmer cut decorative paper to 7” x 9” being sure to keep in mind the area you want to use for your mosaic.  Then cut this into seven 1” x 9” strips, be sure to keep these in the correct order.  Then cut each strip into nine 1” x 1” squares.  Lay each strip out onto workstation in order.
  4. Use 1” square stamp of choice to stamp pattern onto each square with popcorn ink; this will help give dimension; notice how some squares have more ink then the others, this is ok as it adds interest in the piece.
  5. Evenly space all of the mosaic pieces onto the canvas (optional: using the laser square as a guide) apply felt glue to the back of each 1” square using a toothpick, glue in place, let dry. 
  6. Apply fast finish decoupage on top canvas with paint brush, let dry.  Repeat twice.
  7. Roll clay out to about 1/8” thick, press stamp of choice into clay for texture. 
  8. Cut clay with clay cutters; between 20 – 26 pieces.
  9. Apply a small amount of felt glue onto clay pieces with finger, let dry a few seconds (not completely) and apply foil onto clay pieces in small areas.
  10. Glue clay pieces onto edge of canvas and in areas desired on front with 527 multi use glue.
  11. Glue trim onto back of bottom edge of canvas with fabri-tac.
  12. Use Velcro® Removable Picture Hangers follow manufacturer's instructions to have canvas onto wall.

Contact us

Name

Email *

Message *