Pages - Menu

Search This Blog

Showing posts with label Krylon. Show all posts

Wednesday, June 7, 2017

Patriotic Star Earrings

Patriotic Star Earrings by Cindi McGee
Be ready for the 4th of July with these super easy, sparkling star earrings.  

Materials:

Makin's Clay®- 60g White, Red, Blue 
Makin's® 
  • Clay Tools
  • Clay Cutter Set - Mini Geo 
Makin's Professional®
  • Cutting Mat
  • Professional Clay Tools 
Krylon® Silver Leafing Pen 
Clearsnap® Smooch Glitz™
Silvertone jump rings, silvertone chain, earring wires
Jewelry pliers 

Instructions:

Roll small amount of red, blue and white clay to about 1/8" thick. 

Use star cutter from Mini Geo set to cut several stars. You will need 6 white, 2 blue and 2 red for these earrings.  I cut extra for future projects.


Use fine point tool from kit to create hole in the top of each star for jump rings.  Apply silver leafing pen to 4 white stars.  Apply Smooch Glitz to remaining red, white and blue stars.  Let dry.  Repeat on opposite side.  Let dry. 


Let stars dry 24 hours.  Add jump rings to each star.  Add chain to earring wire. Skipping the first link, and starting on the second, attach stars in desired pattern in descending links of silver chain (chain should have 6 links total.)


Wednesday, April 19, 2017

Time Flies...Steampunk Bird Pendant

Time Flies...Steampunk Bird Pendant - by Patricia Krauchune
For my April project, I made a simple steampunk bird that even a novice can replicate. This project is made easy using Makin's Clay®  The No Bake Clay®. 

Supply List: 

Makin's Clay® - Black          6 Brass Pins/2 Glass Head Pins    DecoArt® Metallic Lustre™ -Silver
3 Watch hands/face                6-7 Small straight pins                 Art® Copper 
Various other watch parts      Copper wire for bale                     Inka Gold Metallic RubGreen/Yellow
Propeller                                Krazy® Glue                                 Craft knife
3 gears in different sizes        Krylon® 18k Gold Leafing Pen   Americana® Triple Thick Gloss Glaze

Recommended Makin's® Tools:

Makin's® Professional® - Cutting Mat
Makin's® 
  • Clay Roller
  • Texture Sheets - Dots & Wood Grain
Instructions:


Hand roll the Black Makin's Clay® to a 1/4" thickness. Using the pattern at the bottom, cut out the basic bird shape with your craft knife. Place the bird on the "Dots" texture sheet then place the "Wood Grain" texture sheet on top. Lightly burnish to impress the patterns onto the clay. 


Remove the top texture sheet, but leave the bird on the bottom one.  I added the watch hands for the tail feathers securing them with the yellow plastic head pins.  The watch face was then glued in place with Krazy® Glue followed by the propeller which is held in place with a glass head pin  I cut a gear in half and glued that above the watch hand tail "feathers".  Another gear was inserted into the side of the bird.  Use whatever watch parts you have to complete the head.  A small gear with a glass head pin forms the eye.  I looped some copper wire to make a bale.  Put aside for 48 hours to completely dry.  When dry, I used the Krylon® 18k Leafing Pen to color the edges. 
Various colors of Metallic Rubs were used to finish...copper, silver, green/yellow.  Lastly, I sealed the entire bird with Americana® Triple Thick Gloss Glaze™.


That completes your steampunk bird pendant. Anything is possible with Makin's Clay®!


Friday, June 10, 2016

Stars & Stripes by Patricia Krauchune


STARS & STRIPES

Living in Liberty House, I am very fond of all things patriotic. Here's my Makin's Clay® "flagpole", my interpretation of stars and stripes forever.

Supply List:

Makin's Clay® Red / White / Blue
Metal Tape

Statue of Liberty Mold
Small brass rod

Large paint stirring stick
Adirondack® Alcohol Ink Pitch Black

1 1/4" Smoothfoam Ball
Gold Cordage

Krylon 18K Gold Leafing Pen
2 Gold Tassels

Beacon™ 3-in-1 Adhesive
Green/Gray/Red/Blue/Silver/Gold Acrylic paint


Recommended Makin’s® Tools:
Makin's® Texture Sheets: Stripes, Stars (Set B and Set D)

Instructions:

I had a small silicone mold I made from one of my Statue of Liberty figurines.  Push some white Makin's Clay® into the mold and allow to dry overnight.


Unmold when dry, trim away excess clay and paint green and gray.  I used a Krylon 18K Gold Leafing Pen on the torch tip.


Next roll out red, white and blue clay using the Makin's Professional® Ultimate Clay Machine® on the # 1 setting.


The Makin's® Clay Cutter, large stars set, has three sizes...start with the largest and cut out a red star, then a medium star from the white clay and the smallest will be cut from the blue clay.  With the Makin's® Texture sheet, Stars, impress into the white clay.

Now use the Makin's® Texture sheet Stripes and impress the red and blue stars.  Cut out a small square, 3/4", in the center of the blue star.


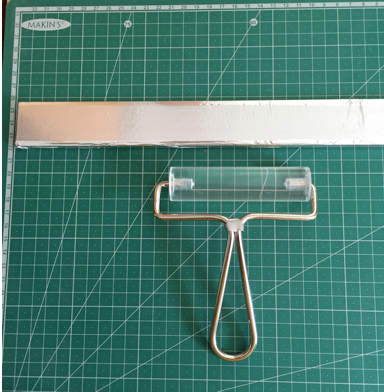
Cut the handle off a paint stirring stick.  Use metal tape to cover the stick.


 I wanted a steampunk kind of look to the flagpole so I scored some segments on the staff. I then used the pitch black Adirondack® Alcohol Ink to "antique" the  texture I had embossed.

Cut a 1 1/4" Smoothfoam ball in half then coat with the Krylon 18K Gold Leafing Pen.

Attach the "ball" to the top of the flag pole using the small brass rod.


 I used the Krylon 18K Gold Leafing Pen to outline each star.
At this point I used the Beacon's™ 3 in 1 Adhesive to glue the Statue of Liberty to the red star.


I painted the star impressions red, blue, silver and gold. The blue star has the cut out section.


Now glue the stars in place with the Beacon's™ 3 in 1 Adhesive. I had a small red glass star bead and I glued that in the center of the blue star.

I got some gold cordage from Joann's Fabric and weaved it around the stars and added the tassels to the bottom. So here you are, stars and stripes forever!  God bless America.

Contact us

Name

Email *

Message *