Pages - Menu

Search This Blog

Showing posts with label 4th of July. Show all posts

Wednesday, June 20, 2018

4th of July Polymer Clay Embellished Patriotic Vase DIY Video - Makin's Clay® Design Studio

'

In this DIY episode from the Makin's Clay® Design Studio from our MakinsClayUSA YouTube channel, Cindi McGee shares how to do a simple technique to create blended clay for your projects.  She uses the Makin's Clay® blend, along with our Makin's® Star Clay Cutters and Stars Texture Sheet, to make decorative stars for a festive 4th of July upcycled centerpiece.

Wednesday, June 7, 2017

Patriotic Star Earrings

Patriotic Star Earrings by Cindi McGee
Be ready for the 4th of July with these super easy, sparkling star earrings.  

Materials:

Makin's Clay®- 60g White, Red, Blue 
Makin's® 
  • Clay Tools
  • Clay Cutter Set - Mini Geo 
Makin's Professional®
  • Cutting Mat
  • Professional Clay Tools 
Krylon® Silver Leafing Pen 
Clearsnap® Smooch Glitz™
Silvertone jump rings, silvertone chain, earring wires
Jewelry pliers 

Instructions:

Roll small amount of red, blue and white clay to about 1/8" thick. 

Use star cutter from Mini Geo set to cut several stars. You will need 6 white, 2 blue and 2 red for these earrings.  I cut extra for future projects.


Use fine point tool from kit to create hole in the top of each star for jump rings.  Apply silver leafing pen to 4 white stars.  Apply Smooch Glitz to remaining red, white and blue stars.  Let dry.  Repeat on opposite side.  Let dry. 


Let stars dry 24 hours.  Add jump rings to each star.  Add chain to earring wire. Skipping the first link, and starting on the second, attach stars in desired pattern in descending links of silver chain (chain should have 6 links total.)


Monday, June 27, 2016

Patriotic Party Favors by Donna Budzynski

Design Team Member Donna Budzynski shares these fun patriotic party favors here on her blog.  Donna used Makin's Clay® and Makin's Star and Water Drop Clay Cutter Sets to decorate her treat jars.  (I want to come to her 4th of July festivities!) 


Wednesday, June 22, 2016

Patriotic Pinwheel Pins by Donna Budzynski


Patriotic Pinwheel Pins
Designed by: Donna Budzynski

Materials:

Makin’s Clay® VINEYARD TONES
Tac Pins

Tools:
Makin’s Clay® Cutting Mat
Makin’s® Cutters - Square, Stars
Makin’s® Roller
Beacon Power Tac Adhesive

Instructions:


Gather all supplies needed.

 Using Makin's Professional® Ultimate Clay Machine® roll out Makin’s Clay® beginning on setting #1 and ending at setting #3.


Cut Concord Blue clay using Makin's® large square cutter from 3 piece set. 
Roll Merlot and Natural clay in Ultimate Clay Machine® to setting #3.  Cut into strips approximately 1/4".  Cut stars from Merlot clay.  (Hint:  Strips are small and will begin drying quickly, cover with a damp paper towel to keep your work from drying out before you are finished).

Use Merlot and Natural strips in an alternating pattern to cover the Concord Blue square.  Fresh clay will stick to fresh clay without additional adhesive.   Let dry for a couple of hours.  

Once the clay has begun to dry, find the center and cut as shown (this picture is my first attempt, not great.  Things don't always turn out as planned!) 


At alternating cuts, fold to center.  I used Beacon Power Tac adhesive to adhere to the center.  Adhere the stars to the centers of each pinwheel. 


Adhere the pin backs with Power Tac.


Friday, June 10, 2016

Stars & Stripes by Patricia Krauchune


STARS & STRIPES

Living in Liberty House, I am very fond of all things patriotic. Here's my Makin's Clay® "flagpole", my interpretation of stars and stripes forever.

Supply List:

Makin's Clay® Red / White / Blue
Metal Tape

Statue of Liberty Mold
Small brass rod

Large paint stirring stick
Adirondack® Alcohol Ink Pitch Black

1 1/4" Smoothfoam Ball
Gold Cordage

Krylon 18K Gold Leafing Pen
2 Gold Tassels

Beacon™ 3-in-1 Adhesive
Green/Gray/Red/Blue/Silver/Gold Acrylic paint


Recommended Makin’s® Tools:
Makin's® Texture Sheets: Stripes, Stars (Set B and Set D)

Instructions:

I had a small silicone mold I made from one of my Statue of Liberty figurines.  Push some white Makin's Clay® into the mold and allow to dry overnight.


Unmold when dry, trim away excess clay and paint green and gray.  I used a Krylon 18K Gold Leafing Pen on the torch tip.


Next roll out red, white and blue clay using the Makin's Professional® Ultimate Clay Machine® on the # 1 setting.


The Makin's® Clay Cutter, large stars set, has three sizes...start with the largest and cut out a red star, then a medium star from the white clay and the smallest will be cut from the blue clay.  With the Makin's® Texture sheet, Stars, impress into the white clay.

Now use the Makin's® Texture sheet Stripes and impress the red and blue stars.  Cut out a small square, 3/4", in the center of the blue star.


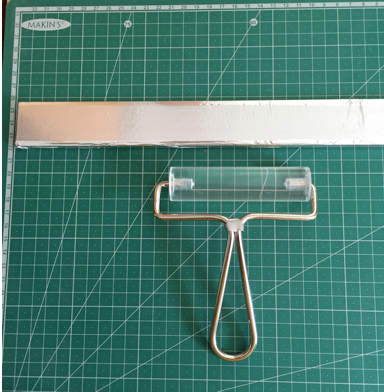
Cut the handle off a paint stirring stick.  Use metal tape to cover the stick.


 I wanted a steampunk kind of look to the flagpole so I scored some segments on the staff. I then used the pitch black Adirondack® Alcohol Ink to "antique" the  texture I had embossed.

Cut a 1 1/4" Smoothfoam ball in half then coat with the Krylon 18K Gold Leafing Pen.

Attach the "ball" to the top of the flag pole using the small brass rod.


 I used the Krylon 18K Gold Leafing Pen to outline each star.
At this point I used the Beacon's™ 3 in 1 Adhesive to glue the Statue of Liberty to the red star.


I painted the star impressions red, blue, silver and gold. The blue star has the cut out section.


Now glue the stars in place with the Beacon's™ 3 in 1 Adhesive. I had a small red glass star bead and I glued that in the center of the blue star.

I got some gold cordage from Joann's Fabric and weaved it around the stars and added the tassels to the bottom. So here you are, stars and stripes forever!  God bless America.

Contact us

Name

Email *

Message *