Pages - Menu

Search This Blog

Showing posts with label 4 leaf clover. Show all posts

Saturday, February 17, 2018

Four Leaf Clover Pendant


Materials:

Makin’s Clay® - White 
Makin’s® - 
  • Mini Geo Clay Cutters 
  • Round Clay Cutters - 3 piece set 
  • Clay Roller 
Makin’s Professional® - 
  • Cutting Mat 
  • Professional Clay Tools 
Gold satin cording 
DecoArt® Dazzling Metallics™ acrylic paint - 
Paintbrush 
Assorted green mica powders 
Plastic wrap
Craft knife
Circle cutter about 1/2” wider than first cutter 
Beacon Tacky Glue™ 

Instructions:

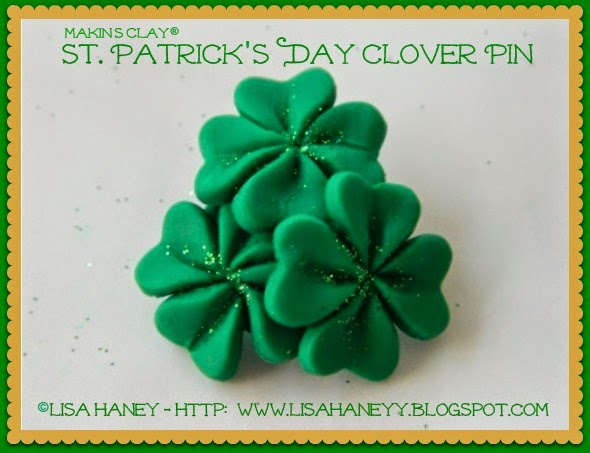
Roll white clay to about 1/4” thick.    Place plastic wrap over rolled clay and use heart shaped cutter to cut 4 hearts to form a shamrock.  Use craft knife to cut stem for clover and trim any "extra" clay remaining as shown. 


Use largest sphere tool from Professional Clay Tools to make random indentations over entire surface of clay to mimic hammered metal.  

Sprinkle on assorted green mica powders, carefully brush/press to adhere to fresh clay (I found it worked best to use my finger to gently pat the powders and adhere them instead of using the brush - I wanted the different shades to blend slightly but not completely blend together).


Roll additional white clay to about 1/4” thick.  Place plastic wrap over rolled clay.  Use larger clay cutter to cut circle. 

Use sphere tool to texture the circle, front and back. 

Paint with gold paint.  Let paint dry and paint back side.   


Apply a small amount of tacky glue to the back of the shamrock disc and glue to the gold
disc.  

Make a small hole in the top for the cording.   


Let dry 24 hours.   Add gold cording and sliding knots for closure. 

Saturday, March 11, 2017

Quilled Clay 4 Leaf Clover Earrings

Quilled Clay 4 Leaf Clover Earrings by Cindi McGee

’Tis the season for wearing GREEN!   St. Patrick’s Day is fast approaching and these “lucky four leaf clover” earrings will be a cute accent to any green outfit.  March is Youth Art Month and this technique is easy and could be recreated in any size by any age.  The effect is similar to paper quilling. 

Materials: 

Makin’s Clay® - Green 60g
Makin’s Professional® 
  • Ultimate Clay Machine®
  • Cutting Mat
  • Professional Clay Tools 
Ruler 
Gold earring wires, large jump rings, eye pins, accent beads 
Jewelry pliers 


Instructions:

Roll green clay in Ultimate Clay Machine® on setting #1, then #2, and end on #3.  

Use guidelines on cutting mat to measure over one half of square on cutting mat (dot in center), place ruler on rolled clay and use cutting wheel to cut strips from clay. 


Begin coiling strips of clay tightly, on oppostie ends of first strip.  End about 1/2” from center of strip, then fold in half to create stem and bottom leaves of shamrock.  

Roll two additional coils the same size as the bottom leaves.


Roll a small ball of clay and flatten slightly, place 3 sections of shamrock onto clay and press gently to adhere.  


Let dry 24 hours. 


Add large jump ring to each clover, then add gold accent bead to eye pin and attach to earring wires. 


Saturday, February 27, 2016

Shamrock Jewelry - Version 2 by Lisa Haney

Design Team Member Lisa Haney liked the technique she shared with us this month for faux glazed ceramic clay jewelry, that she created a new version of the very first project she ever shared with us - this time using the new technique.  We think both versions would be a fun addition to add a little "luck" to your fashion!
 
Shamrocks - 2.0! 

The "Originals" 

Monday, March 16, 2015

St. Patrick's Day 4 Leaf Clover Earrings by Lisa Haney


Four Leaf Clover Earrings
Designed by Lisa Haney

Yesterday we shared Design Team Member Lisa Haney's clever shamrock pin and today we are sharing a fun set of earrings to match!  

Skill Level – Easy

Supplies:

120g Green Clay

Recommended Makin’s® Tools
Roller
Clay Mixing Ruler™ - Pointed Mixing Wand
Geo Cutter Set – Heart

Other Materials:
Green Glitter
Beacon® Quick Grip Glue
Earring wires, jewelry pliers 

Method:

1. Roll green clay to 2mm thickness with Makin's® roller.  Cut out four petals using the (Tip:  If the clay sticks inside the cutter, use the stylus end of the mixing wand to push it out). 
heart-shaped cutter.  
2.  To shape a petal, lay the pointy end of the mixing wand down the center, press gently, and pinch the bottom of the petal.  Do this to all the petals. 

3. Form the petals into a clover making sure all of the petals touch firmly in the center. Wet clay will stick to wet clay with no additional adhesive needed. (Tip:  If the clay has begun to dry out, paint a tiny amount of water down the sides of the petal.  Keeping open clay not in use in a ziplock bag with a damp paper towel or baby wipe will help keep it fresh and prevent drying.)


4.  Add glitter to the center of the clover for some sparkle. (Tip:  Apply a small amount of adhesive then sprinkle on glitter.) 

  • 5. Using the sharp end of the mixing wand, poke a hole in the top of one of the petals for the jump ring.  
6.  Repeat steps 1-5 to make second clover. 
7. Let both clovers dry 24 hours, then using jewelry pliers attach the jump rings and then add to earring wires. \

Sunday, March 15, 2015

St. Patrick's Day Four Leaf Clover Pin by Lisa Haney

Four Leaf Clover Pin 
Designed by Lisa Haney


This adorable pin is perfect for St. Patrick's Day - but also for bringing a little luck into your wardrobe any day of the year!  

Skill Level – Easy

Supplies:

120g Green Clay

Recommended Makin’s® Tools
Roller
Clay Mixing Ruler™ - Pointed Mixing Wand
Geo Cutter Set – Heart

Other Materials:
Green Glitter
Beacon® Quick Grip Glue
Pin Back

Method:

1. Roll green clay to 2mm thickness with Makin's® roller.  Cut out four petals using the (Tip:  If the clay sticks inside the cutter, use the stylus end of the mixing wand to push it out). 
heart-shaped cutter.  
2.  To shape a petal, lay the pointy end of the mixing wand down the center, press gently, and pinch the bottom of the petal.  Do this to all the petals. 

3. Form the petals into a clover making sure all of the petals touch firmly in the center. Wet clay will stick to wet clay with no additional adhesive needed. (Tip:  If the clay has begun to dry out, paint a tiny amount of water down the sides of the petal.  Keeping open clay not in use in a ziplock bag with a damp paper towel or baby wipe will help keep it fresh and prevent drying.)

4.  Add glitter to the center of the clover for some sparkle. (Tip:  Apply a small amount of adhesive then sprinkle on glitter.) 

5.  Repeat steps 1-4 two more times for two more clovers. 
  • 6. Flatten a 3/4" ball of the green clay for the base.  Apply a thin layer of glue to the flattened ball and the backs of the clovers.  Attach the clovers to the flattened ball.  
7.  Let the piece dry 24 hours, the glue on the pin back. 

Contact us

Name

Email *

Message *