Pages - Menu

Search This Blog

Showing posts with label clay vessel. Show all posts

Monday, February 26, 2018

Upcycled Angel Vessel


This time I upcycled an empty container with Makin's Clay® and some molds.  I was after a vintage look like this tin has been around for centuries.

Supply List:

Makin's Clay®  any color works, I happend to have some brown
Makin's® Push Molds - Floral, Borders 
Tacky glue
Acrylic paint in metallic, silver, green and blue, black plain acrylic paint for patina
Metalic wax
Tools
Silicon mold with frame and angel
Empty metal container about 4 inches

Instructions:

I sanded my tin to have a better adhesion for the Makin's Clay® and also added some Tacky Glue when I applied the embellishments.

I started with the borders push mold and made some bands around the bottom and the top. I took them out carefully and attached them when they were still fresh.

I had to make several of the same borders and put them together. How many times depends a bit on the size of the container. And of course they didn't fit perfectly, so I had to cut one piece at the end.

After adding the frame and the angel, I made some tiny embellishment with the floral push mold.

I didn't fill the whole flower, just the center of the flower, this gives tiny little buds.


Next, I had to let it dry completely, before I could go over it with some Gesso. I didn't cover up completely as I was going for a more random look.

When the gesso was dry I covered everything with some silver metallic paint.


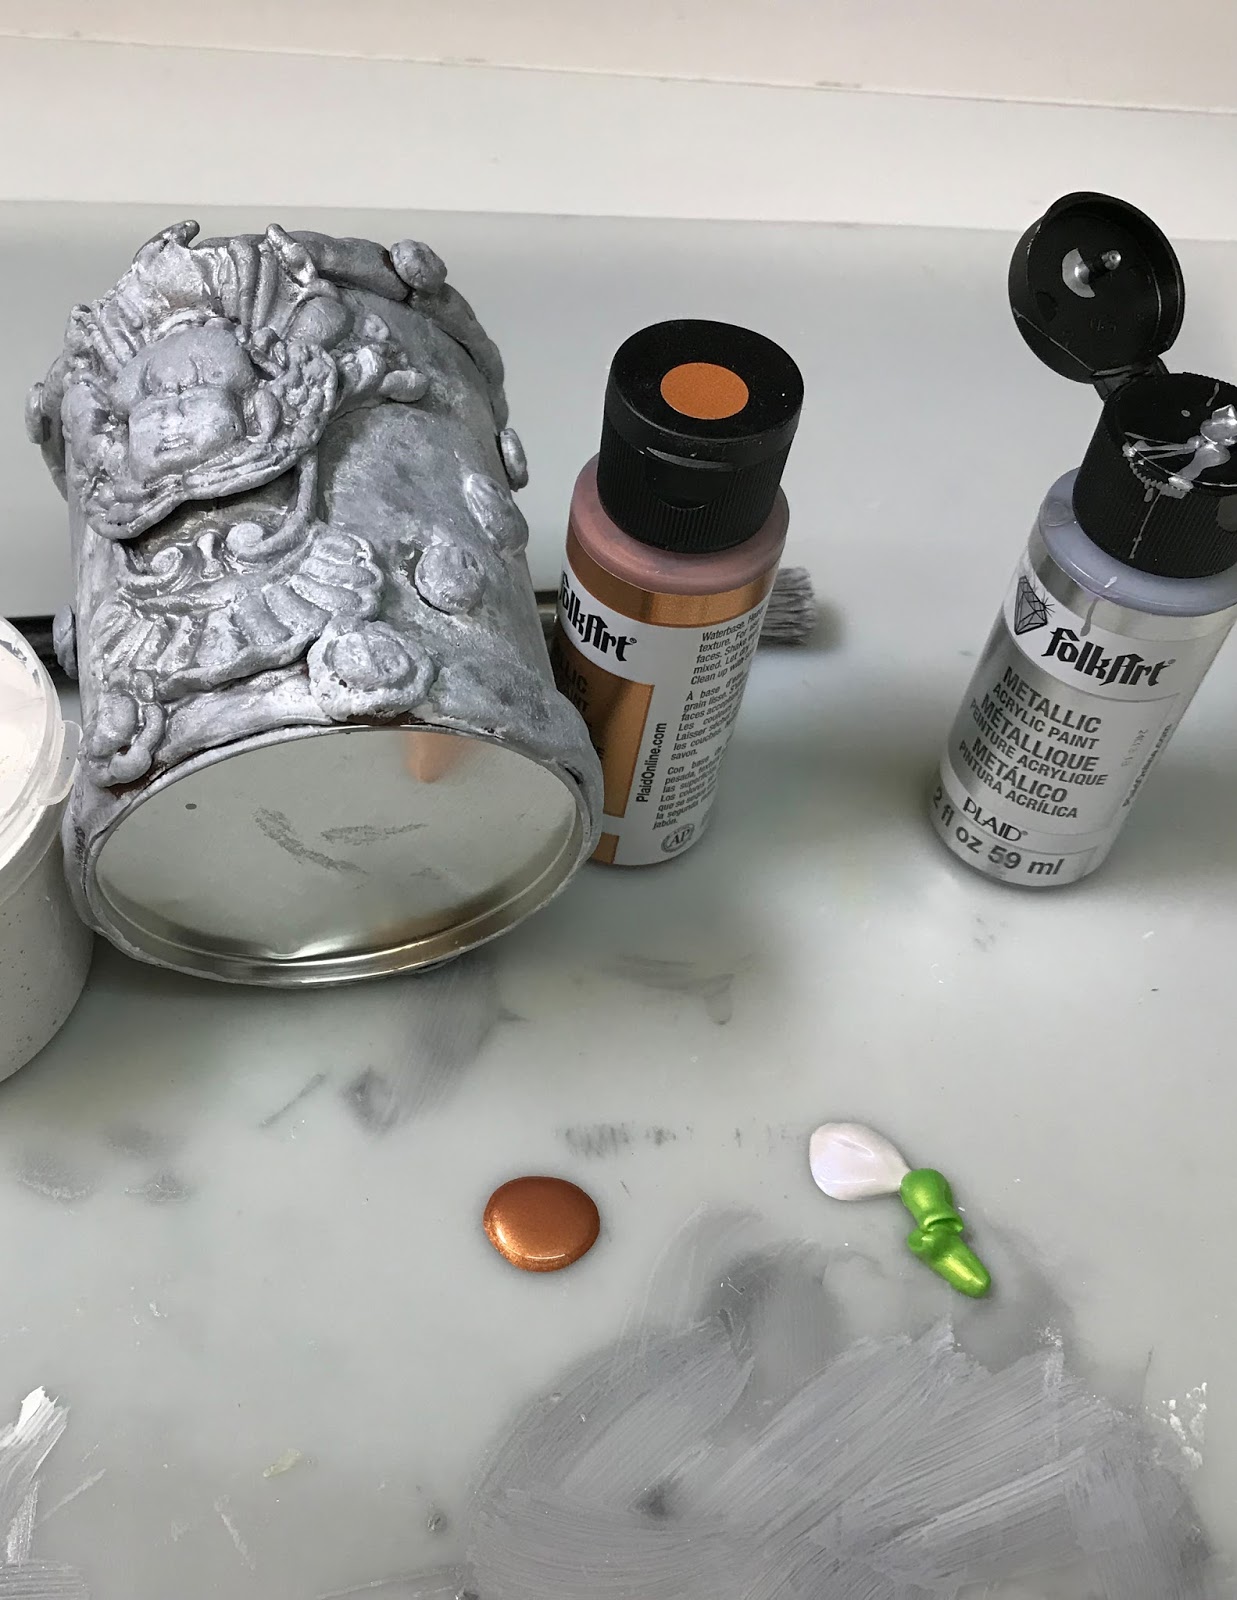
To bring up the relief a bit better I applied first some black paint and then wiped it off again with a wet wipe while the paint is still a little bit wet, which left the black in the crevices.

I also added in some random spots other colors of metallic paint and as a final step I added some metallic waxes, again applying it and then removing a part again.

I thing I also like to do is apply heat to the acrylic paint until it bubbles, this adds to the vintage character of any piece. Just be careful and move the heattool around so you don't accidently set the anything on fire or make it all black.

The really fun part was to buy some spring flowers for the little container, but you could also store for exemple your pencils or what not. I leave it up to you, just have fun working with Makin's Clay®.

Thursday, August 17, 2017

Beetle Pot

Beetle Pot by Patricia Roberts-Thompson


Did you know that Nail powders work wonderfully on Makin’s Clay®? Here’s a little Beetle pot that uses the new Chameleon Nail Powders by Born Pretty.

Materials:             

Black Makin’s Clay® 120 G
Makin's Professional® 
  • Ultimate Clay Machine® or Makin's® Clay Roller
  • Cutting Mat

Born Pretty Chameleon Nail Powders. I used GRB20, RGB20 and BYB20. You can substitute PearlEx powders or Metallic paints
Round cutters – 3 ¼”, 2 ¼” and a 1 inch diameter
Light bulb (Standard size) or Bath Bomb mold, bottom of a large Nestea Ice Tea soda can or other curved surface. You can use a larger light bulb also
Clay blade, craft knife, toothpick, paint brush
Aleene’s Tacky Glue or white glue


Instructions:

Step 1:     

Roll 60g Black Makin’s Clay®, on the thickest setting of the Ultimate Clay Machine® (#1) (or use clay roller).  Use the 3 ¼” round cutter, or a large lid as a template,  and cut one circle. Mark the center to help with the placement of the circle onto your light bulb or bath bomb form. Put the remaining clay into a ziplock bag with a wet wipe.  Place the center of the circle on the center of the light bulb and begin to Press the clay to the glass, using the palm of your hand. Work the clay in quarters to lessen the amount of distortion. When you have it pressed evenly on the glass, use a clay blade or craft knife to straighten the edges.


Step 2:                    

Use the leftover clay to make the foot of the pot. I doubled the clay, and used the 1” round cutter to cut a circle, which I added to the center of the clay pot.  This can be done now or after the clay has hardened. I used a little water so the clay would bond better. If you choose to wait, use a bit of glue to attach the foot.

Step 3:                    

To make the lid, roll out the remainder of your clay on the thickest setting. Cut a 2 ¼” circle and place it on a curved support. You’ll want the curve to be more shallow than the light bulb.  A large round light bulb would work well for this, or the bottom cut from a large can of Nestea Ice Tea. ( it’s bigger than a regular soda can).  Roll a bit of black clay into a ½” ball and taper it slightly. Flatten the bottom on your work surface.  Use a toothpick to press a line near the narrow end, to divide the Thorax from the Abdomen.  Press another line to define the Head. Smooth the head and press it back toward the Thorax. Next, use the toothpick to press a line down the center of the Abdomen, curving it left and right to indicate the wings of the beetle. I used a bit of Aleene’s Tacky Glue to secure the Beetle to the center of the lid. Coat the Beetle with the Born Pretty Chameleon Nail Powder GRB20,using a brush to apply, or mica powders, or you could choose to wait until it dries and paint it with Metallic Acrylic paints.


Step 4:                  

Let the bowl and lid dry for 24 hours, then loosen the top edge of the bowl from the lightbulb, and it will come off the glass. The third photo above shows the fit of the lid. Don’t worry if it doesn’t fit as well, as you can roll out a snake of clay, and add it to the top edge with a bit of white glue. Put the top on and adjust the fit. Remove the top, so the new edge can dry. If you didn’t make the foot for the bowl, now is the time to add it. I added powder to the rim.


Step 5:                    

You can decorate your little pot any way you like, I choose to add bits of powdered clay.  Roll a little black clay as thin as you can, and brush the Chameleon Nail Powder on 3 sheets, then tear the colours into tiny pieces. Using a brush, add some glue to the lid and add the pieces randomly. Use scissors to trim excess from the edges.  Add glue wherever needed to secure the rough edges of the pieces. A few lifted edges are okay, and add to the “look”.


Step 6:                     

Apply white glue with a brush, and add the torn pieces to the bottom of your little pot.   Use scissors to clean up the edge around the foot, then let everything dry.

Enjoy your cute little Beetle Pot, just the right size to hide a small treasure!                                


Contact us

Name

Email *

Message *