
Hi everyone, Steph Ackerman here today with a fun winter project to share. With winter upon us that means snow will be here shortly. Since it can be a little too cold outside to make snowmen, why not create your own snowmen from the comfort of your home.
Supplies:
Tattered Angels Baseboard - Lava
Ribbon
Leaves
Wiggly Eyes
Adhesive
Instructions:

Start by creating the snowman using tinfoil which has been tightly rolled into 3 balls. Continue adding tinfoil until you have 3 different sized shapes. Place toothpicks between the balls and glue in place to hold the shape. Put aside to dry.

Start by creating the snowman using tinfoil which has been tightly rolled into 3 balls. Continue adding tinfoil until you have 3 different sized shapes. Place toothpicks between the balls and glue in place to hold the shape. Put aside to dry.
Using the Ultimate Clay Machine®, roll each piece of clay starting at the thickest setting (#1).Continue putting the sheets of clay through the clay machine, moving up the settings one at a time, until the panels are the thickness desired.


Wrap the clay around the snowman, folding and pinching where necessary to achieve a desirable snowman. Since snowmen are not always smooth, don't worry about the lumps and bumps that show as a result of the underlying tinfoil.


Allow the snowman to dry 24 hours, then paint with white paint.
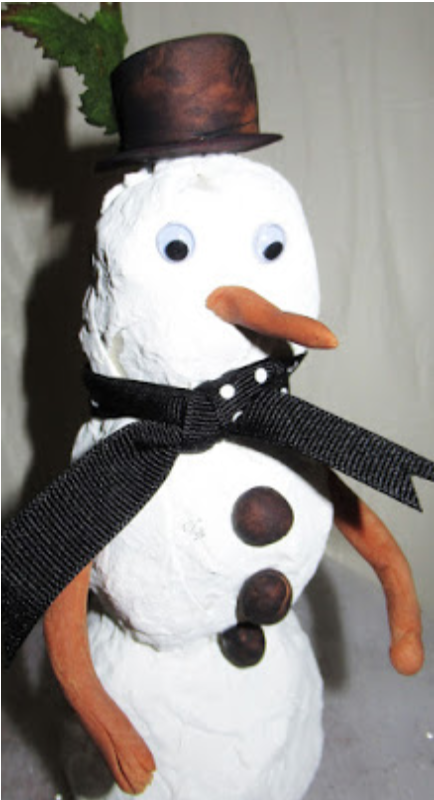
 I had no black clay handy so I rolled out 3 little balls of terra cotta clay for his buttons and his hat. Then I spritzed them with Tattered Angels Lava mist to change the color of the clay.
  I placed the hat on his head and added leaves to the side. Finally I tied ribbon around his neck.
Standing about 7" tall, he is a reminder of the winter weather that is to come.
Thanks for stopping by.


No comments:
Post a Comment