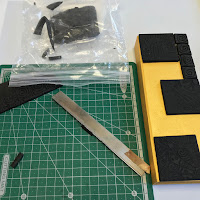
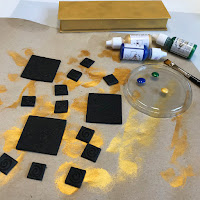
Today, I'm here with some cool Mosaic Boxes in Boho Style. I had this cardboard boxes since a while and thought it is time to pretty them up.
Materials:
Makin's® Clay Tool Set
Makin's Professional® - Ultimate Clay Machine®
Makin's Professional® - Cutting Mat
Makin's® - Square Cutters
Tissue Blade
Tissue Blade
Metalic Paint Lumiere by Jacquard
Sponge Dabber
Stamps
Bling
UV Resin and lamp
Instructions:
Instructions:
I started with painting the box in gold and let it dry completely.
Next, I started rolling out about half of a 60 g package Makin's Clay® - black. This is of course also depending on the size of your box and how many mosaic tiles you need. I used the Ultimate Clay Machine® on the setting one which is the thickest setting.
Then I sprayed some water on the rubber stamp and the clay and did dab it back slightly, I only want it a little bit wet but no big puddles of water.
Now it is time to make some impressions. I uses the roller from the Makin's® Clay Tool Set and rolls over from one end to the other and making sure to give a good pressure. I don't recommand to go back and forth, but rather one heavy roll. You risk to have double impressions when you go back and forth.
 |
| You should get something like this. |
To cut the large mosaic tiles I use the tissue blade.
The leftovers you can simply smoosh together and run again through the Ultimate Clay Machine®.
Here you can see the second patch, which gonna be the smaller tiles and I going use the Makin's® - Square Cutters.
A little trick here for you. I use an acrylic block on top of the cutter. This way I get more pressure to have a clean cut and it doesn't hurt my hands.
 To test how many small tiles I need I placed the big ones the way I wanted them onto the in the meantime dry box.
After having so much fun with the first box I decided to make another batch, this time with rather smaller tiles, there are so many variation how you can make them...
 I let the tiles dry overnight and now it it is time to paint them. I do use the Metallic paint for some extra sparkle.
As a first step I apply a color with a brush to make sure that I get into the crevices.
While the paint is still somewhat wet I take again a wet wipe and wipe off some of the paint on the surface, leaving color mostly in the crevices.
Next I add other colors on top, sometimes it is a back and forth applying color taking away until you are happy with the result.
Next I add other colors on top, sometimes it is a back and forth applying color taking away until you are happy with the result.
They looking quite good already, but I want to go a step further, so I go for some UV Resin next.
I usually start by applying along the edges and then add a blop in the middle and start spreading around. I also do at least 2 layers which I cure in between.
I usually start by applying along the edges and then add a blop in the middle and start spreading around. I also do at least 2 layers which I cure in between.


No comments:
Post a Comment