Pages - Menu

Search This Blog

Showing posts with label witches. Show all posts

Friday, October 25, 2019

Witches Hat Earrings


With Halloween approaching, I wanted to make something fun to go with my Halloween Costume… and what better way to add to a costume than jewellery! Makin's Clay® is lightweight and durable to make fun themed earrings and jewellery pieces. Any guesses to what I am dressing up as? 

Materials:

Makin’s Clay®- Black, Plum Wine and Yellow
Makin's Clay® Roller or Clay Machine 
Makin’s Professional® Cutting Mat 
Makin's Professional® Ultimate Clay Extruder®
Makin's® Texture Sheet Set C - Weave
Makin's® Clay Tool Set - Chisel
Clay Blade
Circle cutter 3cm diameter
Triangle cutters (optional) 
2 Micro square cutters, one approx. 1cm and 0.8cm 
Micro Circle cutter approx. 1cm
Tacky glue 
Black coated jump ring 1.2cm
Surgical steel earring posts 0.5cm
Pin Vice Drill
Jewellery pliers 

Instructions:

Roll out your Makin's Clay® black to the thickest setting on your clay machine, then cut two, 3cm circles. Smooth edges of the circle with your fingers. Lay aside and cut two triangles to fit each circle. I used a diamond cutter and then used the same circle cutter to do a curved cut in the middle of the diamond, then trimmed it to fit the circle. 

Lay the triangles on top the circle bases, use a touch of water or tacky glue to attach them.


Extrude Makin’s Clay® - Plum wine with the help of Makin's Professional® Ultimate Clay Extruder® and the single circle extruder disk, to make the witches hat ribbon. 

Place the strip of clay around the base of the point hat tip with water or tacky flue. Smooth the edges down slightly.


To make the witches hat buckle, roll out your Makin's Clay® Yellow to the 3rd thickest setting on your clay machine. Cut a little square using the larger of the 2 square cutters, then in the centre of that square place the smaller square cutter and cut out the square, leaving a square outline use as a buckle.
  
Place the put line square onto the hat ribbon using tacky glue or water, I placed them a little off-centre to add interest. 


Roll out your Makin's Clay® Plum Wine to the thickest setting on your clay machine, then cut a 1cm circle, using a micro circle cutter. Smooth edges of the circle with your fingers. At this point, you can put a hole towards the bottom of the circle and towards the top of the Witches hat point, for later on jump ring attachment. or I used a pin vice drill, later on, once dry to put the holes in.

Set aside the Hats and circles to dry for 24 hours. 

This next step is optional.

Roll out your Makin's Clay® Plum Wine to 3rd thinnest setting on your clay machine, then Lightly dust, dusting powder (cornstarch) over the clay. Place the Makin's Clay® Texture Sheet Set C - Weave on top of the clay, using your fingers press and roll over the texture sheet, pressing the impression into the clay. Does not have to be a perfect impression right around, it is to give an organic feel.

Use the same circle cutter used to cut the base of the hat, cut a circle out to place on the bottom of the hat base. Adhere it with some tacky glue. Smooth edges with your fingertips.


Allow to dry for 24 hours. 

Place holes using the pin vice drill (if already haven’t) drill holes in towards the bottom of the circle and towards the top of the witches hat point. To finish the earrings off, attach jump rings to attach the hat and circle. Then glue earring posts to the back of the circles.


Hope you have fun making and wearing these Witches Hat Earrings!
Happy Halloween! 

Friday, October 11, 2019

Witches Bat Necklace


Design Team Member Naomi Scarparo recently shared this cute yet creepy bat necklace just in time for Halloween.  Naomi made her necklace with Makin's Clay®.


Thursday, October 3, 2019

BOO! Halloween Wall Panel


BOO! Halloween Wall Panel by Steph Ackerman
​Hi everyone, Steph Ackerman here today and I've got a new Spooky project to share for Makin's Clay®.

​Supplies:

Makin's Clay® - Black, Brown, White, Earth Tones
Makin's ProfessionalⓇ Ultimate Clay MachineⓇ
Makin's ProfessionalⓇ Cutting Mat
Makin's Clay Cutters - Rectangles, Halloween Set
Beacon Adhesives - 3-in-1
​ Mod Podge clay mold
​ Memento Fireworks Shimmery Craft Sprays
​ Sizzix dies
​ Burlap Panel

Instructions:


​Start by spritzing the panel with assorted colors of Fireworks Inks.  I started with lighter colors then realized I wanted a darker effect so I added a darker blue and gray.

Begin by conditioning the white, black and brown clays.  Then place each individually in the clay machine at the highest setting.  Reduce the setting on each pass until you have the thickness you need for your project.


As I was creating a Halloween scene, I die cut a haunted house from the black clay.  To be sure the clay did not stick to my die, I place the clay between wax paper and then ran it through my die cut machine.  Although still damp, it die cut beautifully. 

Picking up the left over black clay, I mixed it with some white clay and again ran it through the clay machine until I had a mottled effect.  I then die cut the roof of the house and placed it atop the main image. 

As the clay was still damp/fresh, no glue was needed to adhere the pieces.


​ 

​Next, I die cut 2 trees using another Sizzix die.  Again, I placed the clay between wax paper so it would not stick to the die.                           
Once all my elements were ready, I started creating a spooky scene.  I began by adhering some torn strips of paper across the panel then put the trees in place.  Realizing I wanted fence posts, I used the left over black and white clay and die cut the fences.  I also had left over brown clay so I free hand cut a sign.  Using the small pumpkin cutter, I created several pumpkins, used a craft stick to create texture, then spritzed each with Fireworks Craft Sprays.  They were placed around the sign onto which I added letters spelling BOO.


​Using the ghost clay cutter, I created a number of ghosts that I adhered to the panel.  In the upper corner I created a moon and placed a ghost on top. 


The black cats are standing on the fence and the witch's hat is in the tree.  Yellow clay was added behind the house to simulate light in the windows then the house was adhered to the panel.  Using the remaining black and white clay panel, I used a rectangle cutter to create bricks for a walkway.


​Hoping you have a Happy Halloween!

​Thanks for stopping by.

​Steph

Monday, September 23, 2019

Witches Hat Ring Holder

Witches Hat Ring Holder by Naomi Scarparo

With my one of my favourite holidays approaching, I wanted to make something practical and have a Halloween theme to it… I don’t know about you, but I am always taking my rings off to do sculpting or any messy crafting fun. What a spooky way to store your rings on this Witch’s Hat Ring Holder, that you can make yourself...

Materials:

Makin’s Clay®- Black, Plum Wine and Yellow
Makin's® Clay Roller or Makin's Professional® Ultimate Clay Machine® 
Makin’s Professional® Cutting Mat 
Makin's® Texture Sheet - 
Makin's® Clay Tool Set - Chisel
Small Dish (I used a 10cm diameter size)
Circle cutter to fit your dish 
2 square cutters, one approx. 1cm and 0.8cm 

Instructions:

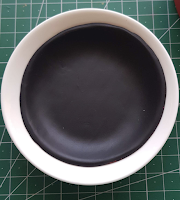
Roll out your black clay to the thickest setting on your clay machine, then cut a circle to fit a small dish (10cm diameter size). Smooth edges of the circle with your fingers. Lay the circle clay into the little dish, making sure there are no air bubbles.


Roll a large sausage shape of black clay then roll tampering the top into a point. Widen the base by setting it up with the pointed end upwards. Slightly making the top half crocked so a ring can sit there. Tip - test it the width with a ring.

Place it in the centre on top of the clay dish, using a touch of tacky glue or water to adhere to the base of the bowl.

Extrude Plum Wine clay with the help of Makin's Professional® Ultimate Clay Extruder® and the wide flat extruder disk, to make the Witch’s Hat ribbon. 

Place the strip of clay around the base of the point hat tip with water or Tacky Glue. Smooth connector ends, blending them together.

Set aside. 


To make the witch’s hat buckle, Roll out your yellow clay to the 3rd thickest setting on your clay machine. Cut a little square using the larger of the 2 square cutters, then in the centre of that square place the smaller square cutter and cut out the square, leaving a square outline use as a buckle.

Place the put line square onto the hat ribbon using tacky glue or water. 

Set it aside and allow to dry for 24 hours in the dish to keep its shape.


These next steps are optional.

Roll out your Plum Wine clay o 3rd thinnest setting on your clay machine, then Lightly dust, dusting powder (cornstarch) over the clay. Place the Makin's® Texture Sheet Set C - Weave on top of the clay, using your fingers press and roll over the texture sheet, pressing the impression into the clay. Does not have to be a perfect impression right around, it is to give an organic feel.

Use the same circle cutter used to cut the base of the hat, cut a circle out to place on the bottom of the ring base. Adhere it with some tacky glue. Smooth edges with your fingertips.


Extrude black clay with the help of extruder, and the small single extruder disk, make an edging for the rim of the dish. Adhere it with Tacky Glue.

Again Extrude more black clay using the extruder  and the tiny hole extruder disk and make tiny strands of clay. Place in between the first extruded rim clay, just to tidy areas up, this step is certainly not a necessity. 

Allow to dry for 24 hours.


Thursday, October 4, 2018

Witch's Hat


Hi everyone, Steph here today with a witch hat that can double as the top of a candle holder.  While  Halloween is just around the corner, there is still time to create some fun Halloween projects!

​Supplies

Makin's Clay- Black 

​Black Gesso
​Prima Marketing Metallique Paints
Paper mache hat
​Candle Holder

Instructions

Starting on setting #1, roll black clay through the clay machine, increasing the settings one a time,​ until I had the thickness I desired.  For this project, I ended on setting #5.

​ 
​I found a paper mache witch hat that I thought would be fun to alter.

Damp clay will seal together without glue, so starting from the tip, I wrapped the clay around the point.  I cut off  the excess clay as I covered the hat.   I snipped the clay along the bottom edge so it would sit evenly on the brim.  

​I took the cut off remnants and wrapped them around the brim, sealing them to the hat.  Again, I trimmed the clay so it would sit evenly on the brim.


I cut off the overhanging clay then painted the hat with black gesso.  Once the clay had been allowed to dry for 24 hours, I decided to paint the hat a lovely metallic purple.

​I wanted to add some "hair" to the hat so I die cut Rinea Glossy Copper Foiled Paper and adhered the
hair under the hat.

​I then curled each piece individually by wrapping each around a craft tool.  Next, I adhered some white mesh around the hat.

​ To finish, I adhered some lovely purple jeweled spiders to the mesh.
​ 

​​
I created the witch wand by wrapping black clay around a stick.  For the top of the wand, I die cut  Rinea Ebony Starstruck  Foiled Paper and added it to the top, curling each piece.

Thanks for stopping by.

​ Steph


Contact us

Name

Email *

Message *