Pages - Menu

Search This Blog

Showing posts with label fall craft. Show all posts

Monday, October 28, 2019

Autumn Leaves Photo Frame


Materials:
  • Makin's Clay® white 
  • Makin's Professional® cutting mat
  • Mini leaves cutters
  • Roller
  • Chalk pastels in fall colours
  • White glue
  • Soft paint brushes
  • A blade
  • Plastic bag or foil

Instructions:

This project was born really fast as I had a great helper, my daughter Liza.  I actually,find Makin's Clay® one of the best clays to work with when working with - there are tons of possibilities and it is easy to use.  

1.  Take a piece of white clay out of a package and roll it to a thin layer  (the rest of the clay should be kept in a zip lock with a w et wipe inside.)
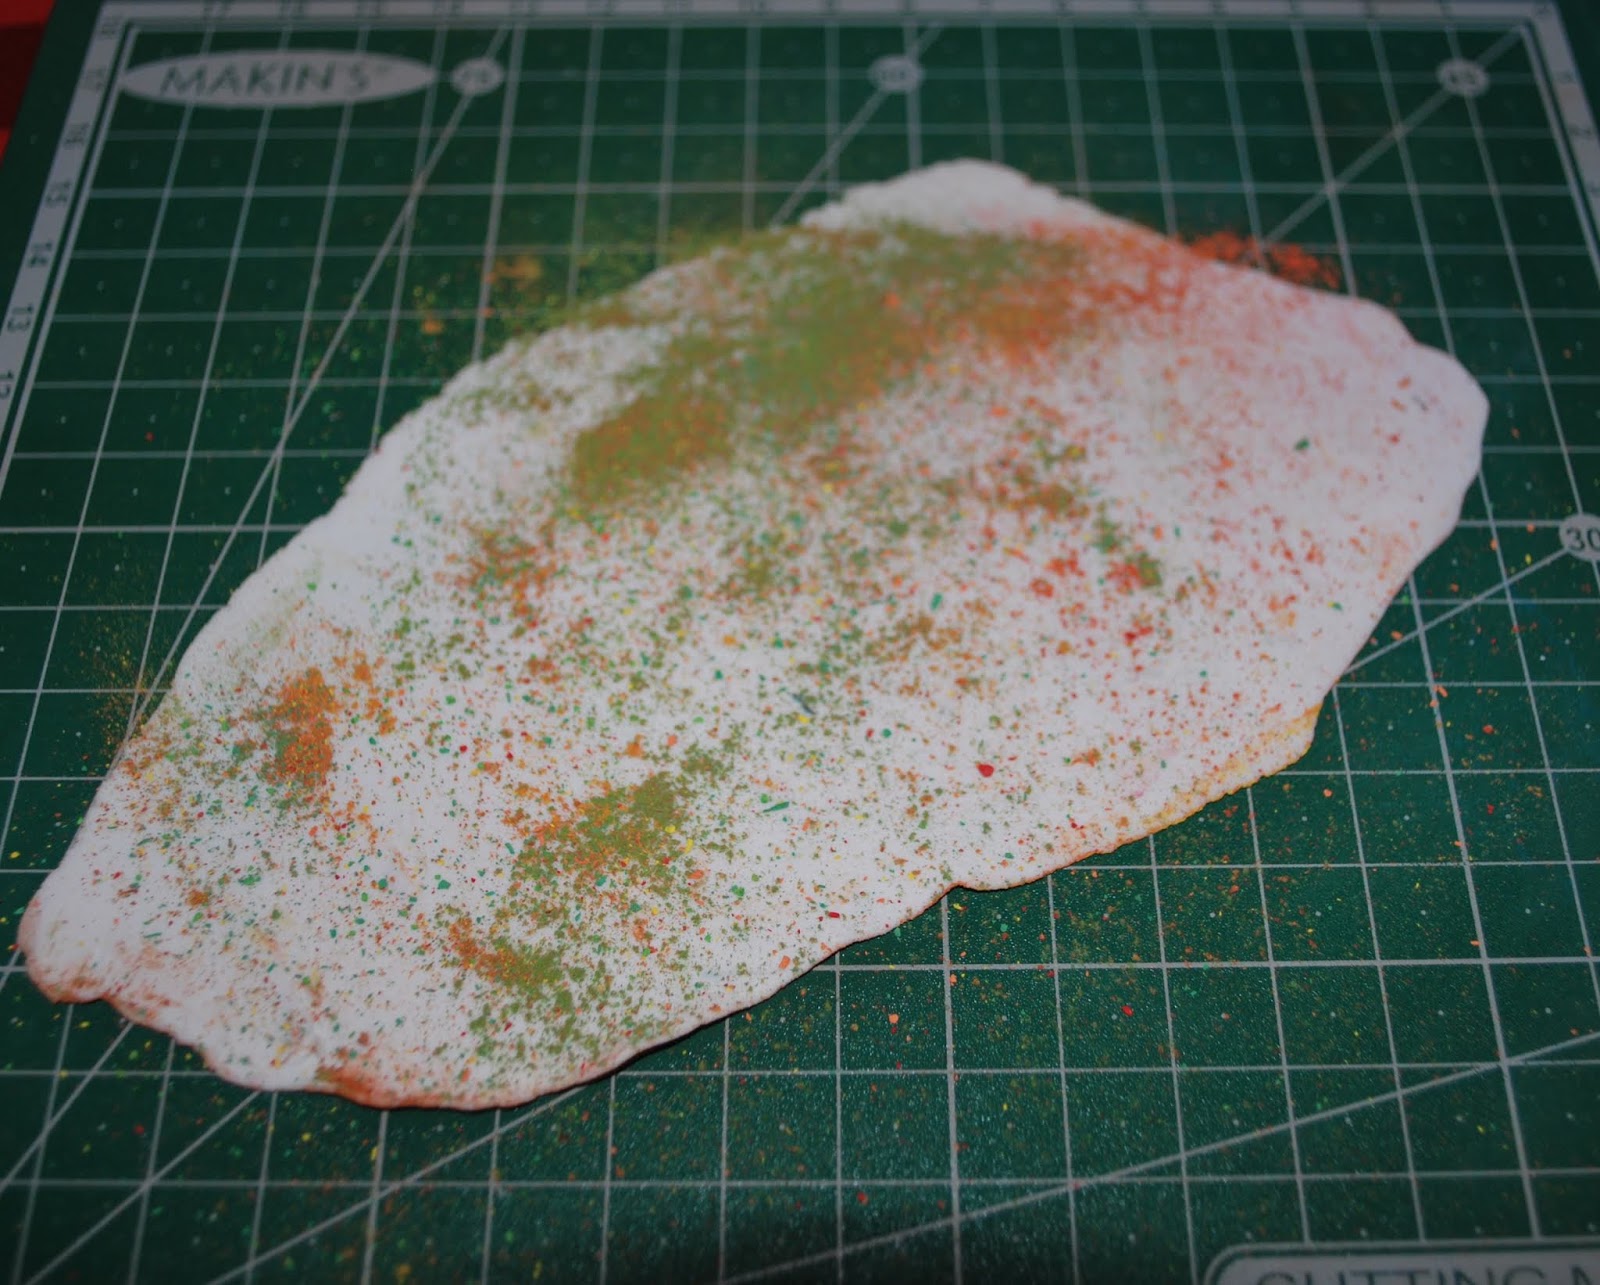
2   Add some chalk dust in autumn shades right on the white sheet. 
3.  We used a blade to make the dust.  
4.  Use a soft brush to spread the chalk powder over the clay.  
5.  Blow the rest.  Keep a sheet so that you collect the colourful dust. 
6.  Put the colouful dust you collected on the other side of the clay sheet. Repeat  steps 4 and 5.


7.  Use mini leaves cutters to cut as many leaves as you wish.

8.  Some leaves will separate well, and some will not, so leave the sheet for 30-50 minutes and then use regular scissors to cut them out. The chalks help the clay dry faster. Let the leaves dry completely for about 20-24 hours.


9.  Meanwhile, let us prepare the picture and the paper frame – I have coloured it with gold acrylic and left some fingerprints, to add some texture. I use double side tape to adhere the pic and the frame.
10. Prepare the cardboard, I glued “knitted” scrap paper on it, and some embellishments.  The main embellishments are the leaves.  For them to be a bit glossy I have used white glue.  Just take each leaf and brush some white glue over from both sides.  Leave to dry for about 30 minutes. (NB! This was my biggest discovery in this project, as I had no clue what to use to make the leaves glossier and had no special mediums).  Attach the leaves chaotically with tacky glue.  


You may use this frame as a frame, or make a page in a scrapbooking album, or make a magnet out of it.  It is up to you! Go and create!!!

Monday, June 19, 2017

Haunted Birdhouse Featured in Just Steampunk! Magazine


Cindi McGee recently shared that she has a project featured in the most recent issue of Just Steampunk! Magazine.  Her "Haunted Mausoleum Birdhouse" features Makin's Clay® used in a variety of applications.


Thursday, November 3, 2016

FALL Decorative Jars

"FALL" Decorative Jars by Steph Ackerman
Hi everyone, Steph Ackerman here today with a fall project that was so much fun to create. 

Supplies:

Makin's® Clay -
Makin's®
Makin's Professional®
Beacon Adhesives Tacky Glue
Spellbinders Dies & Grand Caliber machine
Mason Jars

Instructions:

Roll out Straw clay into a thin sheet using the clay roller.

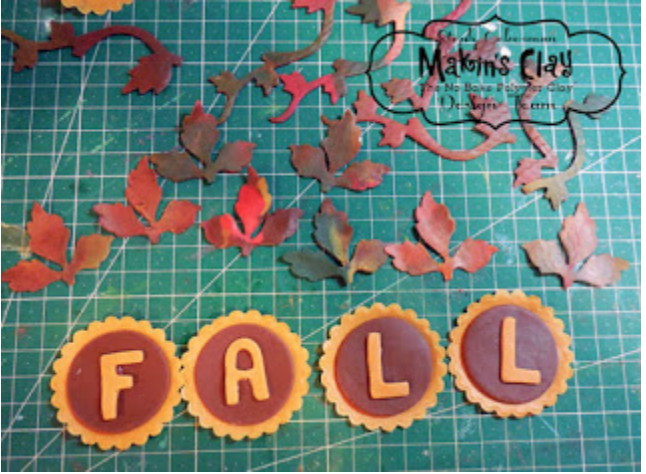
Cut letters from the clay.


Place remaining damp clay between two layers of wax paper.
Place a scalloped die on top and run through die cut machine.
Peel off both layers of wax paper to reveal the die cut elements.
Using wax paper ensures that the clay does not get stuck in the die when cutting with fresh clay.


Use the clay roller and roll out brown clay to a thin layer.
Use the largest round cutter to cut 4 circles.


Mix assorted colors of clay together and roll to a thin panel using the Ultimate Clay Machine®.
Begin with the highest setting #1.

Continue placing the panel in the clay machine, turning the dial up each time until the panel is thin.  I finished on setting #5. 

Look at all the fun combinations of colors you can create!


Die cut an assortment of leaves from the clay panels.
Assemble the circular elements and letters.


Emboss leaves with a texture sheet.
I allowed this layer of clay to dry overnight, then die cut scalloped circles for the tops of the jars.
Dried clay die cuts easily and there is no need to use wax paper as you need to when the clay is fresh.


Finally, assemble the jars.
Use Tacky Glue to adhere burlap around the jars. 
Adhere the letter panels and leaves to the burlap.
Place the die cut scallops on the top of the jars.


These make great decorations for the holidays.  They would also make great hostess gifts don't you think?

Thanks for stopping by.


Contact us

Name

Email *

Message *