Pages - Menu

Search This Blog

Showing posts with label teacher gift. Show all posts

Tuesday, May 8, 2018

Deception: "Colored Pencil" Necklace

DECEPTION:  "Colored Pencil" Necklace by Patricia Krauchune

For my May Makin's Clay® project, I decided to make a copy of a necklace I saw on Pinterest, except mine will not be made from pencils but from Makin's Clay®. 

Supply List:

Makin's Clay® in Light Adobe              7 Metal Beads                                  3/32" Drill Bit
Ball Chain, 10.9M                                  Sharpie® Permanent Markers 

Recommended Makin's® Tools:

Makin's Professional® Ultimate Clay Extruder® - Disc 17  (Hexagon)

Instructions:

Using the Makin's Professional® Ultimate Clay Extruder®, insert some Light Adobe clay into the barrel of the extruder. The #17 Disc: (hexagon shape) was inserted into the end of the barrel and I turned out several pieces of extruded clay. 
I covered the extruded pieces of clay with a damp cloth for about 8 hours for the pieces to dry slowly. Next I uncovered the pieces and let them continue to dry for 24 hours. 


When dried, I cut the extrusions into about 7 two inch pieces and let them dry another 24 hours. 

I used a small drill with a 3/32" drill bit to create a hole about 1/8" down from one end. 


I used a craft knife to "sharpen" the ends of the "pencils" to a point (I only used 6 of the 7 pieces using one as a practice piece.)


I colored my "pencils" with Sharpie® Permanent Markers in rainbow colors.


Finally, I strung the "pencils" on the ball chain with a metal bead between
each "pencil" and a bead on either end. 


I named this project DECEPTION because looks can be deceiving... the "pencils" are really clay!

Monday, September 11, 2017

Happiness Box

Happiness Box by Iris Rodriguez
Hello Makers!

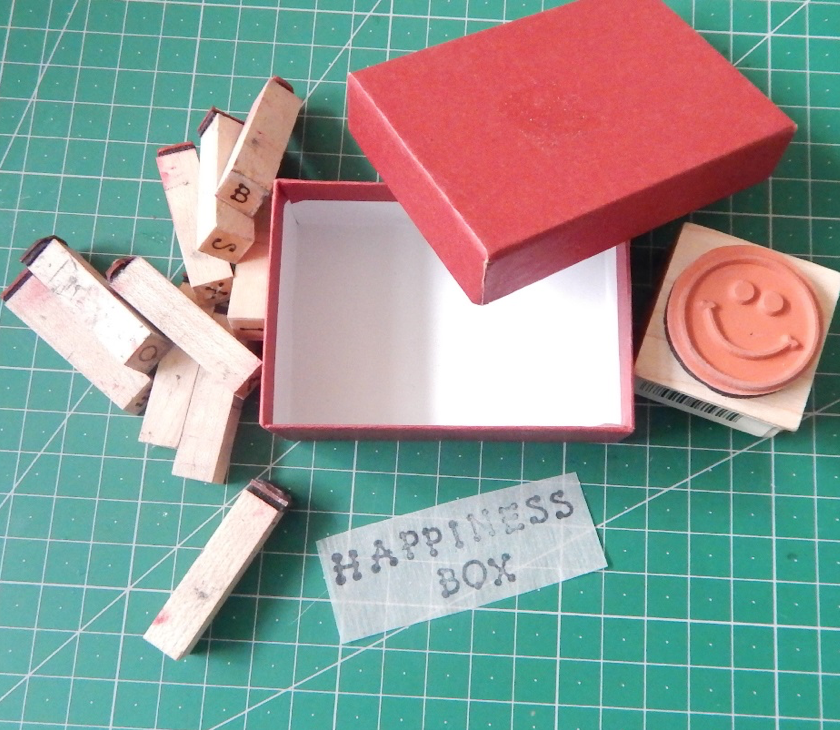
Today I bring you happiness…in a box, that is. So a long time ago, I saw happy face stamp at my local craft store…don’t know why, but it simply made me smile and I went ahead and bought it, yet I had no idea what I was going to do with it. Silly, I know.

Because I am little silly, I made a whimsical Happiness Box project out of my happy face stamp. Make one, it will make you happy, like it made me. Keep a Happiness Box to keep at your desk, and it's guaranteed to make you smile every time you open it. Use it in the office; you bet, it will be a conversation piece.

The Happiness Box would also make for a unique gift for to someone to lift their spirit or for another special occasion. Glue small magnates on the back of the faces and make them into refrigerator magnets.


Materials:

Makin's Clay® White
Makin's 
  • Roller
  • Texture Sheet - Set A-38001 (Waves Sheet) 
  • Round Clay Cutters

  • Cutting Mat
  • Ultimate Clay Machine®
  • Ultimate Clay Extruder® - Disc 3

Acrylic Paints, desired colors
White Mica Powder
Scrap plain paper
Permanent Fine tip ink pen (.05 mm)
Alphabet rubber stamps (6 mm)
Happy Face rubber stamp
Small Jewelry size box
Round Cutters
Gloss Glaze or Varnish

Instructions:

Use a small jewelry box. The box I used measures 3 in. X 2 in. Really, you need a box that is going to  hold a few of the happy faces, maybe 5 to 7 faces. Use a happy face stamp, if you don’t have one, draw in the happy face with a stylus or make your own stamp. A happy face is the easiest thing to draw.

Stamp the words on a piece of paper to determine fit and placement on the box.

Roll the clay through the Ultimate Clay Machine® on the thickest setting, #1.


Dust a little cornstarch on the Waves texture sheet. Place the texture sheet over the clay, then roll
the clay on top of the texture sheet. Ensure to press firmly. To get an even look, turn the texture sheet 90 degree and roll again.


Trace the box outline on the top of clay sheet, measure and cut to size. Ensure to leave about 1/6 of
inch on all sides to allow for shrinkage. Or you wait for the clay to cure, then cut to size.


Stamp the words on a sheet of clay.

Trim the Happiness Box label. Make it a little fancy, by adding a little fold in the left and right edges, kind of makes it look like a ribbon.


To make the squiggly embellishment, use the Ultimate Clay Extruder® and use a disc with a single hole in the center and simply extrude about 8 inches.

Sculpt out the squiggly shape. This is done exactly the way you would draw squiggly lines on paper. Ensure to measure that it fits under the label.

Cut out a little bit of clay to prop up the label.  


Now we are ready to make the faces. Simply stamp the faces onto the clay and cut the faces using the round cutter.

Now all your pieces are done. Allow them to cure for 24 hours.


Paint all the pieces with acrylic paint.

Then use a gloss glaze or varnish with white Mica Powder. This adds a slight shimmery glossy look. I believe this adds to the happiness concept. It also protects all your pieces.


Use a permanent ink fine tip black pen to paint in the grooves of the letters and happy faces. Voila!

You’re finished, now go and spread happiness.


Contact us

Name

Email *

Message *