Small Tissue Box
Designed by
Lisa Haney
This tissue box is half the size of a regular one. You simply cut your tissues in half and save
by doubling the amount of tissues you have to use. No more wasting a big tissue when a small one
will do!
Supplies:
Makin’s Clay®
Recommended
Makin’s® Tools
Other Materials:
Small Box (I used a Luna® Bar box)
Scissors
Corn Starch (I keep mine in a small sock and gently
pounce it where needed)
Large Oval Cutter
Paint Brush
Small Mixing Cup
Method
Once the clay has dried, use the scissors to trim the
clay to fit INSIDE of the box. This is to
ensure the bottom of the tissue box will be smaller than the top of the tissue
box. The top of the tissue box should slide over
the bottom when the tissue box is complete.
Glue the sides, one at a time, to the bottom of the box using
the SureHold® Plastic Surgery® Super Gel. The gel is great because it isn’t runny and
there is enough time to get the sides positioned properly on the box.
Create another sheet of white clay on the largest setting (#1) of the clay machine. Because you will be running the texture sheet through the Ultimate Clay Machine™ with the clay, it is a good idea to use cornstarch as a
clay release on the Makin’s Clay® Diamond Texture Sheet. (If you were applying the texture by just applying pressure by hand, the cornstarch is not necessary.) Run the sheet back through the clay machine
with the texture sheet (make sure the side with the corn starch touches the
clay.) Cut the clay sheet a little larger
than the top of the Luna® box. Cut the
center out of the piece with a large oval cutter.

Create sheets for the sides of the box the same way – run
white clay through the clay machine, apply the corn starch release, run both through
the clay machine, and cut each strip a little larger than the sides of the box.
Let the clay dry 24 hours.
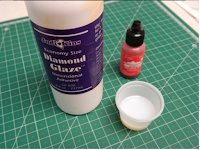
Mix Diamond Glaze with the alcohol ink and paint all of
the textured sheets. Make sure to paint
the sides. Let the glaze dry.
Cut a stack of tissues in half and place in the bottom of
the box.
Place the lid on the box and now you have a great money
saving tissue box.


2 comments:
Super cool idea and project Lisa!
Great idea and looks awesome!!!!
Post a Comment