Pages - Menu

Search This Blog

Showing posts with label Iris Rodriguez. Show all posts

Friday, March 22, 2019

The Red Dress Sculpture

The Red Dress by Iris Rodriguez 


Hello Makers!
One thing about creating with clay is you’ll always will have scraps. However, that does not have to be the end of your clay; just reuse the clay. One way to reuse Makin’s Clay scraps is by placing them in a sealable bag; spray with water and let it soak for a couple of days. It turns into a thick paste that you use to sculpt relief type pieces. As you work through your piece if it’s too wet, let it sit out for a bit it begin to harden. Conversely, add water to make it soft again. After completing your piece, let it dry for a day or more, depending on the thickness. Then finish it off with paints or waxes. Check out how I made my red dress using this process.
Materials:

Makin's Clay®– White, Black
DecoArt Americana Acrylic Paint-Santa Red
Baroque Art Gilders Paste- Slate, Cream
Finnabair-Ruby Red Metallic Wax
Ziploc Bag
Substrate-Canvas or wooden cradled board

Instructions:

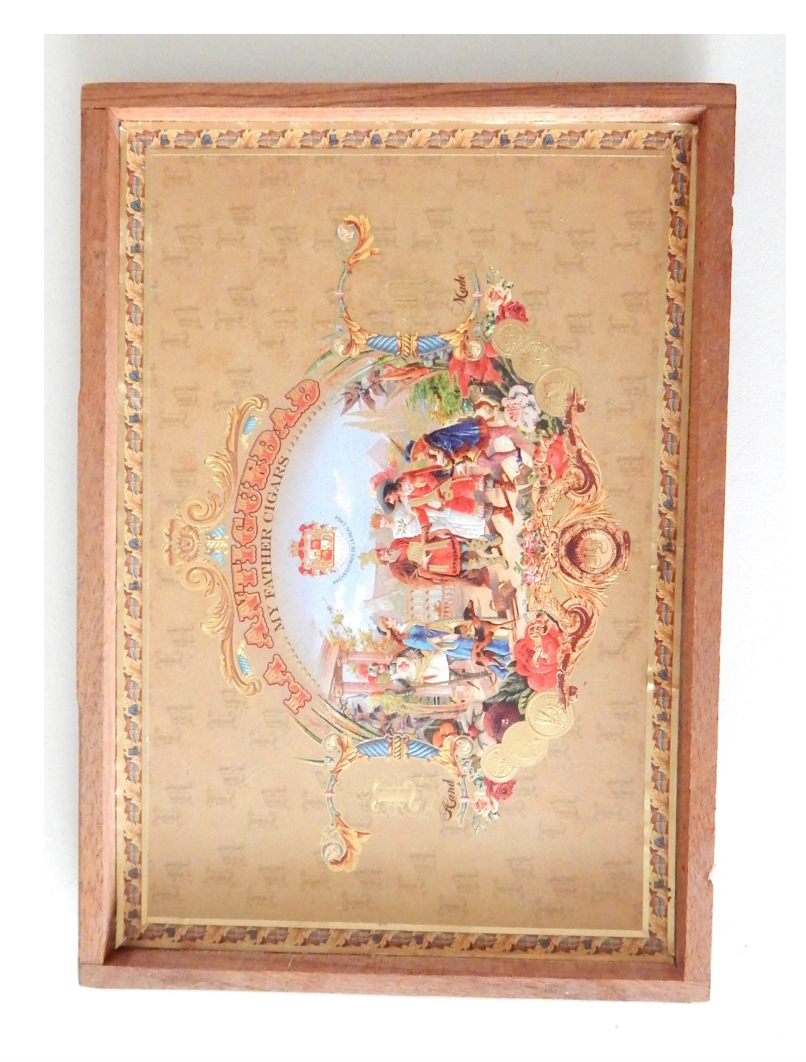
Begin by selecting a substrate. Here I used the lid of a cigar box, I used the main box for another project, so I was left with just the lid. Makin’s Clay® is lightweight, so you can safely use a canvas. Or you can use a wooden cradled (shadowbox) or flat board.  
Place the clay in a sealable bag and spray water into it, ensuring to soak the clay thoroughly. Allow the clay to soak for a day, then check on the clay. At this point you can determine the viscosity of the clay. The consistency can vary from a mash potatoes to a soft dough. I would recommend something in this range. If it’s not soft enough, add more water and allow it to soak some more. If it’s too soft, take it out of the bag and let it sit out for about 20 mins; it will begin to harden.
When handling the clay, your hand will get dirty. Don’t worry, Makin’s Clay® does not stain your hand or your surface. Nor does it leave residue. Clean up is very easy; Makin’s Clay® is water soluble. As you work through your piece, clean hand with wet paper/cloth towel. Wipe your surface with water and paper/cloth towel.


Sculpt your piece. Recommend sculpting pieces that can take advantage of the irregular texture. Think wabi sabi, abstract, no rules…just create. Allow your piece to dry for one to three days, depending on the thickness.
Paint with gesso; it helps the paint to better adhere to your piece. 
Paint the dress with a makeup sponge or brush. I added a little Ruby Red metallic wax on top of the paint to give a little shine
Using Slate and Cream Baroque Gilders Paste wax, add some color to the background.
And just like that, you have a new dress, lol! Enjoy!


Wednesday, February 20, 2019

Live Inspired Accordion Book

Live Inspired Accordion Book by Iris Rodriguez
Hello Makers!
I am not a big book maker. I’ve made like a few, but they have been very simple and whimsical. This little accordion book is easy and fun to make. Add motivational phrases or words, or affirmations. Not into the words, then add pictures of your children, relatives. This book is made using the white Makin’s Clay, Mini Geo Cutters and whimsy.
Materials:
Makin's Clay® – White
Makin's®– Mini Geo Cutters
Makin's Professional® Ultimate Clay Machine
DecoArt Americana Acrylic Paint-Peony Pink, Warm White, Orange Canyon
Alphabet Stamps
Scrapbooking paper
Quote/phrase computer print out
Glue

Making the Book Cover
Condition the clay using Makin's Professional® Ultimate Clay Machine®, roll out a sheet of white  clay to the second 2ththickest setting.

Ensure that the sheet is big enough for the front and back covers of the book.
Stamp a phrase, word, sentiment using a rubber or clay alphabet stamps.
Using the Makin’s® Mini Geo cutter set, stamp images by lightly pressing the cutters into the clay and not cutting through. Cut the book to a desired size; center on the phrase/word. You can also cut the clay after it dries with scissors.
On the second sheet (back cover) stamp images with the Mini Geo cutters, ensure to fill the sheet to the intended book cover size. The clay shrinks a little when dry, recommend cutting the back cover after it dries. 
Allow the book covers to dry for 24 hours. Cut the back cover to desired size.

 Sponge on acrylic paint.
Color in the stamped images and letters with a fine permanent marker. Seal the book covers with polymer clay sealer or polyurethane.
 

Making the Book Pages


Select scrapbooking/designer paper. A single 12x12 inch sheet works well. Or you can paint/stamp a background onto a sheet of watercolor paper. 
Cut a long strips of scrapbooking paper slightly smaller than the book cover, about 1/16 to 1/8 inch smaller. 
Fold the strip in an accordion fashion. Fold the width about 1/16 to 1/8 inch smaller than the cover. Glue strips to lengthen the pages.


Glue one end of the pages onto the front cover. 
Glue the opposite end to the back cover. 

Print or stamp an inspirational phrase unto white cardstock or copy paper, then cut out the words/phrases. Ensure the phrases will fit across the page. 
Glue the phrases with a glue stick; keeps the paper from warping. Vary the grouping and angle of word/phrases on each page to give it variety and whimsy.


Now you’re done! Go forth and gift this book to someone who needs inspiration today.

Tuesday, January 22, 2019

Heart Clay Bowl


Design Team Member Iris Rodriguez recently shared this pretty heart bowl just in time for Valentine's Day!  Find her tutorial here.  Iris made her bowl from a stoneware clay, and used the tiny heart from the Makin's® Mini Geo Cutter Set to cut her hearts into the bowl.


Friday, January 18, 2019

Stitched Heart Pendant


Stitched Heart Pendant by Iris Rodriguez 
Valentine’s Day is around the corner. Don’t forget to show some love with this stitched heart pendant. Or make one for yourself. Not only is this heart pendant fun wear, they fuss free to make. Simply adhere two water drop shapes created with Makin's Clay® and the Makins'® Water Drop Cutters.
Materials:
Makin's Clay®– Black
 Makin's®– 
Clay Roller
Water Drop Clay Cutters  
Makin's Professional® Cutting Mat
DecoArt Americana Acrylic Paint-True Red
Glue
24 gauge silver wire
Clay needle tool or awl
Drill bit (optional)
Leather or cotton cord

Instructions:
Roll out a ¼ inch sheet with the roller. Cut two water drop shapes.
Make a heart shape by adhering both pieces on the curved end. Play around with the shapes; offset a little or a lot; you can get different wonky heart shapes. 

Glue both pieces together. 
Keep a little a pressure on the shapes until the glue adheres. Allow the heart to cure for 24 hours.

Using a pastel pencil or other water soluble marking tool, make X’s. At the ends of the X’s is where you will poke a hole. Ensure you have enough clay area to poke a hole.
Poke holes into the ends of X’s. For this you can use a drill bit, needle clay tool, or awl. Ensure that your wire will fit through the holes. It’s wise to use a wooden surface or other tough surface, so that you don’t damage your crafting area, mat or table. Use a paper towel or cloth with a little water and wipe off the X marks.

Paint the heart with acrylic paint, wax or other paints. 

Before the adding the wire, seal the clay with a clay sealer, or other type of sealer or varnish. Wrap the wire into the holes. 
Secure the ends in the back by twisting the ends. Run you fingers, ensure that the ends are not sticking out, if so; bend the wire in towards the clay or tuck under another piece of wire.  At this point you can leave it like this or roll out a thin piece of clay and glue to the back, ensuring to cover the back. Add a hole toward the top of one of the sides of the clay; this is where you’ll on hand the chain. Run a leather or cotton cord through the hole. Add a clasp and you’re done! 


Thursday, December 27, 2018

House Village

Create a happy little village of homes, insidea a home for your home, lol! I know it seem redundant, but you gotta admit it’s whimsical and fun to make. The tiny houses were made using a combination of Makin’s® rectangle and square cutters. Check out this tutorial to see how it all came together.   

Materials

Instructions


First you need to get a house substrate. There are several makers of these house kits on the market. You can also make it out of plain cardboard. There are several tutorials on websites and YouTube that I’ve seen. If you don’t like a house shaped substrate, use a simple, small shadowbox.   
Assemble the house with glue.  

Paint the inside. I am going for blue sky background.
Work on the on the land that the mini houses will be sit on. The idea is to make houses on the side of a hill. The hill is made out of crafting foam that will be cut into step-like shape; houses will be place on each level. Using a regular knife or foam hot knife, cut the foam. The cutter gets hot and melt into the foam. 
Other ways to make the hill. Make it out newspaper by shaping into a hill and tape it down with masking tape. Using this same technique, make it out aluminum. 
Using the Makin's Professional® Ultimate Clay Machine®, roll out a sheet of White Makin’s Clay® to the second 4ththickest setting.
Texture the clay with Makin’s® cobblestone sheet from Texture Sheet Set A.

Apply glue to the entire front side of the foam.
Drape the clay over the foam. Let it cure for 24 hours. Do not cut the excess clay off.; the clay tends shrink a little bit after it dries; you risk leaving exposed spots if it’s cut before it’s cured. The excess can easily be cut after it cures. 

After the clay cures, cut the excess clay off with scissors.
Roll out a desired thick piece sheet of white clay for houses. Cut out rectangle shapes using rectangle cutters.
Using the rectangle cutters, cut out the rooftop by placing a corner of the square cutter over the middle of rectangle and push down to cut.

Make little windows and doors with a stylus or other clay shaping tools. Let the clay cure for 24 hours. 
Now we are going to paint the houses. Because these houses are tiny, they are little hard to get a hold with your finger and paint; no worries, use masking to aid you with this task. Roll up masking tape with sticky side up, adhere to the surface, and then adhere the houses to it. Paint the houses. Here I used a combination of DecoArt Craft paints Buttermilk and Warm White.
Paint the rooftops red. Paint the windows and doors with a dark brown, Raw Umber or black. Paint the foam/clay hill, created earlier.  Adhere with glue onto the house substrate. Now you have a little happy village.

Contact us

Name

Email *

Message *