 |
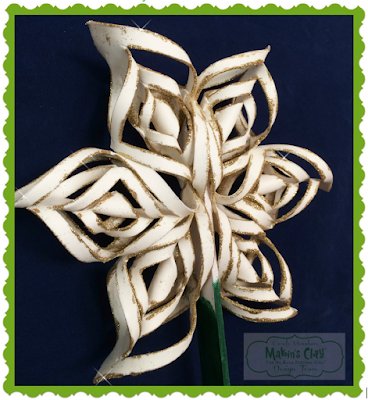
| A Star for a Cause by Carole Monahan |
This is how I made the tree topper.
Materials:
Makin's Clay® 17.6oz of white clay #31002
Makin's Professional®
- Ultimate Clay Machine®
- Professional Clay Tools
Gold glitter
White and green acrylic paints
Green wire
Paint stirrer
Tools:
Sharp blade
Paint brush fine
Mini clothes pins
Template
Materials:

Roll out the white clay in the Ultimate Clay Machine® starting on setting #1, moving to #2, and ending on #3.
Cut out template squares from paper and lay them on the clay. Cut the size 1st then score the lines to be cut with a sharp craft blade.
Here are all the squares cut and scored and
left to semi dry for about 2 hours.

After the clay dried for about 2 hours I cut
it with a sharp craft blade.
After the clay is cut now it is time to glue. I used Beacon Adhesives™ Tacky Glue. You just need to
alternate the sides that you glue. I secured each side briefly as the glue quickly
set.
 Now
for the FLASH!! I used the Tacky Glue and a fine paint
brush and edged all the sides of the cut segments and then I sprinkled them with a fine gold
glitter. An afterthought: you could also just use a
glitter glue and save a step and SAVE
the TONS of glitter that is ALL over MY HOUSE, my face, and even my Hubby had glitter on his face!
I just happen to have a
paint stirrer so I painted it white and some of it green to blend with the top
of the tree. I
again grabbed the Tacky Glue and adhered 2 pieces at a time to the paint stick
and I secured it with a clip until dry.
Now it is just waiting for the beautiful tree
to put it on ! Keep an eye out on my Guilds
Facebook page to see ALL
the great polymer clay ornaments and the completed tree for the Ronald McDonald House in New Haven, CT!
TEMPLATE: Reduce/Enlarge as desired.


No comments:
Post a Comment