
Masked Beauty
Designed by Carole Monahan
Supplies:
Mask from dollar store
Covered in foil to use again
Makin's Clay® 2oz pack of white clay
Acrylic paint mine was gold iridescent
Gold glitter
Swarovski flat back crystals
Ribbon
Beacons tacky glue
Beacons Quick grip glue
Tools -
 Makin's Clay® Ultimate Clay Machine™
 Makin's Clay® Florals push mold
Here is a stunning Venetian Style Mask that comes together quickly with the help of the Makin’s® push molds.
1st roll out a sheet of clay large enough to cover your mask on the
second setting.

Then cover the mask with this sheet and carefully trim all the edges and openings
This is an easy step with the flexible Makin’s Clay®.
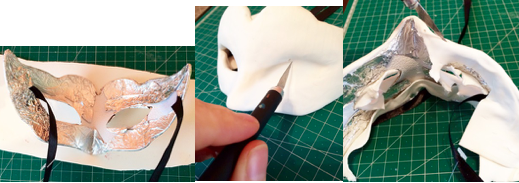
Then take your 1st layer of clay and adorn it with items your molded with your push mold.
Let the molded items dry for at least an hour before removing them from the mold so you don’t lose any details. TIP and TIDBITs Remember if the clay starts to dry it will not stick to itself as well so I just keep a damp paper towel nearby and touch the back of each molded piece to the back to adhere it. I trimmed some of the molded items and used them in different ways.

I added some icicle like horns on the sides for more of a Fairy look to them. Blend in your edges.

I diluted the Beacon® Tacky Glue with some water and covered the areas I wanted to glitter very lightly. The other areas I painted with an acrylic gold paint.
I also used Beacon® Quick Grip glue to attach the flat back Swarovski crystals.
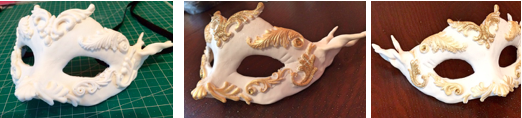
I plan on make MORE masks this was REALLY fun! Keep an eye on my pages to see what else I make for Halloween !
CuriousClayCreations.com
1 comment:
Nice mask.
Post a Comment