Pages - Menu

Search This Blog

Showing posts with label vintage. Show all posts

Sunday, July 14, 2019

Polymer Clay Vintage Lock & Key Charms


Vintage Lock & Key Charms by Nancy Nickel
Materials Used:
Makin’s Clay® - Black Clay
Makin’s Professional® - 
Cutting Mat - Small
Mold for Key and Lock Charm;
ScraPerfect Best Glue Ever;
Silver Leafing;
Jump Rings;
Scruffy Paint Brush.
Instructions:
1.   Roll black clay into smooth round balls. Store any unused, open clay in an airtight container with a moist towelette or damp paper towel to retrain freshness for later use. Push clay into mold areas. Remove excess clay from back. Allow clay to dry in mold, or remove clay from mold and allow to dry. It works great either way.


2.   Squeeze a small amount of glue onto a scrap paper. Using your finger, dab a little bit of glue onto the charm pieces. Let the glue dry for a while, until it is just a little bit tacky. 

3.   Lay the silver leafing onto the charms, covering all the tacky glue. Rub with your fingers. Then take the scruffy brush and burnish very well, brushing away all the excess leafing.


4.   Add jump rings, and your piece is finished! Now it’s ready to use as an embellishment on any project, or even to add to a chain!


This is such a fun and easy project to make, and I really like the results! The hardest part of the whole job is cleaning up the mess left behind by the silver leafing!

Thursday, February 15, 2018

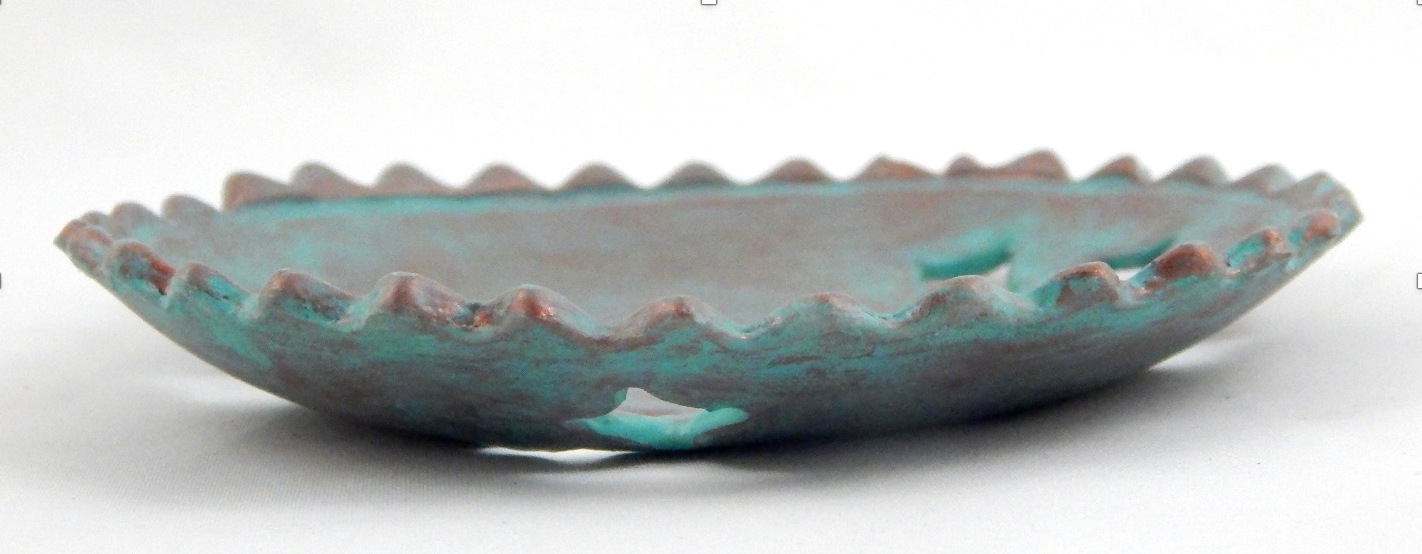
Copper Patina Bowl


Copper Patina Bowl by Iris Rodriguez
Hello Makers!

Today I bring you a holy bowl. No not the type that will save your soul, but can keep your trinkets though. I am referring to my copper and patina bowl. I used Makin's Clay®: Mini GEO cutters, Roller and Cutter Set and white clay. For the surface treatment I used copper metallic paint and Patina Wax used for home décor and wooden furniture, but work great on clay.

  • Makin's Clay®– White 
  • Makin's Professional® 
    • Cutting Mat
    • Ultimate Clay Machine®
    • Cutting Mat 
  • Makin's®– 
    • Mini Clay Cutters - GEO Set
    • Roller and Cutter Set
  • DecoArts Metallics-Warm Penny
  • Art Minds Wax-Patina
  • Verathane-Matte Polyutherane for sealing clay
  • Imagine-Doodlestix Silicon Tapered Tip tool
  • Bowl
Use the Makin's Professional® Ultimate Clay Machine® to roll out a sheet of white clay on setting #1.


Determine desired shape and size. Here I used a bowl that measured 4 inch diameter as a guide.

Using the bowl as a guide, cut the clay using the crinkle shape cutter. I wanted that crinkle shape on the edges. If you want a straight, use the solid cutter in the Makin's Clay® Roller and Cutter Set.


Cut out the holes using the Makin's Clay® Mini Clay Cutters-GEO set. I used the diamond looking shape from the set.

Smooth out edges with your fingers and silicone tool.


Place the clay in bowl and let it cure for 24 hours. The clay will take on the shape of the bowl.
The bowl after curing for 24 hours.
Paint the bowl with the copper metallic paint.

Paint the clay with the Art Minds Patina Wax, then lightly wipe with a dry paper towel.


This what it will look like after the Patina Wax is wiped off. The wax is chalky, hard to believe it’s wax as it is not shiny. I like how the chalkiness makes for an awesome distressed look. You can add more copper metallic paint after adding the wax. Doing so, will make the bowl look more vibrant. I left my bowl alone, as I like the very distressed look. Be sure to get into holes, as real Patina tends to go in crevices. At this point, you can leave the bowl as is, since the wax is also a sealer too. I like to seal it anyway, with a clay sealer; since polymer is plastic based and things tend to scratch off if handled too much.


Well this is it for me. I hope you like my bowl and will give it a try.

Contact us

Name

Email *

Message *