Pages - Menu

Search This Blog

Showing posts with label handmade cards. Show all posts

Sunday, October 27, 2019

Feather Card


Feather Card by Nancy Nickel
Materials Used:

Makin's Clay® - Blue Clay
Feathers Mold  
Carta Bella  Wildflower Paper
Recollections - Cardstock
Enamel Accents - White
White Seam Binding

Instructions:

1.   Start with making the three clay feathers. Press the blue clay into the feather mold. Allow to air dry in mold, or remove from mold.
2.   When feathers are dry, dab with white Enamel Accents, to bring out all the details.
3.   Adhere decorative paper to card base.
4.   Adhere feathers in place, on the decorative paper. Position them in the center towards the top.
5.   Tie the seam binding into a bow, and adhere in place over the clay feathers.


Makin's Clay® is so much fun to work with, and it offers endless creative possibilities!


Friday, September 20, 2019

"Thankful" Autumn Cards


"Thankful" Autumn Cards by Bea Grob

Fall is around the corner, I did spot already some colorful leaves. That and because I need some cards anyway inspired me to make some “faux fall leaves.”  Embellishments from Makin's Clay®are easy to make and once the Makin's Clay® is dry it is acid free, so perfect for going onto cards, scrapbooks and what not.

Supplies

About 40 gr (1 ounce) of white Makin's Clay®
Makin's® Push Mold Leaves SKU 39001
Cutting Matt
Several colors of mica powders

Materials

I started with a rolled ball of clay approximately 1 cm diameter.  Push it into the mold.

Make sure that the backside is flat, by smushing excess clay away from the leave. Continue to make as many leaves as you would like. 

While the clay still is fresh, right after you have made the backside flat, pull the leaves carefully out from the mold. Sometimes it is helpful to bend the mold a bit which can be done, as the mold is flexible. Make a bunch of leaves and make sure that they don't dry. I sprayed mine with a little bit of water, while working on some more leaves. For the next step the Makin's Clay® still needs to be damp.


Grab several colors of mica powders you like. I have chosen greens, golds, copper, yellow. I also added a hot pink. I added them in different spots onto the leaves with a brush. Simply dip into the powders and then dabb it onto the leaves.

I let them dry overnight.


The next day I grabbed some papers, ribbons and card bases to make two cards.

On some craft colored card stock I have printed on my computer the word thankful and then I cut it to size. I mostly always add some black outline with a permanent marker. 

For the card base and the mat I use some glue, but for the word and the leaves I use some foam tape to raise them up a bit.


Now you have some beautiful fall themed cards which would also work well for Thanksgiving day.

Wednesday, August 14, 2019

"Thanks" Greeting Card


Materials:
Makin’s Clay® - Clay
Makin’s Professional® - 
Cutting Mat - Small
Makin’s®- Push Mold – Borders;
White Cardstock;
Scrap of Red Cardstock;
Decorative Paper (I used Making Memories – English Garden Collection);
Your Next Die – Thanks.

Instructions:

1.    Roll green clay into a skinny little piece. 

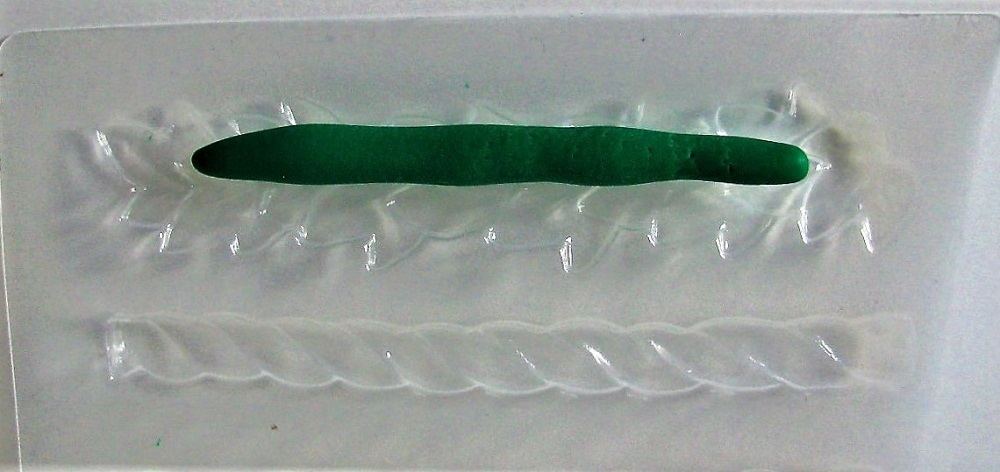
2.    Lay skinny piece over ivy portion of border mold. Push into mold using ball of fingers.

3.    Turn mold over and ensure that all the little corners have been filled. On the back, make sure that all the edges are pushed in smooth.


4.    Pop the clay piece out of the mold and allow to dry flat. Alternatively, allow piece to dry in mold, and then pop out when dry. Create two of these leaf borders.


5.    Cut A2 tent-fold card out of white cardstock. 

6.    Adhere a 4 ¼” x 5 ½” piece of decorative paper to the card front. 

7.    Cut a 4 ¼” x 1 ¾” piece of white cardstock. Adhere in place on card front 1” from bottom edge. 

8.    Adhere clay pieces along top and bottom edge of white cardstock strip.

9.    Die-cut “Thanks” from red cardstock. Adhere to white cardstock strip, centering between clay border pieces. 


Clay borders are such a fun addition to a handmade card! They add some lovely dimension and make it special! 😊


Saturday, February 2, 2019

Polymer Clay Embellished Valentines' Day Cards


Hi everyone, Steph Ackerman here today with a pair of Valentine's Day cards.  Valentine's Day is right around the corner so it's time to start creating your cards.  ​Makin's Clay can be used for the main element on your cards, or even as smaller elements that help set a theme and add a great dimensional touch to your cards.  Makin's Clay® remains flexible, and is acid free when dry, making it a perfect choice for paper crafting!

​
​ 
Supplies:
​Cuttlebug Embossing Folder
​Crafter's Companion, Spellbinders dies
Paint
​
​Instructions:

​As I wanted a darker red for my first card, I added some brown paint to the red clay then conditioned the clay to mix in the paint to achieve an even color.  Next, I ran the clay through the clay machine starting on the highest setting (#1).
​
I continued putting the sheet of clay through the clay machine, reducing the setting each time, until I had the panel at the desired thickness.


​Once the panel was ready, I cut it to fit an embossing folder, then used the clay roller to imprint the words onto the clay.  With fresh clay and medium pressure, the words become imprinted quickly.  You can also use a die cut machine if desired, just be careful of the pressure used.

I trimmed the panel with the Cutter to approximately 4" square.
​

Using the left over clay, I  die cut some arrows.
​
​Allow all the elements to dry at least 24 hours before continuing.
​
​For the first card, I matted the clay panel with layers of cardstock and adhered it to a striped card.  For a little shimmer, I rubbed  silver paint lightly over the panel.   Love was adhered across the bottom edge.


​For my second card, I used the roller to roll out red clay, then placed a die onto the clay.  Using the roller again, I  forced the die into the clay, cutting the design.  Since the clay was fresh, I only needed light pressure to cut the clay.
​
​I created my card and added a large die cut heart.  In the center of the heart I added a die cut arrow, then placed Love across the center.


​Happy Valentine's Day.
​
​Thanks for stopping by.
​
​Steph
​
​
​
​
​
​
​

Friday, May 4, 2018

Dimensional Roses Greeting Cards


Hi everyone, Steph here today with a set of cards that would be perfect for Mother's Day.  Or for those of us without moms, perhaps the cards can be given to those other special people in your life.

Supplies:

Makin's Clay® White
Makin's ProfessionalⓇ Cutting Mat
Beacon Adhesives - 3-in-1
Rinea Foiled Papers
Prima, Quick Quotes pattern paper
Prima Mold
Bazzill cardstock

Instructions:

Begin by placing White Makin's Clay® in the mold.  Be sure to push the clay deep into the mold so all the details are pressed into the clay.   I filled most of the designs as I knew I'd be using each design at some point.

Using the large floral spray, I inked it with Imagine Inks - Memento Luxe Love Letter, Delicata Rose Gold and VersaFine Clair Green Oasis.


To create the card, I created layers of pattern paper and cardstock then die cut additional layers for the center of the card.  I stamped and embossed a phrase on the top panel.

Using Beacon Adhesives, I adhered the floral spray to the left side and an individual rose to the right side.  Several butterflies were punched from Rinea Blush/Gold Glossy Foiled Paper and adhered to the card.


I created another card in the same fashion and used a smaller spray of roses to run down the side of
the card.  I used the same inks to color the roses.


I punched butterflies from Ruby/Gold Glossy Foiled Paper and adhered them to the card with Beacon Adhesives.  

Clay elements add no weight to the cards, and remains flexible when dry, so they are easy to send through the mail.

Thanks for stopping by.

Steph


Tuesday, January 2, 2018

Embossed Clay Cards


Hi everyone, Steph here wishing you a Happy New Year.   Today, I wanted to show you some cards I created using Makin'sⓇ Clay, clay tools, embossing folders, and inks.

Supplies:

Makin'sⓇ Clay - White, Red
Makin's ProfessionalⓇ Cutting Mat
Makin'sⓇ Clay Roller and Cutters Set
Makin'sⓇ Clay Ultimate Clay Machine
Beacon Adhesives - 3-in-1
Joy Clair and Penny Black stamps
Spellbinders Dies
Cuttlebug Embossing Folders
ImagineⓇ Inks
Ribbon
Cardstock


Did you know that you can emboss damp clay?  Clay can be easily embossed with an embossing folder while still damp and no special preparation of the embossing folder is necessary.  Embossed clay is perfect for creating backgrounds for cards as the clay adds very little weight to cards. 

For my Valentine's Day card, I started by mixing red and white clay. I blended them creating pink clay.

Once blended, I rolled the clay through the Ultimate Clay Machine® starting at the highest setting.  I repeated the process, moving the dial down a level and rolling the clay through the clay machine until I had the thickness of clay I wanted.  I ended on the 7th setting and had this lovely thin piece of clay.


I placed the clay in an embossing folder and used the cutter to cut away the excess clay.

And this is the embossed panel.  All the details are clearly visible in the damp clay.  I allowed the clay to dry 24 hours before continuing.


Using Beacon Adhesives, I adhered the embossed clay panel to black cardstock.  Then I wrapped red twine down the left side.  The panel was added to the card with foam adhesives to create dimension.  The sentiment was stamped on a white oval and placed atop a black die cut.


For my next two cards, I rolled white clay through the clay machine starting at setting 1, and moving the dial as noted above.  I also ended on the 7th setting.

I spritzed the panel with Fireworks Summer Sky spray ink, then placed it in a winter embossing folder.  

Again, I used the clay cutter to cut away the excess clay.  

With this method, the spray ink becomes embedded in the crevices as the panel is embossed.  I allowed the clay to dry 24 hours before continuing.


The panel was matted with black cardstock and wrapped with ribbon.  Using foam adhesives, the panel was added to the card.  Winter Wonderland was stamped, die cut then added to the card.


Finally for my Christmas card, I repeated the above process using the left over white clay from the winter card.

I placed the clay in a Christmas embossing folder and used the clay cutter to cut away the excess clay.

After embossing the clay, the details are amazing.


Next, I used assorted VersaMagic Chalk Inks to ink over the embossed clay.  I allowed the clay to dry 24 hours before continuing.


I matted the clay panel with red and black cardstock using Beacon Adhesives.  2 different ribbons were added around the panels which were then adhered to the card.

Remember that clay adds no weight to your creations, so these cards can be easily mailed with negligible or no additional cost.


Thanks for stopping by.


Contact us

Name

Email *

Message *