Pages - Menu

Search This Blog

Showing posts with label bats. Show all posts

Tuesday, October 15, 2019

Vampire Bats Bracelet


There's still time to whip up this simple little vampire bat bracelet for Halloween!  This simple project would be fun for kids to make too.

Materials:

Makin's Clay® - Black
Makin's® Halloween Cutter Set - Bat
Makin's® Tool Set
Jump rings, head pins, closure
Jewelry pliers
DecoArt® Dazzling Metallics™ - Red
DecoArt® Metallic Lustre™ - Lightening Black
Cloth towel or fabric for texturing
Black chain

Instructions:

Open black clay and cut off enough from package for the project.  Place the remaining clay in a zipper bag with a damp paper towel or moist towelette for later use.

Roll clay to a little less than 1/4" thick.

I used a towel and gently pressed it into the clay sheet to add a bit of texture (real bats have fuzzy bodies after all...)


Use bat cutter to cut desired number of bats.

Fold one wing inward, and the second wing inward overlapping as shown to create closed wig bats. I made 5 of these, but later decided to use 3 in my bracelet.


Use clay tool to make holes in each wing for the open winged bats.

Insert head pin through center of each closed wing bat body.


Use head pin to add a tiny bit of the red metallic paint to make eyes on each bat.


Let dry 24 hours.

Use jewelry pliers to make loops in pins on either side of the hanging bats.  Trim excess wire.

Add jump rings to the flying bat wings.

Cut small sections of chain (how much will depend on how big you want your bracelet to be).  Working one at a time, put the chain through the large jump rings on the flying bats, fold each section in half, add a tiny jump ring to connect the ends, and then connect to one side of the upside down hanging bats.  Continue until all bats are connected.  Add closure.

I decided my bats needed a bit of highlighting, so I used my finger to apply a light touch of Metallic Lustre to the edges of each bat.


Friday, October 11, 2019

Witches Bat Necklace


Design Team Member Naomi Scarparo recently shared this cute yet creepy bat necklace just in time for Halloween.  Naomi made her necklace with Makin's Clay®.


Saturday, October 21, 2017

Going Batty!


Design Team Member Patricia Krauchune upcycles a broken light into this fun Halloween luminary using Makin's Clay®!  Pat used black clay and the Makin's Professional® Ultimate Clay Machine® to create her spooky bat accents!

Tuesday, September 13, 2016

Nightmare Catcher with Makin's Clay®

NIGHTMARE CATCHER 
Designed by Patricia Krauchune
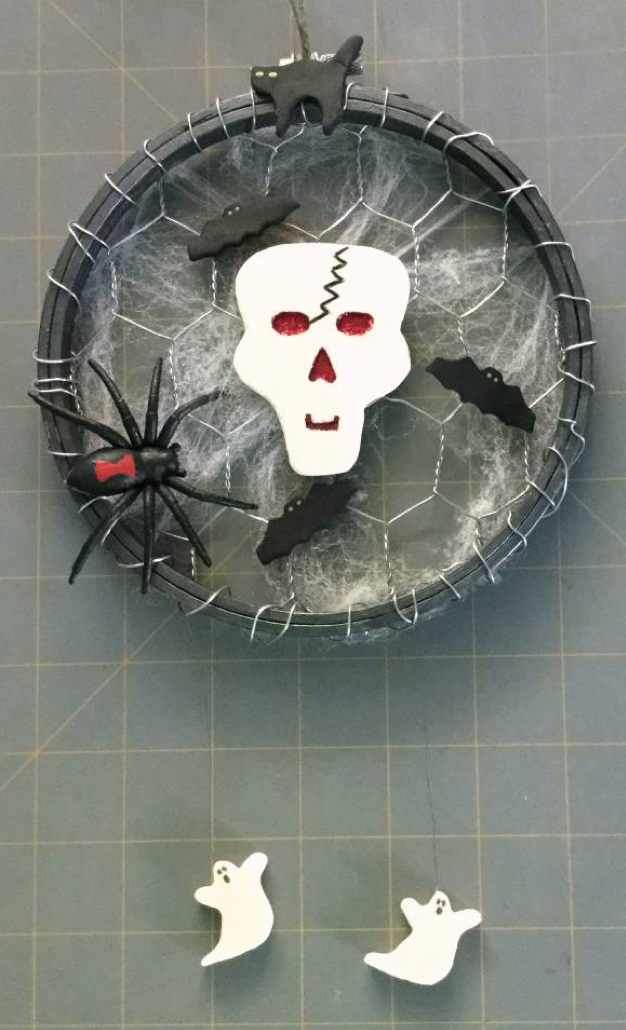
Following the theme of a dream catcher, I made this Nightmare Catcher. All your scary dreams will be caught in this web.

Supply List:
Makin's Clay®: Glow-in-dark / Black
Small piece of chicken wire/wire to attach to hoop.
Small piece of plastic
Beacons™ Tacky Glue
Martha Stewart Crafts™ Black Nickel Paint
Plastic Spider
Beacon™ 3-in-1 Glue
Adirondack® Alcohol Inks: Red Pepper
Black Marker
Beacon™ Power-Tac
XMas Red Stickles™
Spider Webbing: (Michael's)
Beacon Quick Grip™
Jewelry Thread
Piece of hemp for hanger
6" Embroidery Hoop


Recommended Makin’s® Tools:
Makin's Professional® Ultimate Clay Machine®
Makin's® Clay Cutter Halloween Set A
Makin's Clay ® Cutting Mat


Instructions:

1. Paint the embroidery hoop with the Martha Stewart Crafts™ Black Metallic paint.
2. Cut some chicken wire to fit  the outside diameter of the hoop.

Prepare your hoop
3. With some wire, lash the chicken wire to the hoop. Add some dobs of Beacon™ Power-Tac to several spots on back to further secure the chicken wire to the hoop. Then run a bead of Beacon™ 3 in 1 Glue around the entire back perimeter.

Add the chicken wire 
4. Roll out some Glow in the Dark clay on the #1 setting of the Ultimate Clay Machine®. Cut out a skull from the clay using either a craft knife or scissors.

Roll the glow in the dark clay
Trace your skull template
5. You also want to cut out, from the Glow in the Dark clay, 4 ghosts using the Halloween Set A clay cutters. When the ghosts are dry, add some tacky glue to one ghost, lay some jewelry thread into the glue then top with another ghost. Make another ghost "sandwich". Draw eyes and a mouth on each ghost with a black marker.

Make your ghost "sandwiches"
6. When the skull is dry, add a small piece of plastic that you tinted with Red Adirondack® Alcohol Ink to back of skull with 3 in 1 Glue.  Turn skull over and add XMas Red Stickles™ to the eye, nose and mouth openings. Set aside to dry.

Add your red accents
7.  After the Stickles has dried, attach the completed skull to the front of the hoop and secure from the back with Beacon Quick Grip™ glue at points where there is wire.  Make a hanger from a small piece of hemp and attach it to the hoop screw. 

Mount the skull
Back view
8. Now roll out some black on the number 1 setting on the clay machine. Using the Halloween cutter set, cut out a cat and three bats.  

9. I had a plastic spider from Michaels' and I painted an hourglass figure on the spiders back.


Roll black clay 
Cut cat and bats
Add detail to your spider
10. I attached the two ghosts that are on the jewelry line to the bottom of the hoop. Now is the time you use your imagination and glue the bats, cat and spider to a spot that suits your fancy.  I painted little green eyes on the cat and bats and I also glued some spider webbing that I purchased at Michaels to give my catcher a spookier look. 

Have fun and remember all is possible with Makin's Clay®.

Ready to hang!


Contact us

Name

Email *

Message *