 |
| Witches Hat Ring Holder by Naomi Scarparo |
With my one of my favourite holidays approaching, I wanted to make something practical and have a Halloween theme to it… I don’t know about you, but I am always taking my rings off to do sculpting or any messy crafting fun. What a spooky way to store your rings on this Witch’s Hat Ring Holder, that you can make yourself...
Materials:
Makin’s Clay®- Black, Plum Wine and Yellow
Makin's® Clay Roller or Makin's Professional® Ultimate Clay Machine®
Makin’s Professional® Cutting Mat
Makin's® Texture Sheet -
Makin's® Clay Tool Set - Chisel
Small Dish (I used a 10cm diameter size)
Circle cutter to fit your dish
2 square cutters, one approx. 1cm and 0.8cm
Instructions:
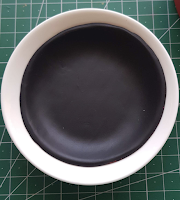
Roll out your black clay to the thickest setting on your clay machine, then cut a circle to fit a small dish (10cm diameter size). Smooth edges of the circle with your fingers. Lay the circle clay into the little dish, making sure there are no air bubbles.
Roll a large sausage shape of black clay then roll tampering the top into a point. Widen the base by setting it up with the pointed end upwards. Slightly making the top half crocked so a ring can sit there. Tip - test it the width with a ring.
Place it in the centre on top of the clay dish, using a touch of tacky glue or water to adhere to the base of the bowl.
Extrude Plum Wine clay with the help of Makin's Professional® Ultimate Clay Extruder® and the wide flat extruder disk, to make the Witch’s Hat ribbon.
Place the strip of clay around the base of the point hat tip with water or Tacky Glue. Smooth connector ends, blending them together.
Set aside.
To make the witch’s hat buckle, Roll out your yellow clay to the 3rd thickest setting on your clay machine. Cut a little square using the larger of the 2 square cutters, then in the centre of that square place the smaller square cutter and cut out the square, leaving a square outline use as a buckle.
Place the put line square onto the hat ribbon using tacky glue or water.
Set it aside and allow to dry for 24 hours in the dish to keep its shape.
These next steps are optional.
Roll out your Plum Wine clay o 3rd thinnest setting on your clay machine, then Lightly dust, dusting powder (cornstarch) over the clay. Place the Makin's® Texture Sheet Set C - Weave on top of the clay, using your fingers press and roll over the texture sheet, pressing the impression into the clay. Does not have to be a perfect impression right around, it is to give an organic feel.
Use the same circle cutter used to cut the base of the hat, cut a circle out to place on the bottom of the ring base. Adhere it with some tacky glue. Smooth edges with your fingertips.
Extrude black clay with the help of extruder, and the small single extruder disk, make an edging for the rim of the dish. Adhere it with Tacky Glue.
Again Extrude more black clay using the extruder and the tiny hole extruder disk and make tiny strands of clay. Place in between the first extruded rim clay, just to tidy areas up, this step is certainly not a necessity.
Allow to dry for 24 hours.


1 comment:
omg I totally LOVE this!!!! How much for you to make one?? lol would totally fit with my bathroom decor theme right now. I don't have all these clay making materials. <3, Heidi
Post a Comment