Pages - Menu

Search This Blog

Monday, November 30, 2015

Holiday Ornaments for a Great Cause by Carole Monahan


These are Design Team Member Carole Monahan's Makin's Clay® ornaments which will be added to her Polymer Clay Guild's tree this year for the 26th annual Ronald McDonald House Trees for Hope for New Haven Ct .  We love how she combined the stencil, golden coloring, and cut out centers to let the light shine through!  Find stepped-out photos of how Carole created these ornaments here.

Vintage TV Christmas Diorama by Patricia Krauchune

Design Team Member Patricia Krauchune pulled out all the stops with this clever diorama made entirely with Makin's Clay®!  Pat created what looks like a vintage television set complete with a holiday scene inside that looks like it's taken off the screen of a favorite holiday movie.   Pat's original post with details on how she created her elements is here on her blog.  She used Makin's Clay®, Makin's® Texture Sheets, the Ultimate Clay Extruder™, Ultimate Clay Machine™, Makin's® Push Molds, and hand created man of her pieces too.  We can't decide which element we like best!  

Sunday, November 29, 2015

Christmas Tree Earrings by Kim Hale

Design Team Member Kim Hale recently shared these fun Christmas Tree earrings made with Makin's Clay® here on her blog.   It's the perfect time to make a pair of these festive and fun earrings to wear with your holiday outfits!


Christmas Cookies Ornaments by Andrijana Katavić


CHRISTMAS COOKIES ORNAMENTS
 by Andrijana Katavić 

Hello everyone!

There’s nothing like baking and decorating cookies to inspire creativity. In the kitchen, and also in our studios. I love to bake, and since holidays are not festive enough without cookies, I had to make some in my studio with Makin’s Clay®. I make sweet ornaments for my Christmas tree. My Makin’s® cookies are shiny and partially transparent, which makes them a great decoration for the window as well. What make these cookies even better than baked ones is that you do not need oven for making and they will last for years and years!

MAKIN’S® MATERIALS LIST:

Makin’s Clay® Terra Cotta 120g
Makin’s Professional® Ultimate Clay Machine®
Makin’s Professional® Cutting Mat
Feather Point from Makin’s Professional® Tools set
Spiky (pointy) modeling tool from Makin’s Clay® Mixing Ruler™
Makin’s® 3 Heart Cutters
Makin’s® 3 Star Cutters

OTHER NECESSITIES:

2 x Plastic cup lid (transparent and flat)
Beacon™ Quick Grip Permanent Adhesive
Large cookie cutter - Star
Large crinkle cookie cutter - Heart
Glitter - red and green
Paint for glass - red and green
Painting brush
Scissors
Metallic gold string ribbon (about half a meter long)
Wooden skewer

INSTRUCTIONS:

STEP 1.
Place Makin’s Professional® Cutting Mat on your working table. Unpack Terra Cotta Makin's Clay® and roll on #1 setting on a Makin’s Professional® Ultimate Clay Machine®.

STEP 2.
With large cutter, cut two crinkle hearts from clay tile. Use your finger to smooth clay edges.

STEP 3.
With large cutter, cut two stars from clay tile. Use your finger to smooth clay edges.


STEP 4.
Turn one heart (side in which you looked during cutting should be placed on working mat). Carefully
place the second heart on top of the first one (side you're viewing while you cut stays facing you). Repeat the process for the stars.

STEP 5.
Place medium Makin’s heart cutter in the middle of a big heart and cut. Place medium Makin’s star cutter in the middle of a big star and cut.

STEP 6.
Carefully separate hearts and stars, and remove small forms from the cutters. Turn lower heart and star on the right side.


STEP 7.
Gently tap on clay in all directions with a feather point tool to create texture. Apply texture to all stars and hearts. Tap the bottom side of the little star and heart as well.

STEP 8.
Again turn one heart (textured side down on working mat), and carefully place the second heart on top of it. Poke hole with spiky (pointy) modeling tool which is included in Mixing Ruler set. Repeat the process for the stars. Separate hearts and stars.

STEP 9.
With spiky (pointy) modeling tool poke holes on one side of small heart and star.
STEP 10.
Leave all clay parts to dry for about 12 hours. In the meantime prepare the transparent part of cookies ornament. With brush apply green glass paint on a plastic lid. With another brush, apply red glass paint on the second lid. Wait for about 15 - 20 minutes then apply a second coat on both lids. If necessary, add a third coat of paint.

NOTE: You can use alcohol inks, but since we do not have them in my country I used paints for glass.


STEP 11.
Immediately after coating a second coat of paint, sprinkle with green sequins on the green and red one to red lid. Leave both lids for a few hours to dry well.

STEP 12.
Use scissors to cut colored lids. Cut a piece of the lids large enough to cover hollow part of ornaments, but small enough to not exceed edges of shape or holes.


STEP 13.
On the bottom of a big heart (the side without texture) apply Beacon’s™ Quick Grip. Lightly press

glitter red lid part above the central of the heart. Then add a second heart (the side without texture) making sure the edges and holes overlap. To be sure that the holes in this position, pass again a spiky (pointy) modeling tool through hole. Press a bit that clay merges with glue, and set aside for glue to dry. Repeat the process for the stars.

NOTE: Be careful when gluing, because you want to see the texture on both sides of heart and star.


STEP 14.
Place metallic gold string ribbon on the Cutting Mat to measure it. Cut two ribbons of about 20 centimeters for a large, and about 10 cm for small ornaments.


STEP 15.
Apply a small amount of Beacon’s™ Quick Grip in holes on small ornaments, and with wooden skewer place ribbon ends inside. Set aside for adhesive to dry. Pass the ribbons through the holes in large ornament and tie ends.
Your Cookies ornaments are finished, and all you have to do is to place them on the Christmas tree or to attach them with double-sided adhesive tape on the window.


P. S. If you want to see other pieces that I made visit my blog
http://www.studioartesania.com/2017/12/15-diy-projects-makins-polymer-clay.html


Saturday, November 28, 2015

Pull-Tab Santa Pin by Patricia Krauchune


PULL TAB SANTA
Designed by Patricia Krauchune 

I really enjoy upcycling. Here's a quick easy holiday pin featuring Santa made with Makin's Clay® and a pull tab from a can of veggies. HO HO HO, have fun!

Supply List: 

Makin's Clay® Red, White, Peach, Black, Yellow
Large pull tab
Pin Back

Americana Triple Thick Gloss Glaze™
Beacon™ Tacky GlueKrazy Glue® 

Recommended Makin’s® Tools:

Makin's Professional® Ultimate Clay Machine®


Instructions:

Roll a small piece of red Makin's Clay® through the Makin's Professional® Ultimate Clay Machine® on the # 1 setting.  Place pull tab on the clay. 


Trim clay around the pull tab with a craft knife. Carefully lift tab from clay, brush a small amount of Krazy Glue® on back of tab then put the tab back on the clay glue side down. 


Roll out a marble size ball of red clay. Slice off about 1/3 from the ball.


Place the red ball onto the bottom larger hole in the pull tab. You may want to add a drop of Beacon'sTacky Glue for added adhesion. 

Now roll a smaller ball of peach color clay and add to the smaller hole in the pull tab, again adding a drop of glue. 


Form a hat shape and press onto head. Roll a very thin piece of white clay and add to bottom of hat. I used a small piece of sandpaper to add texture to the white strip. 


At this point roll very tiny balls of black clay for the eyes. Form rice shapes with white clay for eyebrows and add texture with the tip of your craft knife. Add some white clay for the beard and again texture with your knife. 

Larger rice shapes from white clay make the moustache and again texture with your knife. 

A small ball of peach color clay makes the nose. 

Add a little belt made with black clay and a small buckle from yellow clay.


Glue a pin back on with KrazyGlue® and when dry, I added a small strip of clay over the pin back for added strength. 

I dipped the pin front in Americana Triple Thick Glaze™

Your Santa pin is now ready to wear. HO HO HO have a wonderful Christmas! 


Friday, November 27, 2015

Fantastic Fall Canvas by Candice Windham


Fantastic Fall Canvas
Designed by Candice Windham 


I remember it like it was yesterday. Back in 1975, we had been to Shelby Forest State Park near Memphis, spending the day with our four-year-old son Michael, jumping in leaves, fishing and just enjoying a beautiful autumn afternoon. On the way home, we passed a field covered in soft cream-colored grass. My hubby, who was just learning to use his new 35mm camera, took Michael out in the middle of the field and shot almost an entire roll of film. Every photo was terrific, but this one has always been my favorite.

I used a combination of Makin’s Clay® and Ann Butler’s Earth Safe Finishes Irridescents to make this canvas come to life.


Supplies:

Makin’s Clay® - Brown,120g, and Olive green from the Earth Tones clay multi-package
Makin’s® Texture Sheets, #38008 Set H
Makin’s® Push Molds #39008, Christmas Nature
Makin’s® Ultimate Clay Machine™
Makin’s® Cutting Mat
Makin’s® Ultimate Clay Extruder™ with discs #2 and #3 from the #35100 Ultimate Clay S/S Extruder Discs Set 
Sizzix® Big Shot
Sizzix® Tattered Leaves die 
Ann Butler Irridescents, Sheer Gold, Sheer Copper, Amethyst
Ann Butler’s Irridescent Powders, Sunshine and Bronze
Ann Butler Crafter’s Ink, Tangelo, Limelight, Desert Sand and  Canyon
Colorbox Spritzer Dye Ink Spray, Mudslide (Clearsnap)
Craft Corrugate Tape (Little B)
9” x 13” canvas and frame
Silk leaves in fall colors
Stencils (Crafter’s Workshop and Rebecca Meier)
Heavy Gel Paste (Golden)
Acrylic Glazes, Green, Gold and Copper (Golden)
Printed photo
Palette knife
Paper towels
Sponges

Instructions

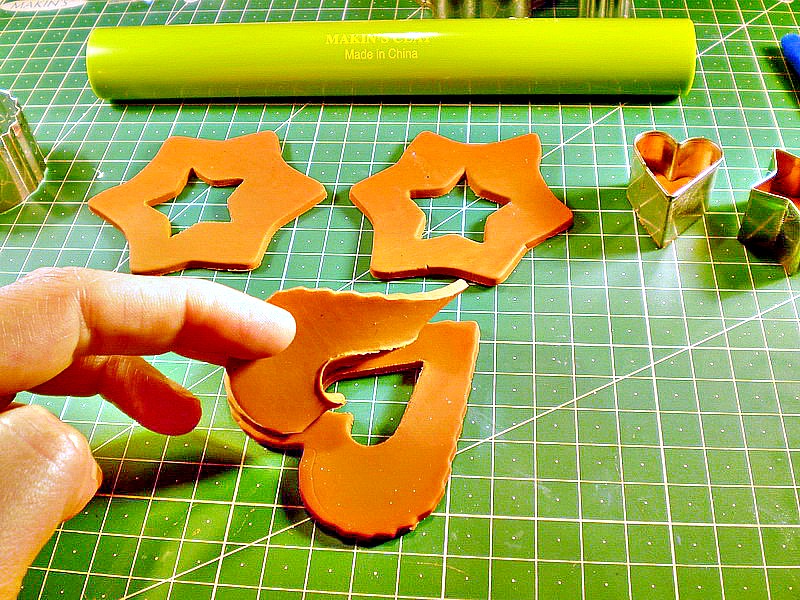
1.Place the Makin’s® Cutting Mat on your work surface. Roll out ½ package of brown Makin’s Clay® to a slab beginning on setting #1 and ending on setting #4 on the Ultimate Clay Machine™.
Run 1/3 of the slab back through the machine on setting #2 with each of the three texture sheets attached. Set aside to dry with the texture sheet left attached. It will pop off when dry.  When dry, cut the textured pieces with the Sizzix Tattered Leaves die and apply Ann Butler Iridescent Paint and Powders to all the pieces.

Use the push mold to create pine cones and acorn with the remaining brown clay, and the Ultimate Clay Extruder™ to make vines with green clay. Set all aside to dry overnight.

2. Apply acrylics glazes to the canvas with a foam brush, remove some with a crushed paper towel and allow it to dry.


3. Spritz the canvas edges with Mudslide Colorbox Spritzer Dye Ink Spray and lightly brush with a foam brush.

Place the grass stencil on the canvas and use the palette knife to apply the Golden Heavy Gel. Allow to dry. Apply additional stencils as desired and allow to dry until clear.


4. Sponge gesso lightly over the dandelions and apply Ann Butler Craft Ink in Limelight directly to the grass and denadelion stems.


5. Use small stencils to apply gesso and Ann Butler inks with a sponge.


6. Cut the frame edges from Corrugate Tape, mitering the corners if desired and sponge the inner and outer edges with Tangelo ink.


7. Ink the corners of the photo paper where the Craft Corrugate will meet with Desert Sand ink to hide any imperfections Remove the release paper from the Craft Corrugate and apply it to the photo.

8. Attach the frame and photo to the canvas with Beacon 3-in-1 Adhesive.

9. Attach the vines to the canvas with Beacon 3-in-I Adhesive.

10. Attach the silk leaves to the canvas with Beacon 3-in-I Adhesive.

11 Attach the clay leaves to the canvas with Beacon 3-in-I Adhesive.

12. Attach the pine cones and acorns to the canvas with Beacon 3-in-I Adhesive.


Add the purchased frame and place it on an easel. What a beautiful addition to your holiday décor!

Designs by Candice Windham for Makin’s Clay®
©2015 Candice Windham Design Studio


Contact us

Name

Email *

Message *