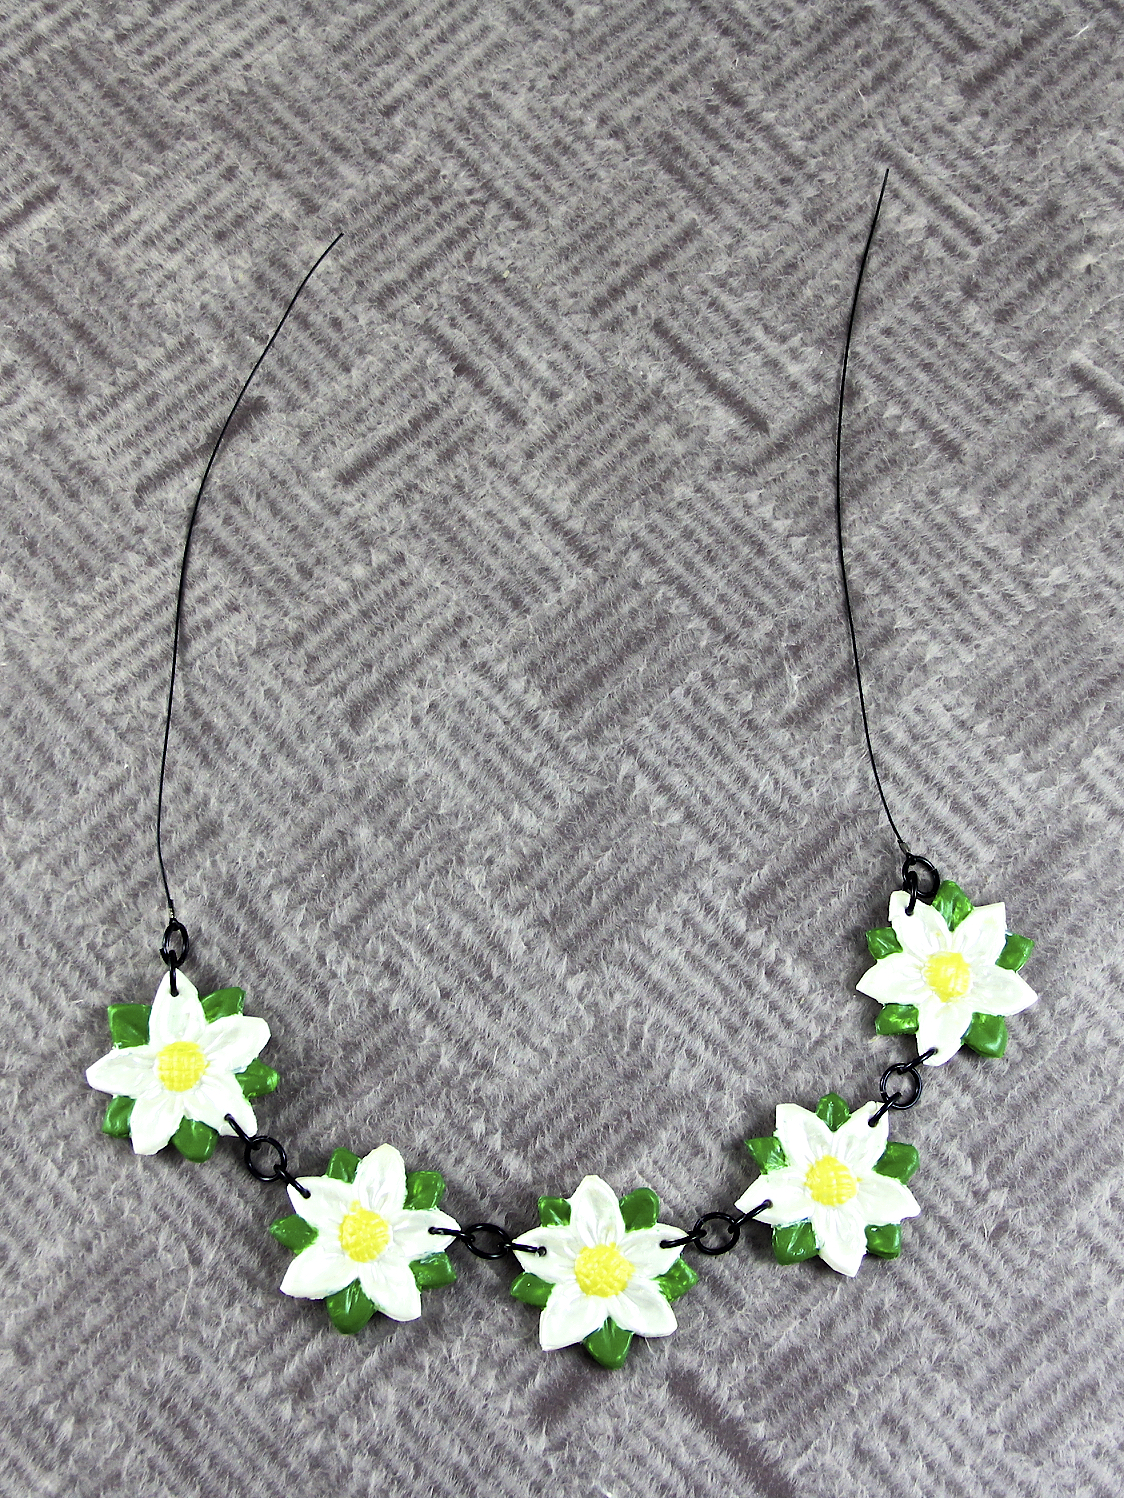
Pages - Menu

Search This Blog

Sunday, May 31, 2015

Flower Shawl Pin by Andrijana Katavic


Flower Shawl Pin 
Designed By ANDRIJANA KATAVIĆ

Hello everyone! Global warming has made quite a mess with weather in my country. In Serbia currently it should be the beginning of the summer, but in just one day we have several seasons. Summer is not one of them. So, without a sweater, boots and umbrella it is not advisable to go out. When the weather is like this I love to wear knitted or woven shawls. When it is cold I just take the shawl from my bag and wrap it around my shoulders. And, if it suddenly starts to be warm it's easy to put the shawl back in the bag. Since I had to wear shawls very often during May, I decided to make another shawl pin, but this time with Makin's Clay®. So, here it is in a step by step tutorial!

MATERIALS:

Makin’s Clay® - Clay Mixing Ruler™
                         - Roller & Cutters Tool Set
                         - Makin's Clay® White 60 g
                         - 3 Flower Cutters
                         - Curly Fur Texture Sheets - Set E
                         - Plastic package from Makin’s® Flower Cutters Set
Beacon Adhesives™ Premium Tacky Glue
Glass or ceramic tile
Wooden Skewer
Wavy scissors
Black marker
Sharp knife
FIMO Bronze Powder

INSTRUCTIONS:

STEP 1.
Starting from pointy part of skewer, with Mixing Ruler™ measure 8 centimeters and mark it with black marker. Tracing the marked point cut the skewer with sharp knife. Leave pointy part of skewer on your work table, and rest of it place aside for some other project.

STEP 2.
Place glass or ceramic tile on your work table. Open white Makin’s Clay® and with Makin’s® Roller
make tile approximately half a centimeter thick.

STEP 3.
Place Makin’s® Curly Fur texture sheets (from Set E) on clay tile, and press it with roller. Carefully remove corner of texture sheet to check if the pattern is well impressed on clay. If so, remove the texture sheet.


STEP 4.
With the smallest cutter, cut two flowers on corner of textured clay tile. Carefully remove rest of clay tile from glass or ceramic work 
surface. Place plastic package from Makin’s® Flower Cutters Set in the middle of clay tile. Following the contours of plastic package cut clay with wavy scissors. Remove plastic package, and place shaped clay on the work surface. Put medium flower cutter in the middle of the clay and cut it. Use your finger to smooth clay edges.

STEP 5.
On a glass or ceramic tile pour a small amount of FIMO bronze powder. Use your finger to apply the powder over the surface of the textured clay. Also, apply powder on both (earlier cut) small clay flowers.

STEP 6.
On back of both small clay flowers apply a tick coat of Beacon’s™ Premium Tacky Glue. Take earlier cut skewer, place on one clay flower (on side with glue), and then put another clay flower. Gently press flowers with your fingers to merge them around the skewer. Smooth edges with your fingers.

STEP 7.
Bend large flower gently around the Makin’s® roller. Allow at least 24 hours to dry. After drying,

varnish your project and leave to dry according to the manufacturer's instructions. Remove large
flower from roller and put your pin on shawl.


And... Wear it with pride and smile!

P. S. If you want to see other shawl pins that I made visit my blog http://www.studioartesania.com/2017/12/15-diy-projects-makins-polymer-clay.html

Saturday, May 30, 2015

"Daddy" Frame by Madeline Arendt

We love this Deflecto "wood" feel frame embellished with  Makin's Clay® by Design Team Member Madeline Arendt!   What a wonderful Father's Day gift this would make!  Find Madeline's instructions here on her blog.

Friday, May 29, 2015

Mom's Perfect Apple Pie Altered Vintage Pie Tin by Candice Windham

Mom's Perfect Apple Pie Altered Vintage Pie Tin
Designed by Candice Windham

I have a collection of pie tins that started back in the ‘70s when I ran across a tin from Famous Pies, a brand of pie that my family bought in the ‘60s. They were the best around as far as store-bought pies went, and the tins were actually metal, not the aluminum things we get today. My collection has grown over the years and is now too large for the wall space I have, so I needed to do something to be able to recycle these pieces.

My husband and son think I make the best apple pie ever, so I wanted to make my recipe live on in infamy with this project featuring one if my tins, my recipe and Makin’s Clay® embellishments. With Makin’s Clay®, I can get the exact embellishments I need without having to search the craft stores for just the right thing.

Supplies:

Makin’s Clay® - White
                          - Circle Cutters 
                          - Clay Tool Set
Pigment Izinks, Geranium, Mimosa and Volubilis (Clearsnap)
Diamond Glaze (Judikins)
Printed paper, red plaid
Card stock,  Cream, 8 ½” x 11”; Red, 2 ½” x 1 ¾” and 4” x 2”
Ribbon, ¼” black, 6” and ½” black and white dotted, 6”
Hole punch, ¼”
Punches,  1 3/8” Circle and Corner Rounder
Cinnamon sticks, 6
Jute, approximately 24”
Smoothfoam™, two 1”x 1”x 1” cubes
½” double-stick tape (Sookwang)
Large Glue Dots
Paint brush

Instructions:

1. Roll out white Makin’s Clay® to ¼”. Cut six pieces with a circle cutter and squeeze the top and bottom tog
ether gently to create  an apple shape. Using tools from the Clay Tool Set, make a crease down the middle of each piece and press the end of the rounded tool into either side of the crease to make seed shapes.


2. Roll out a second piece to ½” to ¾” thick, shaping it like a half-apple and cut it with the same circle cutter and push the top center
down to shape the apple. Shape a stem from a small piece of clay, push a hole in the top of the apple and insert the stem. Allow all pieces to dry overnight.

3. Paint the half-apple and the edges of the apples slices with Mimosa Izinks. When dry, brush on a coat of Geranium Izinks. Mix all three Izinks colors together equally to create a brown ink and paint the stem and apple seeds. Coat all the clay pieces with Diamond Glaze and allow to dry.

4. Cut a piece of printed paper 5 ½” x 10”. Score at 2” and 7”, fold
and adhere the flaps with double-stick adhesive. Punch a half-circle at the open end of the pocket. Sponge all the edges with Vintage Photo ink.  Trim corners on the 4” x 2” red card stock scrap, score it down the middle, fold and adhere it to the bottom of the pocket. Adhere the black and white dotted ribbon across the bottom and pull it to the back on each side.

5. Print out the Mom’s Perfect Apple Pie tag.  Trim, round the corners, sponge the edges and mount it
to the remaining red scrap. Round the corners on the red scrap and sponge the edges. Mount it to the pocket front. Adhere the rounded apple clay piece to the pocket front using Beacon Quick Grip.

Use Glue Dots to complete the following steps, referring to the final project photo for placement:

7. Print out the recipe and cut it to fit inside the pocket. Punch a ¼” hole and tie the black ribbon through the hole. 

8. Mount the pocket to the edge of the pie tin, and adhere the small cubes of Smoothfoam™ under the right side of the pocket to give support.

9. Adhere silk flower leaves under the pocket edges, top and bottom.

10. Tie cinnamon sticks with jute and adhere above and below the recipe pocket.

11. Place the apple pieces above and below the recipe pocket.

12. Place the pan on an easel or hang it on a wall to display in your kitchen.


Now, my wonderful apple pie recipe is exactly where my hubby and son can find it if there is ever a need. Maybe they will surprise me with an apple pie this weekend!

Proud to Be An American Card by Candice Windham

Design Team Member Candice Windham's projects are always about the DETAILS - even when it's
a greeting card - the details are always wonderful!  Candice shared this project on her blog recently - she used Makin's Clay® to make the dangling star accents - Find her full instructions here.

Birthday Numbers Card by Martha Lucia Gomez

Design Team Member Martha Lucia Gomez creates wonderful cards and we love that she uses Makin's Clay® as an accent.  Here's a fun Birthday card she shared on her blog recently.  Find her instructions here.  


Thursday, May 28, 2015

All-Star Designers Spring Series: Save The Date Card with Makin's Clay® Accent


Makin's Clay® is a sponsor of the When Creativity Knocks All-Star Designers Spring Series - Judi Watanabe shares this project and uses a clever technique for adding dimension to clay flowers cut with our clay cutters -

https://youtu.be/ghb5uXsQKBk


ART Mixed-Media Tag by Irit Shalom

Design Team Member Irit Shalom recently shared this fabulous mixed-media tag project featuring rubber stamped Makin's Clay® - Find her instructions here.

Wednesday, May 27, 2015

Daisy Chain Necklace by Suzann Sladcik-Wilson

Daisy Chain Necklace
Designed By Suzann Sladcik-Wilson

Summer has officially begun, so today I want to share with you a necklace that will be the perfect accent to any summer outfit. The Makin’s Clay® Daisy Chain Necklace is easy and fun to make.
Makin’s Clay® is especially effortless to work with. You definitly don’t want something heavy around your neck in the summer heat, and the Makin’s Clay® pieces are so light weight, you barley notice you are wearing the piece.
Like many of you, I am all about craft materials that are simple to work with. The push molds worked great every time. I also liked that all I needed to cut the pieces out after molding was a pair of scissors.
Ready to make your own Daisy Chain Necklace?  Read the instructions below to find out how!
Materials and Tools:
  • Makin's Clay® - White
        •  Floral Push Mold
  • Martha Stewart Pearl Paint in Mother of Pearl and Duckling
  • Apple Barrel Gloss Paint in Real Green
  • 16 – 6mm Bicone Swarovski Crystals in Emerald
  • 8 – 6mm Pearls
  • 6 – Daisy Black, White, and Yellow Lampwork Glass Beads
  • 17 – 16g 1/4″ Inner Diameter Black Jump Rings
  • Soft Flex Medium 49 Strand Beading Wire in Black
  • Lobster claw clasp in black finish
  • 4 – 2x2mm crimp tubes in gunmetal
  • Paint Brush
  • 2 Chain Nose Pliers
  • Crimping Pliers
  • Hole Punching Pliers in 1.80mm diameter
  • Scissors (Not Shown)
  • Wire Cutters (Not Shown)
Finished Length: 18 inches
Impression of a daisy using Makin’s Clay Floral Push Mold
1. Make 5 – 1.5 inch balls of white Makin's Clay®. Press each one of these into the daisy shape in the Floral Mold. Allow your molds to dry overnight, or as the molds are flexible, you can pop out your molded clay pieces immediately and allow to dry. 
2. Once the daisies are dry, cut away excess clay using scissors.


3. Paint your daisy using the Ducking color in the center, the Mother of Pearl for the petals, and the Real Green for the leaves.
4. After your paint has dried, use your hole punch pliers to make holes in the top outer petals on all of your daisy components.

Makin’s Clay® Daisy Components Linked Together
5. Insert a jump ring into the hole on each of the petals on all of your daisy components. Link your components by using the additional jump rings. Add jump rings to the ends of your last two components.


Attaching Beading Wire

6. Attach 6 inches of beading wire to each side of your linked daisies using 2 of your gunmetal crimps. Tip: If you don’t have gunmetal crimps, use silver crimps and use a black paint pen to cover them. You can also do this if you are unable to find a black clasp.
7. String on one Emerald Swarovski Crystal, one pearl, one Emerald Swarovski Crystal, one daisy lampwork bead. Continue pattern until you finish with one pearl and one Emerald Swarovski Crystal. Attach one half of your clasp.  Repeat pattern on other side to finish your necklace.
Finished Daisy Chain Necklace


Tuesday, May 26, 2015

All-Star Designers Spring Series - Garden Tool Apron Featuring Makin's Clay®


Makin's Clay® is a sponsor of the When Creativity Knocks All-Star Designer Spring Series - in this week's episode

Cindi Bisson shares her mixed-media Garden Tool Apron featuring Makin's Clay® accents made with our Garden Tools push mold.

"Tie-Dyed" Neon Flowers Necklace by Cindi Bisson


Tie-Dyed Neon Flower Necklace
Designed by Cindi Bisson 

I was inspired by the “tie-dye” blended clay technique Design Team Member Amanda Phillips shared last week to create her "Mad Men" jewelry set, so I tried my hand at it and created this bright and colorful necklace.  This project is easy to create, and uses just a few materials.  It would make a great project for kids of almost any age and I think it would be perfect for summer camps, vacation Bible schools,  and more.  

Materials: 

Makin’s Clay® - 120g Neon Multi-Pack 
                        - 60g Black 
                        - Clay Roller 
                        - Texture Sheet Set G
                        - Flower Cutter Set 
                       - Non-Stick Cutting Mat 
Beacon® Tacky Glue 
Neon yarn 
Scissors 

Instructions: 

Open Neon multi-pack of Makin's Clay®.  Gently mix and blend equal parts pink, orange and green clay together to make marbled “tie-dye” effect clay.  

Roll with clay roller to approximately 1/8” thick.  

Use flower cutters to two medium flowers.  Use small flower cutter to cut out inside of medium flowers.  Cut two additional small flowers.  (I cut multiples of many sizes for future projects).


Roll black clay to approximately 1/8” thick.  Place selected texture sheet on black clay and gently roll to transfer texture.  

Cut two large flowers and two strips approximately 1/4” x 1 1/2”.  

Measure and cut two strands of neon yarn to desired length.  Fold in half. 

Apply Beacon® Tacky Glue to back of one black flower.   Place folded end of yarn onto center of flower.  Place second black flower over first and seal ends between black flowers. 

Use Tacky Glue to mount medium neon flower to center of each black flower.  


Tie knot in yarn at top of flower. 

Begin rolling one strip of black clay above knot, roll around yarn to create bead.  

Use Tacky Glue to mount small tie-dye clay flower to left and right strands of yarn.  Mount second flower over first flower on each side (“trapping” the yarn between the two flowers).  

Roll strip of textured clay above each flower around yarn to create rolled beads.  

Roll black clay very thin (paper thin).  Use straw to make small round pieces of clay and mount to center of each small flower.  

Tie ends of yarn together, or add jewelry closure, to finish necklace.


Sunday, May 24, 2015

Neon Flower Ring by Amanda Phillips

Neon Flower Ring
Designed by Amanda Phillips 

Supplies:

Makin's Clay® - 120g Neon Multi-Pack
                         - Ultimate Clay Machine™
                         - Clay Mixing Ruler™
                         - Flower Cutter Set 
Lg. Stylus
Strong Glue (such as Super Glue)
Craft knife 
Med. white brad
Stain w/ applicator ( your choice)

Instructions:

I put this little ring together in 10 minutes and have to say that I will be using this as the project at the neighborhood bash!  It was fun and easy and the possibilities in colors are endless! 

First you roll out a quarter sized ball of the neon pink Makin's Clay® on the #3 setting in your Ultimate Clay Machine™ (approximately 1/8" thick).

Using your Clay Mixing Ruler stick, hold onto one side of your strip and slice off the edge straight. then turn your clay around on your ruler measuring to the end of the inch marks (see pic). This will give you the perfect width for your ring. Now measuring the length of the finger you wish your ring to fit. (You may use string to do this ) allowing 1/2" for over lap, Cut and smooth edges. 

Roll a piece of neon Orange clay in your Ultimate Clay Machine™ on setting #2 (slightly thicker than 1/8"). 
Cut out using our Flower cutters both medium and small. 

Indent your petals with the stylus. 

Now place your flowers within one another and stick a hole in the middle for your brad...doing the same on the ring as well. Stick the brad through the entire thing marking the brad if it pushes through to your finger so you may trim off excess. Take apart and dab with glue and reassemble. Now use stain/glitter to highlight your petals. 

Thank you for joining me here today. HAVE FUN! 
 
Amanda Phillips

Saturday, May 23, 2015

Flower Dangle Woven Necklace by Carole Monahan


Flower Dangle Woven Necklace
Designed by Carole Monahan 


Materials List:

Makin’s Clay® - 2 oz. White 
                         - 2 oz Plum Wine  
                         - Clay Roller
                         - Texture Sheet Set 
                         - Flower Cutter Set 
1 lobster claw clasp 
1 inch basic chain 
2 jump rings 
2 end caps 
4 inches 16 gauge wire (I used stainless steel) 
Mica powder 2 colors 
Vintage silk sari cloth strips 
I used 4 Strands of 120 inches each to make a 20 inch necklace
PYM- Preserve Your Memories Sealant spray 
Beacon® Tacky Glue
Small hole punch I used kemper cutters here 
Kumihimo Braid disc 
Crochet hook

Instructions:

Roll out the colors one at a time about 1mm thick.
Place the texture sheet over the clay and press the sheet in with your finger tips.
(since the sheet is clear is it really easy to see when you have a uniform impression) 
I used a different texture on each color for added interest.

Then lightly use your finger to apply mica powder to the raised accents. 

Then take the flower clay cutters and cut out different size flowers in order to alternate and layer them.  Use a small hole punch for the center hole. 

Let all pieces air dry and when fully cured cover with several light coatings of PYM 
Sealant spray. I like this sealant since it does not add any sheen or shine to the piece. 

Before I started this project I used my Kumihimo Braid disk and 4 Stands of 120 inches each of Vintage Silk Sari cloth to weave the base of this necklace. 

Here is a picture of a Kumihimo Braiding Disc. 

These are the Silk Sari cloth Strips I used. I got mine on Etsy.

These discs are very inexpensive and it is very easy to learn this basic weave. 
There are great videos on YouTube that show you how to do this step by step. 
I call this my active form of meditation since when you get into the rhythm of this it very soothing.
 You are in “the Zone".

 My friend Debbie always has this in her bag so whenever she has to wait somewhere like the doctor or on the train she has one handy.   

Here is a close up of the weave. 

Next we need to string the flowers onto the necklace.  

I selected several strands of contrasting colors and cut them roughly to
the length I wanted them to hang.

I then used a crochet hook to open parts of the weave to put the single ribbon with the flowers on it through. 
I tied each flower with a double knot in the back of the flower to secure them. Make sure all the flowers are facing the correct way BEFORE you knot them or cursing will ensue! Yup that happened! 

Then take the 2 inch wire stick it through the end of the weave and twist it around to secure it. 
Then place the end cap on I used Beacon Tacky Glue to secure the endcaps.  Both ends please. 
Then make a basic loop with the twisted wires and cut off where you need it. 

Again there are some great how to videos on YouTube that show in detail how to finish a Kumihimo necklace. 

Add the basic chain and the jump rings and the Lobster claw clasp to finish the necklace. 

Wear it with pride ! 

Remember……. Be boundless be creative !
There are NO mistakes; only learning and growing!

You can see more of my designs on these pages 


Contact us

Name

Email *

Message *