Pages - Menu

Search This Blog

Thursday, October 31, 2013

BOO to YOU from Makin's Clay®

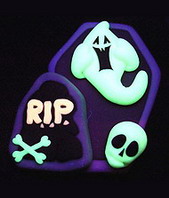
Happy Halloween from Makin's Clay®  Today we are sharing a fun Halloween tomb project - and it even glows in the dark! Find the instructions here at the Makin's Clay® website.   - Cindi


Tuesday, October 29, 2013

Clay Wreath for Fall

Last week I shared the steps for creating a Makin's Clay® Mask using the Earth Tones Clay and the Leaves Push Mold.....well you are not limited to Mask....be creative and see what other home dec items you can create using this easy technique.....


Here is a Makin's Clay® Wreath for Fall which I created the same way as the mask only instead of gluing the leaves to a mask I glued them to a 9" DIY Wooden Craft Ring....again quick and easy!

Wednesday, October 23, 2013

Getting Spooky on When Creativity Knocks with Makin's Clay®


Makin's Clay® is the perfect accent for this adorable Halloween card created by Designer & owner of JudiKins stamps - Judi Watanabe!  Judi shows you how to create this fun clay accent along with her card on this new episode of When Creativity Knocks!  Click the link above to see Judi create this cute card.  Makin's Clay® is a sponsor of the 8 episodes in the WCK All-Star Designers' Holiday Series featuring Jonathan Fong, Judi Watanabe, Mark Montano, Ana Araujo and Cindi Bisson, and we'll be sharing many episodes where Makin's Clay® was used by the participating designers in their projects.  And, if you sign up to receive the newsletter on the When Creativity Knocks website, you'll be eligible to win one of 8 prize boxes full of product from the series sponsors, including a GREAT Makin's Clay® prize in each box!  - Cindi


Tuesday, October 22, 2013

Trick-or-Treat Bucket


Create this creepily fun Halloween treat bucket with a recycled flower pot and Makin's Clay®! Your little beggars are sure to be surprised by it's glow in the dark elements and it's furry monster accent - Cindi

Materials: 
  • Recycled plastic flower pot (10” used for this project)
  • Makin’s Clay®– The No-Bake Polymer Clay® -  Black, Natural, Vintage Tones, Earth Tones, Multi- Neon
  • Also from Makin’s Clay® :
    • Makin’s Professional® Ultimate Clay Machine®
    • Makin’s Professional® Ultimate Clay Texture Set 
    • Makin’s® Texture Sheets 
    • Makin’s® Halloween Clay Cutters, Alphabet Clay Cutters, Rectangular Clay Cutters 
    • Makin’s Professional® Ultimate Clay Extruder®
Instructions: 

  1. Remove plant & soil from plastic flower pot.  Remove hanger from pot.  Wash & dry thoroughly. 
  2. Roll approximately half a 120 gram package of black clay using Ultimate Clay Machine™ on setting #4.   Cut into long 2” strip.  Repeat this step.
  3. Apply thin layer of  Tacky Glue around top outside edge of pot.  Mount 2” strip of black clay over adhesive on outside of pot.  
  4. Roll ½” x 1” piece of plum clay from Vintage Tones set using Ultimate Clay Extruder on setting #6.   Continue to roll until you can cut a piece approximately 3 ½” x 3 ½”.  Select Makin’s® Texture Sheet and apply texture by placing onto clay and applying gentle pressure.
  5. Apply thin layer of adhesive on side of pot.  Place textured plum clay square on side.  
  6. Repeat steps 4 using dark green & plum clay from Vintage Tones set, pumpkin colored clay from Earth Tones set until you have 5 squares (2 green, 2 plum, 1 orange) with assorted textures applied.  Roll black clay using setting #6 until you can cut a piece approximately 6 ½” x 3 ½”.  Black clay was not textured.
  7. Repeat step 5, measuring over approximately ½” from first square and apply remaining squares (allow approximately ½” between each, ending with the larger black rectangle). 
  8. Roll black clay using setting #6.  Cut four ¾” x 3 ½” strips of black clay.  Use adhesive to mount between colored squares of
    clay. 
  9. Roll natural clay using setting #2.  Apply texture sheet of choice.  Use ¾” x 1 ½” rectangle cutter to cut 21 rectangles.  Use adhesive to mount textured rectangles around top black border, spacing approximately 1/2” apart.  
  10. Choose border from border mold, place black clay into mold and make 7 border strips.  Use adhesive to mount under bottom border edge of pot (beneath natural rectangle embellishments).
  11. Roll black clay using setting #2.  Apply texture sheet.  Use Halloween shape cutters to cut 3 cats and 5 bats.  Mount bats onto plum square and cats onto pumpkin orange square using adhesive.  I allowed some bat wings and cat tails to extend off the pot for added dimension.  Use tiny amounts of neon yellow clay to create eyes for bats, and neon green for eyes for cats.
  12. Roll natural clay using setting #2.  Apply texture to half of rolled clay.  Use Halloween shape cutter set to cut 3 ghosts from textured clay and one moon from non-textured clay.  Use clay cutters to cut 7 stars in varying sizes from non-textured clay.   Use adhesive to mount moon & stars to green panel, and ghosts to 2nd green panel.  Use tiny amount of black clay to create eyes for ghosts.
  13. Roll pumpkin orange clay using setting #2.  Use Halloween shape cutter set to cut 3 pumpkins.  Use Professional Clay tools to add texture lines to pumpkins.  Cut 3 thin pieces from 3rd pumpkin to mount over 2nd pumpkin to add depth.  Add small amount of brown clay to stem.  Roll small amount of neon yellow clay on setting #6.  Use Professional Clay Tools to cut eyes, nose and mouth for Jack-o-Lantern, mount with adhesive.  Mount pumpkins to 2nd plum panel, adding thin strips of green twisted clay as vines around stems. 
  14. Roll out pumpkin orange clay using setting #6.  Use Alphabet clay cutters to spell out “trick or treat”.  Mount as shown to black panel using adhesive.  
  15. Mix 3 parts natural clay and 1 part black clay until uniform gray color results.    Place clay into Makin’s Professional Ultimate Clay Extruder, add smallest multiple hole extruder disc, and extrude clay to create spider web pattern on black clay strips between colored panels, and on large black panel with text as shown. 
  16. Create dimensional spider using black clay.  Add neon green eyes and wine red pinchers.  Mount to front panel as shown.
  17. Choose border from border mold, place black clay into mold and make 7 border strips.  Use adhesive to mount under bottom edge of pot (beneath colored blocks). 
  18. Cut 7” circle from black felt.  Use adhesive to mount on bottom of pot.  Roll 4 balls of black clay approximately 1 ½” in diameter.  Mount to bottom of pot.  
  19. Apply coat of Powertex Transparent Textile Hardener to all clay surfaces on pot to seal.  Let dry.
  20. Mount small strips of black faux fur along top outside edge of pot.  Measure, cut and mount orange and black felt for pot liner.  Twist 3 pipe cleaners, mount inside pot where black & orange felt meet.  Repeat.  
  21. Fill with candy, use as a Halloween centerpiece, then watch the little ghosts and goblins smile when they see your decorative Trick or Treat bucket!

Friday, October 18, 2013

Getting Creative with Clay Mask

I have to say that I absolutely love Makin's Clay®!  It is so easy to work with since it comes out of the package soft and ready to use....all you need to do is create something with either molds, texture sheets, cutters or your own design and since it is no bake you simply let it air dry......nothing could be easier when working with clay!

Last year I shared a Makin's Clay® Mask that I created pictured below:


Supplies:
Mask

1.  It was easy to create by simply using a package of the earth tones clay and the leaves push mold; I made several leaves in the assorted colors then glued them onto a 99 cent mask.  Do this before the leaves have completely dried so that you are able to bend them easily over the mask.
2.  Let dry completely, 24 - 48 hours.
3.  Follow manufacturer's instructions for the Eco Epoxy, mix together and apply a thin coat over the clay, let dry for a beautiful glossy shine!

Now I want to show you another mask I created the same way but......


with this mask I added Earth Safe Finishes Metallic Gold Powder over the clay instead of the Eco Epoxy for a completely different look....it is amazing that these two mask were both created using the Makin's Clay® Earth Tones and yet they have two totally different results depending on what went on top of the clay.  They are both stunning....so what ever your preference Makin's Clay® is sure to do the job! ~ Ann Butler

Wednesday, October 16, 2013

Create a Makin's Clay® Cornucopia

Makin's® push molds are easy to use and give great results.   This fruit mold would be fabulous to create a Thanksgiving Cornucopia project - we'd love to see your version of this idea on our Facebook page!  - Cindi 

Monday, October 14, 2013

Technique Basics with Makin's® Clay


Basic Techniques:
  • Select a clean working area.
  • Take a small piece of clay and place the remainder of the clay in an airtight plastic bag for storage or cover with wet towel while you are working.
  • Knead the clay for few minutes; while the clay is still soft, it can be shaped, rolled, stretched, or sculpted.
  • If the clay starts to dry, you can mist the clay with a water bottle and knead the moisture back into the clay. It dries at normal exposure to air and it sets hard overnight or longer, depending on thickness of clay.
  • Easy clean-up with soap and water.
Hint:
  • Makin's Clay® mixed with water based hand lotion
    If dry hands are absorbing the moisture out of the clay too rapidly a waterbased hand lotion/cream can be used prior to handling the clay. This lotion/cream can also be used for lubricating the push moulds and/or texture sheets.
Rainbow On Clay 
  • Makin's Clay® can be mixed together to make more color.
  • With different techniques, such as etching, slicing, embossing, spiraling, blending, gathering and mosaics, you can create many different looks.
Antique On Clay 
  • With techniques such as antiquing, stamping, marbling, mixing, slicing and blending, you can create many different looks with Makin's Clay®.
Crystal Reflections® (Plastic Shapes) with Clay 
  • Makin's Clay® molds and bonds to surfaces such as Crystal Reflections®, wood, glass, and plastic. Just add a thin coat of adhesive on the base surface before applying the clay for best adhesion results.
Beginners' Techniques :
With the help of our Makin's® tools, such as Push Molds, Clay Texture Sheets, Clay Cutters, beginners will find it easy to create layered sculptured designs.
Intermediate Crafters' Techniques :
Intermediate crafters will find our full set of tools combined with the Clay Mixing Ruler™ creates a large range of colors to expand their horizons. The projects help them to develop new techniques as they work through them.
Professional Crafters' Techniques :
Professional crafters can combine their professional skills with Makin's Clay®, and move onto more advanced methods: marbling, texturing, bead making, faux-stone effect and more.


Thursday, October 10, 2013

Another Amazing Creation by Lex Sorrentino featuring Makin's Clay®

Lex Sorrentino never ceases to amaze us with her breathtaking pieces of art.  We love how she incorporates Makin's Clay® into her work.   To see many more of her unique and beautifully detailed pieces visit here. - Cindi

Tuesday, October 8, 2013

More tips for Makin's® Clay

How to Achieve Best Results in Removing
Makin's Clay from Inner Packaging :


When working without the Ultimate Clay Machine


  • Remove outer plastic vacuum bag.
  • Open inner plastic wrapping and spread out a bit on work surface. Do not remove plastic wrapping.
  • Let clay sit for approx. 10 minutes.
  • Use hands or roller to lightly flatten clay against plastic wrapping. Do not remove plastic wrapping.
  • Use a roller or even a straight sided drinking glass to roll the clay on top of the plastic wrapping for several times.
  • Peel wrapping from the clay.
  • After removing clay from wrapping, cut off amount of clay to be used immediately, and roll remaining clay into log or short plug shape. Store in air-tight container or cover with damp cloth for more immediate use.
  • Friday, October 4, 2013

    Autumn Leaves Project from Makin's Clay®

    This pretty autumn project is from the Makin's Clay® Netherlands page - you can find the instructions here.  (They are in Dutch...) - I hope it inspires you to create something unique this autumn with Makin's Clay® and Makin's Brand® push molds - Cindi


    Wednesday, October 2, 2013

    Tips for working with Makin's® Clay

    How to Achieve Best Results in Removing
    Makin's Clay from Inner Packaging :

    When working with the Ultimate Clay Machine


  • Remove outer plastic vacuum Bag.
  • Open inner plastic wrapping using craft knife or clay blade and spread package flat on work surface. Do not remove inner plastic wrapping.
  • Let clay sit for 10-15 minutes.
  • Use hands or roller to lightly flatten clay against plastic wrapping. Do not remove wrapping.
  • Insert clay and wrapping material together, clay side up, into Ultimate Clay Machine on #1 setting.
  • Make one pass through clay machine with wrapping still attached.
  • Turn clay 90 degrees and make second pass using #2 setting with wrapping attached.
  • Peel wrapping from clay. If clay does not peel easily from wrapping, run clay with wrapping attached through clay machine one or two more times.
  • After removing clay from wrapping, cut off amount of clay to be used immediately, and roll remaining clay into log or short plug shape. Store in air-tight container such as a zip lock bag or cover with damp cloth for more immediate use.
  • Contact us

    Name

    Email *

    Message *