Designed By - Cindi Bisson, Behind These Eyes™
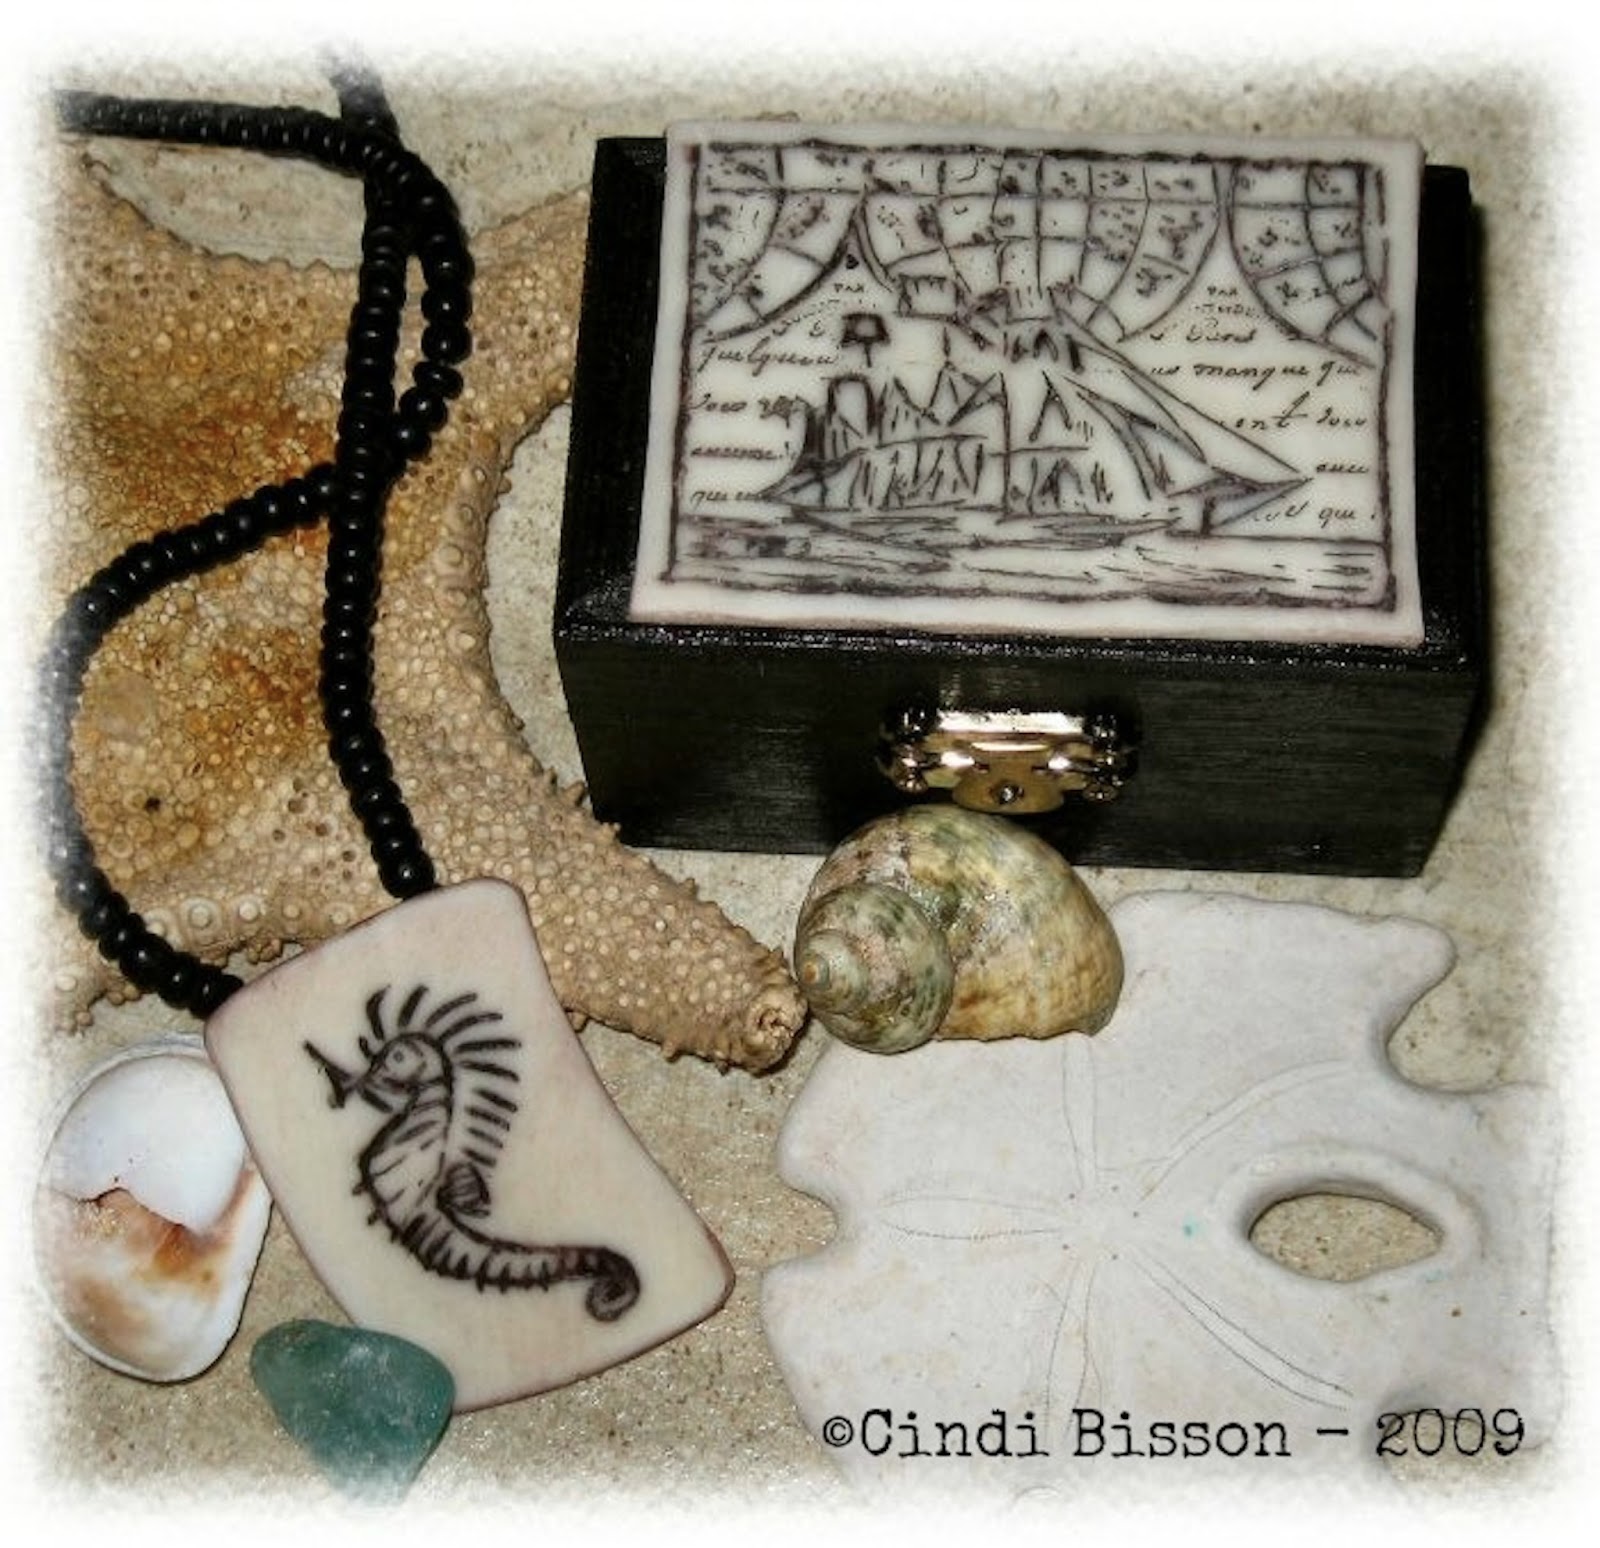
As a transplanted New Englander, when I think about the beach my mind still often envisions frigid ocean water, rocky coastlines, big seagulls & puffins, whale watching, Maine lobster & steamed clams, colorful lobster buoys & traps, those antique glass & rope floatation buoys we often saw hanging in seafood restaurants, and scrimshaw. Any trip through a New England beachside gift shop is sure to result in a variety of “scrimshaw” souvenir choices. Traditional scrimshaw has been an art form for hundreds of years. It involves painstakingly etching a design onto ivory or bone. Here’s a technique that lets you create your own faux scrimshaw – in a more environmentally friendly manner. Makin’s Clay® maintains it’s flexibility when dry, so it can be molded around almost any object (bottles, votives…), and die cut/hand cut into almost any shape. Faux Scrimshaw adds a unique touch to home décor items, jewelry, journals, scrapbook pages or cards. - Cindi BissonMaterials:
Natural Makin’s Clay®
Makin’s Professional® Ultimate Clay Machine® or manual clay rolling tool
Rubber stamp – or - clip art image, white paper, pencil
Plaid Industries black & burnt umber acrylic paints
Makin’s® Professional™ Clay Tools (detailing tool), or needle tool
Instructions:
Roll clay to approximately 1/8” inch.
 Print clip art image onto white paper, trace along all lines of image using pencil. Add details if desired (additional shading is often seen on true scrimshaw art). Place image, pencil side down onto wet clay. Rub gently with fingertips until pencil image transfers onto clay.
OR
Gently press a detailed, uninked rubber stamp into wet clay.
 (Note: The images in this photo were rubber stamped (two with an inked stamp for better visibility – you can use ink if it makes it easier for you to engrave the details, but it is not necessary as it will not effect the finished project once it is washed off, and the 3rd unlinked to show you the indentation left in the wet clay.)
  Use clay detailing tool, needle tool (or even a sewing pin or safety pin
in a pinch!) to carefully etch along transferred/stamped lines.
Use clay detailing tool, needle tool (or even a sewing pin or safety pin
in a pinch!) to carefully etch along transferred/stamped lines. Set aside until thoroughly dry. (Can take up to 24 hours to fully dry – but normally drying time is much quicker – just a few hours!)
Place a small amount of black acrylic paint onto surface. Gently rub paint into etched areas using fingertips. Remove excess paint with a damp paper towel.
 This image shows the pieces after the black paint is applied & removed.
Place a small amount of brown acrylic paint onto piece, rub over entire surface, and sides. Wipe off with damp paper towel. This will give your piece a faux “bone” coloring. Let dry.
If desired, apply a coat of clear finish such as Earth Safe Finishes Nautical Varnish.
Use to create unique jewelry, home décor items, or even as an embellishment to journals, scrapbook pages or hand made cards. E-6000 adhesive works well to adhere dry Makin’s Clay® to almost any surface.
Copyright ©Cindi Bisson